As an Amazon Associate, I earn from qualifying purchases.
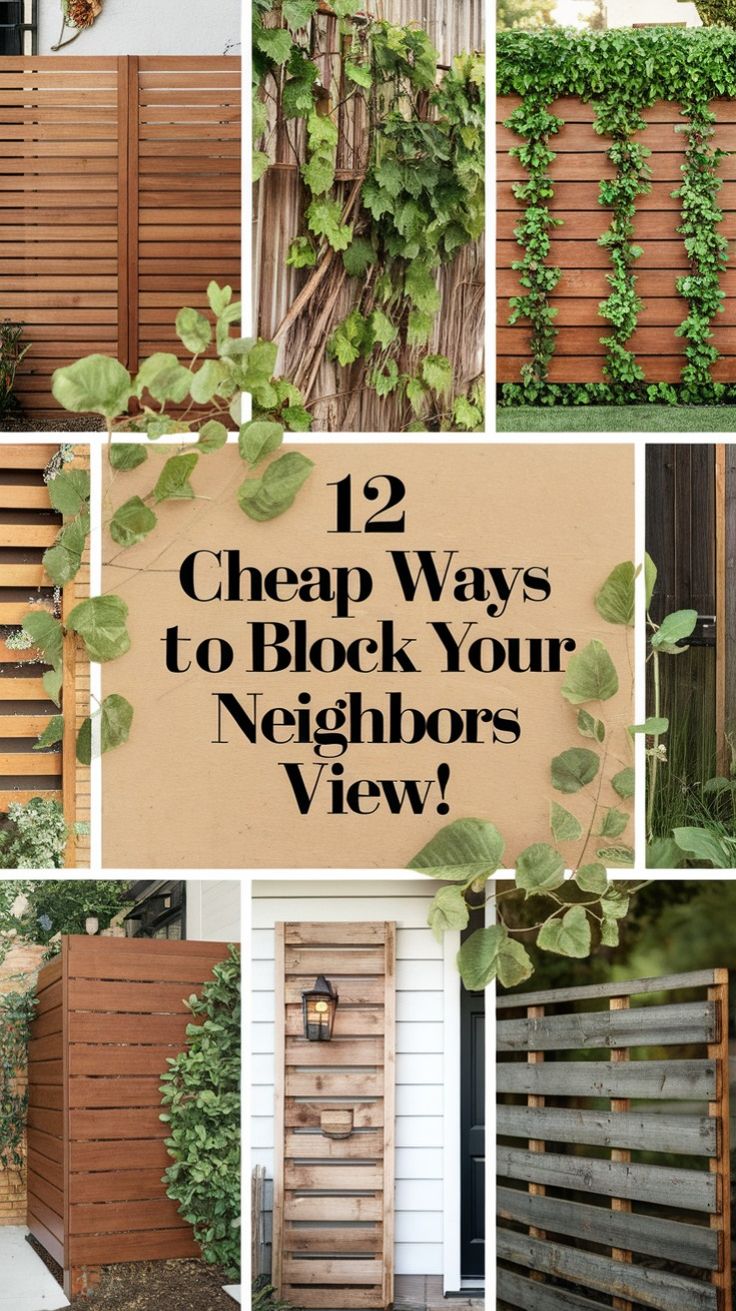
The cheapest ways to block a neighbor’s view include installing outdoor privacy curtains, using lattice panels, growing fast-growing shrubs, placing tall container plants, building a simple bamboo screen, and rearranging existing outdoor furniture. The best option depends on your budget, climate, property boundaries, and whether you need privacy at ground level or from an upstairs window.
Across the United States, homeowners and renters deal with overlooked backyards, close-set suburban houses, apartment balconies, and patios that face neighboring windows. A full privacy fence can be expensive, especially when labor, materials, permits, and uneven ground increase the total cost. Fortunately, blocking an unwanted view does not always require a major construction project. A carefully placed screen, a row of container plants, or an affordable trellis can make a small outdoor space feel more secluded without replacing an entire fence.
The smartest approach is to identify the exact sightline before buying materials. If a neighbor can see your patio from the side, a narrow screen may solve the problem. If an upstairs bedroom overlooks your yard, a short fence might not provide enough coverage. You may need taller vegetation, a pergola with an overhead screen, or a combination of several inexpensive solutions. Renters should also consider removable options that do not require digging, permanent fasteners, or changes to the property.
This guide compares practical privacy options for American homes, including approximate planning budgets in US dollars, installation considerations, maintenance requirements, and important limitations. Cost ranges are illustrative estimates rather than verified live prices, and actual expenses vary by region, product quality, project size, and whether you install everything yourself. The recommendations focus on reducing unwanted visibility while preserving airflow, natural light, and a comfortable outdoor environment.
How to Choose the Cheapest Privacy Solution for Your Yard
The least expensive solution is the one that blocks the specific view you want to eliminate without creating a larger project. Before spending money, stand in the neighboring sightline as best you can and identify the area that needs screening. Focus on the patio seating area, outdoor dining table, hot tub, garden bench, or windows that face neighboring property.
Decide whether you need immediate privacy or can wait for plants to mature. A fabric screen can provide coverage as soon as it is installed, while a young hedge may take several growing seasons to reach the desired height. Your choice also depends on whether the barrier must be temporary, removable, decorative, or capable of withstanding strong wind.
The following table provides illustrative US dollar planning ranges for common DIY options. Prices are not current retailer quotations and exclude some possible costs, such as delivery, tools, taxes, structural supports, and professional installation.
Source: inkl.com
For immediate privacy
Consider outdoor curtains, a freestanding privacy screen, reed fencing attached to a suitable existing support, or a well-positioned trellis.
Consider suitable evergreen shrubs, clumping ornamental grasses, or climbing plants trained on a secure support.
For an upstairs sightline
Evaluate the viewing angle and consider taller planting, overhead shade structures, or a combination of ground-level and elevated screening.
Typical DIY Cost Ranges
These broad estimates help compare project types rather than predict an exact shopping total. A single small project can cost less than the range shown, while covering a long boundary or purchasing mature plants can cost considerably more.
Outdoor curtains
Approximately $25 to $100 for a basic small-area setup, excluding substantial structural work.
Container plants
Approximately $20 to $100 per planter-and-plant combination, depending on container size and plant maturity.
DIY lattice screen
Approximately $40 to $180 for a small project, depending on the frame, panel material, and mounting hardware.
Reed or bamboo screening
Approximately $25 to $120 for a modest screening section, excluding a new supporting structure.
Small wooden privacy panel
Approximately $75 to $300 for a basic DIY section, with material grade and post installation affecting the total.
Young privacy shrubs
Approximately $15 to $60 per plant for many commonly available nursery options, with substantial regional and species variation.
1. Install Outdoor Privacy Curtains
Outdoor curtains are among the most flexible cheap ways to block neighbor view around a covered patio, porch, pergola, or balcony. They create a visual barrier without requiring a solid wall and can be pulled aside when you want more sunlight or an open view.
For an economical installation, use an existing covered structure that is designed to support a curtain track or rod. Weather-resistant fabric made for outdoor use generally handles sunlight and moisture better than ordinary indoor curtains. Choose a fabric with sufficient opacity for daytime and nighttime conditions, since some lightweight materials become translucent when illuminated from behind.
A small curtain arrangement can screen a dining table or seating corner rather than an entire yard. That targeted approach reduces the amount of fabric and hardware required. If the area is exposed to strong wind, use a system that can be opened, secured, or removed during severe weather.
Source: www.pinterest.com
Best for
Covered patios, screened porches, pergolas, and balconies where installation is permitted.
Main advantage
Curtains provide adjustable coverage and can preserve an open feel when privacy is unnecessary.
Main limitation
Fabric can fade, mildew, flap in wind, or require seasonal removal. Curtains also need a suitable support.
How to Set Up Patio Curtains on a Budget
Measure the width and height of the opening you need to cover. Select outdoor-rated curtains and a compatible rod or track, then follow the mounting hardware instructions for the material of the supporting structure. Do not attach a heavy curtain system to weak trim or an unsupported railing.
If drilling is prohibited, investigate a freestanding frame or an approved tension-mounted arrangement. Ordinary tension rods should not be assumed safe for heavy outdoor fabric, exposed locations, or installations where falling hardware could injure someone.
Choose adequate opacity
Check the fabric in both daylight and artificial light to determine whether silhouettes remain visible.
Plan for weather
Open or remove curtains during high winds and store them dry when the season or conditions require it.
2. Use Tall Container Plants for Portable Privacy
Tall container plants create a natural visual barrier without requiring permanent landscaping. They are particularly useful for renters, townhouse patios, balconies with adequate structural capacity, and homeowners who want to conceal one seating area rather than an entire property line.
Choose plants according to your local climate, sunlight, container size, and watering routine. Evergreen shrubs may provide year-round coverage where they are suited to the climate. Ornamental grasses can create seasonal screening, while compact shrubs offer a tidier option for narrow spaces. Plants marketed as fast-growing are not automatically suitable for every region or container.
Large containers and mature plants cost more than seedlings, but they can provide more immediate coverage. Smaller plants are usually cheaper and easier to move, although they need time to grow. Containers should have drainage holes and enough soil volume for the selected species.
Source: suite101.com
Best for
Small patios, balconies, rental homes, outdoor dining areas, and movable privacy zones.
Main advantage
Plants soften a space visually and can be rearranged as seating and sunlight patterns change.
Main limitation
Plants need water, pruning, appropriate light, and enough space. They may leave gaps and do not guarantee complete privacy.
Affordable Plants to Consider
Select species after checking regional growing guidance and mature dimensions. A plant that thrives in a humid Southern garden may struggle in a cold Northern winter, while a drought-tolerant species may be more suitable in parts of the Southwest.
Arborvitae
Certain varieties provide dense evergreen screening in suitable climates, but many need more root space than a small container offers.
Clumping ornamental grasses
Suitable varieties can provide height and movement. Choose noninvasive species and expect some varieties to lose coverage during winter.
Compact evergreen shrubs
Useful for year-round screening when the selected variety tolerates local temperatures and the available container volume.
Bamboo
Clumping types may work in appropriately sized containers, but require watering, space, and attention to local climate. Running bamboo can spread aggressively if planted in the ground.
3. Build a Simple Lattice Privacy Screen
A lattice panel offers partial privacy at a relatively low material cost, especially when it can be attached to an existing, structurally sound fence or pergola. Its open pattern reduces the feeling of a solid wall while providing a support for climbing plants.
Lattice is not completely opaque. People may still see through its openings, especially from close range or when the sun shines directly through the panel. For greater screening, select a tighter pattern or place suitable plants in front of it. Adding a plant layer often looks more natural than covering every opening with improvised material.
For a new freestanding screen, use a stable frame and supports designed for outdoor conditions. Wind can place considerable force on tall panels, particularly when vines mature or fabric is added. The supporting structure matters as much as the lattice itself.
Source: howcanthis.com
Best for
Garden boundaries, small patios, outdoor showers where permitted, and areas that need partial screening.
Main advantage
Lattice can combine decoration, plant support, and privacy in one relatively simple structure.
Main limitation
Openings remain visible, and a tall unsupported panel may be unstable.
Improve Privacy Without Rebuilding the Fence
Measure the exact opening that needs coverage and inspect the existing fence for rot, loose posts, and other damage. Attach lattice only if the fence and its posts can handle the added weight and wind load. Use outdoor-rated fasteners appropriate for the panel and support material.
If the fence is shared or belongs to a landlord or homeowners association, confirm permission before attaching anything. For a rental, a weighted freestanding frame may be a more practical alternative.
Use a layered design
Place planters near the lattice to soften gaps and create a deeper visual screen.
4. Add Reed or Bamboo Screening to an Existing Fence
Reed rolls and bamboo screening can cover gaps in an existing fence at a lower initial cost than replacing the entire boundary. They are especially useful when a wooden or wire fence provides a suitable attachment surface but still allows neighbors to see through.
Natural screening materials vary in thickness, color, durability, and resistance to moisture. Reed is often lightweight and economical, while bamboo screening may have a more substantial appearance. Neither material should be assumed to provide full privacy until you check its actual gaps and visibility from both sides.
Attach the screening with outdoor-rated ties or fasteners suitable for the supporting fence. Keep the material clear of ignition sources and follow local fire-safety guidance, particularly near grills, fire pits, and exterior heating equipment.
Source: yardandgardenguru.com
Best for
Existing chain-link fences, garden boundaries, and patios where the underlying structure is sound.
Main advantage
It can cover a specific section without paying for a completely new fence.
Main limitation
Natural materials can weather, loosen, fade, or deteriorate, and they may increase wind resistance.
Make a Small Section Count
You do not necessarily need to cover the full length of a fence. Screen the area directly behind a patio table or outdoor sofa first. This reduces material use and lets you test whether the height and opacity are sufficient before extending the installation.
Inspect fasteners after storms and replace damaged sections promptly. If the existing fence is weak, repair it or select an independent screen rather than adding material that could increase the risk of failure.
Choose a suitable material
Compare actual opening size, outdoor durability, and maintenance requirements rather than relying only on product photographs.
Check wind exposure
Avoid turning a lightweight fence into a large wind-catching surface without confirming that its supports are adequate.
5. Grow Climbing Plants on a Trellis
A trellis covered with suitable climbing plants can create an attractive privacy screen while using less ground space than a wide hedge. This approach works well beside patios, along garden paths, and near outdoor seating where a vertical structure is practical.
Annual vines can grow quickly during the appropriate season, while perennial climbers may provide longer-term coverage once established. The right plant depends on regional temperatures, sunlight, soil conditions, and how much pruning you are willing to do. Some vines become heavy, spread aggressively, or damage unsuitable surfaces, so choose species carefully.
A young vine does not provide immediate concealment. If you need privacy now, combine the trellis with an opaque temporary screen or position existing container plants around its base. Over time, the plant can contribute more of the visual coverage.
Source: plusmood.com
Best for
Narrow yards, patio corners, garden dividers, and existing fences that can safely support a trellis.
Main advantage
Vertical growth can soften a boundary and create a green screen with relatively little ground space.
Main limitation
Coverage depends on plant growth, season, maintenance, and the stability of the support.
Choose Plants That Suit Your Region
Ask a local cooperative extension office or reputable nursery about climbing plants suited to your USDA hardiness zone and local growing conditions. Hardiness zones describe winter temperature tolerance, but they do not replace guidance about summer heat, rainfall, sunlight, or invasive potential.
Annual flowering vines
Can provide seasonal growth and flowers, but usually require replanting when the growing season ends.
Perennial climbers
May provide recurring coverage, but mature size, pruning requirements, and potential surface damage must be considered.
Edible climbing plants
Suitable beans or other climbing crops can create seasonal screening while producing food, although coverage may be uneven.
6. Plant an Affordable Shrub Hedge
A shrub hedge can provide a durable, natural privacy boundary without the appearance of a solid fence. Buying smaller nursery plants instead of mature specimens usually reduces the initial expense, but the trade-off is a longer wait for effective coverage.
For American homeowners, the best hedge species depend on climate, soil drainage, available sunlight, mature height, and local pest pressures. Evergreen plants can provide year-round coverage in suitable regions, while deciduous shrubs may leave gaps during winter. Native shrubs can be especially useful when they are suited to the site and provide habitat for local wildlife.
Calculate the spacing from the mature width and the nursery’s planting instructions rather than squeezing plants together for an instant wall. Overcrowding can increase disease problems and create a hedge that becomes expensive to maintain.
Best for
Homeowners who want a long-term boundary and have enough planting space.
Main advantage
A healthy hedge can add greenery, soften views, and provide recurring seasonal coverage.
Main limitation
Plants require establishment time, water, pruning, and enough distance from boundaries and structures.
Reduce the Cost of a Living Screen
Compare smaller plants from local nurseries and seasonal sales. Before purchasing, check mature dimensions and ask whether the species is suitable for the site’s soil and moisture. A cheap plant that fails to thrive is not a budget-friendly choice.
Use mulch according to local gardening recommendations to help manage weeds and soil moisture, keeping mulch away from direct contact with shrub trunks. Water new plants according to their needs and local weather rather than assuming every shrub needs the same schedule.
Plan the full row
Estimate plant count using the recommended spacing and the total length of the intended hedge.
Allow room to grow
Keep mature branches away from walkways, neighboring property, utilities, and structures.
7. Repurpose Wooden Pallets Into a Privacy Screen
Clean, sound wooden pallets can sometimes be repurposed into an inexpensive garden divider or decorative screen. This option appeals to DIY homeowners who already have suitable pallets and basic woodworking tools.
Not every pallet is appropriate for reuse. Inspect it for splinters, chemical contamination, rot, loose boards, and signs of pest damage. Avoid pallets with unknown spills or contamination, and do not burn treated or unidentified wood. A pallet that is safe for one application may still be unsuitable for a structure that children or pets frequently touch.
A single pallet rarely creates a complete privacy wall. You may need several units, additional framing, and a stable base. Gaps between slats may also leave clear sightlines, so evaluate the finished structure before depending on it for privacy.
Best for
DIY garden dividers, sheltered patio corners, and temporary screening where local rules allow it.
Main advantage
Reusing suitable materials can reduce material purchases and create a custom design.
Main limitation
Pallet condition, structural stability, inconsistent dimensions, and visible gaps can make the project more difficult than expected.
Prepare Reclaimed Wood Carefully
Select clean pallets with sound boards and no obvious contamination. Sand rough edges where appropriate, wear suitable protective equipment during cutting or sanding, and use exterior-rated hardware. If the project requires a tall or permanent structure, do not assume a pallet is structurally adequate simply because it is heavy.
Secure the screen against tipping and wind movement. Do not attach a large panel to a weak railing or place it where it could fall onto a public walkway or neighboring property.
Check before collecting
Confirm that the owner permits reuse and that the wood has no known hazardous contamination.
Keep it stable
Use a support system appropriate to the finished size, weight, and exposure to wind.
8. Make a DIY Wooden Slat Screen
A simple wooden slat screen can provide more consistent privacy than open lattice while costing less than a long, professionally installed fence. It works best when you need to conceal a limited area, such as the end of a patio or the side of an outdoor seating nook.
Use exterior-suitable lumber and fasteners. Untreated wood may weather quickly outdoors, while pressure-treated lumber and naturally durable species have different handling and maintenance requirements. Follow the product label for any wood treatment and keep treated materials away from uses that are not permitted by their instructions.
The spacing between slats determines how much visibility remains. Narrow gaps provide more visual coverage but increase the amount of material and can increase wind resistance. A staggered arrangement may obscure direct views from selected angles while allowing airflow.
Best for
Small patios, outdoor showers where permitted, garden seating areas, and targeted side-yard screening.
Main advantage
The builder can customize panel width, slat spacing, and finish.
Main limitation
Tools, framing, weather protection, and stable supports add to the cost and labor.
Plan Before Cutting Lumber
Measure the required panel dimensions and draw a simple layout showing the frame, slats, and attachment points. Check the intended height against local fence and screening rules before buying lumber. If a permit or approval is required, obtain it before construction.
For a modest project, compare the cost of individual boards with a ready-made panel. A prefabricated panel may be less expensive after accounting for cutting waste, fasteners, and finishing materials.
Prioritize the viewing angle
Position slats to block the direct line of sight from the neighboring window or seating area.
Protect the structure
Use suitable fasteners and supports, and maintain the wood according to the material manufacturer’s recommendations.
9. Arrange a Freestanding Privacy Screen
A freestanding privacy screen is a practical option when drilling into a fence, wall, or balcony railing is not allowed. Folding screens and purpose-built outdoor dividers can provide immediate coverage while remaining movable.
For the lowest cost, compare used outdoor dividers, secondhand garden panels, and sturdy materials you already own. However, the finished setup must remain stable when people walk past it or when the wind picks up. Lightweight screens that work well indoors may not be appropriate for exposed outdoor locations.
Choose a screen wide enough to block the relevant angle. A narrow panel may conceal a seated person from one position but expose the same area when someone moves a few feet to the side. Two smaller panels arranged at an angle can sometimes offer better coverage than one flat panel.
Best for
Rentals, temporary privacy, patio seating, and spaces where permanent construction is impractical.
Main advantage
The screen can be repositioned, stored, or moved when the layout changes.
Main limitation
Stability, outdoor durability, storage space, and wind exposure can limit where it can be used.
Position a Screen for Maximum Coverage
Move the screen into place while sitting or standing in the area you want to protect. Check visibility from the neighboring direction, then adjust the angle and width. If a second-story window overlooks the space, assess that elevated view as well.
Keep exits, paths, and access to outdoor equipment clear. Avoid improvised heavy weights or attachments that could create a trip hazard or damage the surface beneath the screen.
Test before purchasing multiple panels
Determine whether a single panel blocks the main sightline before expanding the setup.
Remove it when necessary
Follow the manufacturer’s weather guidance and move or secure the screen before strong winds.
10. Use Outdoor Shade Sails or a Pergola Canopy
Shade sails and pergola canopies can reduce visibility from elevated angles while also providing shade. They are useful when a neighboring deck or upstairs window overlooks an outdoor dining area, but they do not automatically block every view from above.
A canopy must be sized and installed for its intended structure and local weather conditions. Shade fabric can catch wind, and poorly anchored hardware can fail. Follow the manufacturer’s installation requirements and consider professional advice for large sails or installations attached to a house.
If the goal is privacy rather than shade alone, assess the canopy’s opacity and angle before buying. A roof-like panel may screen a view from above while leaving the sides fully exposed. Side curtains or a narrow vertical screen may complete the setup more economically.
Best for
Pergolas, covered patios, and outdoor dining areas overlooked from upstairs windows or decks.
Main advantage
The covering can provide shade and reduce some elevated sightlines at the same time.
Main limitation
Anchoring, wind loads, drainage, and structural suitability must be addressed.
Combine Overhead and Side Screening
Start by identifying whether the unwanted view comes from directly above or from a diagonal angle. If the view comes from a neighboring second-story window, a canopy may reduce visibility into the central seating area, but a side screen may still be needed near the boundary.
Do not attach a sail to weak fascia boards, improvised posts, or other supports that have not been designed for the forces involved. In areas exposed to severe storms, follow local weather guidance and the manufacturer’s instructions about removal or seasonal use.
Check the angle
A covering only blocks the views intercepted by its position, height, and dimensions.
Protect the structure
Use suitable rated hardware and secure anchor points for the selected system.
11. Place Tall Ornamental Grasses in Strategic Locations
Ornamental grasses can create an inexpensive, natural screen along a patio edge or garden boundary. Many have upright growth that takes up less horizontal space than a broad shrub, making them useful for narrow American suburban yards and smaller outdoor seating areas.
Choose a species that fits the local climate and the desired height. Some grasses are deciduous or become less effective as screens during winter, while others remain more substantial through colder months. Non-native or aggressive species may spread beyond their intended location, so check local invasive plant guidance.
Planting a few well-spaced clumps near a seating area can be cheaper than landscaping an entire boundary. The main trade-off is that grasses often create partial screening rather than an opaque wall. Combining them with a lattice panel or other screen can improve coverage.
Best for
Garden borders, patio corners, modern landscapes, and narrow planting strips.
Main advantage
Grasses provide movement, texture, and seasonal interest while creating some visual separation.
Main limitation
Seasonal dieback, gaps between clumps, and mature spread can affect privacy.
Plant for Coverage Rather Than Appearance Alone
Check the mature height and width on the plant label. Space grasses according to the recommended planting distance and avoid crowding them against fences, paths, or underground utilities. Water during establishment as appropriate for the species and weather.
For a year-round privacy need, use grasses as one layer rather than the only barrier unless the selected variety reliably retains sufficient coverage in your climate.
Select appropriate varieties
Use locally suitable grasses and avoid species known to spread aggressively in your area.
Account for winter
Determine whether seasonal browning or cutting back will expose the area you want to conceal.
12. Install a Small Privacy Fence Instead of Replacing the Whole Boundary
When a fence is the most effective solution, a short targeted section may cost less than rebuilding the entire yard boundary. A privacy panel behind a patio or beside an outdoor hot tub can screen the area that matters while leaving the rest of the existing fence unchanged.
Compare the cost of a prefabricated panel, suitable posts, mounting hardware, and any required concrete or ground anchors. Existing fences may need repair before they can support additional panels. If the new section is freestanding, its foundation and resistance to wind need to match the structure and site conditions.
Fence regulations vary by municipality and property type. Before buying materials, check applicable height limits, permit rules, easements, property lines, and any HOA or rental restrictions. Rules can differ between front yards, side yards, and backyards, and additional requirements may apply near roads or intersections.
Best for
Homeowners who need reliable coverage in a defined area and can install a compliant permanent barrier.
Main advantage
A properly built opaque panel can provide more immediate and consistent coverage than young plants.
Main limitation
Posts, foundations, permits, labor, and maintenance may make a fence more expensive than expected.
Check Rules Before Building
Contact the local building or planning department to confirm which requirements apply to your address. Ask whether the proposed height requires a permit and whether the panel must be set back from the property line. Check the location of buried utilities before digging, using the appropriate local utility-marking service.
Do not assume that a neighbor’s existing fence establishes the legal height or property boundary for your project. If the boundary is disputed, resolve the issue before placing permanent posts.
Measure the project
Calculate the length and height of the proposed screen and account for gates or irregular sections.
Compare installed cost
Include posts, fasteners, finishing, delivery, ground preparation, and any professional labor.
13. Use a Raised Planter as a Partial Privacy Barrier
A raised planter combines gardening space with a modest visual barrier. It can help separate a patio from a neighboring walkway or create a more private outdoor dining corner without constructing a full fence.
The planter itself may only block the lower part of a view, so taller plants are usually needed when the goal is to conceal seated people or standing adults. Select a planter depth and plant species appropriate for the roots, drainage, and available sunlight.
Raised planters become heavy when filled with wet soil. Choose a location and base that can support the finished weight, especially on balconies, decks, or elevated patios. Do not assume that a residential balcony can safely support several large soil-filled containers without checking its capacity.
Best for
Patios, garden seating areas, and outdoor spaces where additional planting space is useful.
Main advantage
One installation can provide a garden bed, a visual divider, and room for taller plants.
Main limitation
A low planter alone provides limited privacy and may be difficult to move after filling.
Combine a Planter With a Vertical Screen
A planter positioned beneath a suitable trellis can create more vertical coverage than either component alone. Use a trellis designed to attach to the planter or its supporting structure, and ensure the combined assembly remains stable when plants become heavier.
For balconies, check building rules and structural limits before adding heavy planters or drilling into railings. Keep drainage water from damaging the building or neighboring property.
Choose plants by mature size
Select varieties that can grow to the intended screening height without overwhelming the container.
Avoid excessive weight
Use a suitable location and container design, and verify load capacity where structural limits are uncertain.
14. Reposition Existing Furniture and Outdoor Accessories
Rearranging furniture is often the cheapest way to improve privacy because it can cost nothing. Move the seating area away from the direct sightline, turn chairs toward a garden feature, or place a suitable storage bench where it blocks a low view without obstructing movement.
The effectiveness of this approach depends on the height of the furniture and the viewing angle. A low bench may conceal a seated person from a nearby ground-level position but do little against an upstairs window. Large furniture also needs to remain stable and should not block exits, drainage, or access routes.
Use existing umbrellas, permitted shade structures, tall decorative planters, or outdoor shelving designed for exterior use to refine the arrangement. Avoid placing unstable objects on railings or stacking heavy items where they could fall.
Best for
Renters, small patios, temporary seating arrangements, and anyone who wants to test a layout before purchasing screens.
Main advantage
It can provide an immediate improvement without construction or additional materials.
Main limitation
Furniture generally blocks only limited angles and may not provide standing-height or upstairs privacy.
Test the Layout Before Spending Money
Move existing chairs and tables into a new position, then sit and stand where you normally use the space. Look for remaining sightlines and adjust the furniture before deciding whether a screen or plants are necessary.
Try a temporary visual marker in the proposed screen location to estimate the needed height. Do not leave unsecured cardboard, sheets, or other improvised materials outside in wind or rain.
Start with the seating area
Screen the place where privacy matters most rather than moving every object in the yard.
Preserve clear access
Keep pathways, gates, stairs, and emergency exits usable.
15. Combine Two Low-Cost Methods for Better Coverage
Combining a few affordable methods can provide better privacy than relying on a single barrier. A lattice panel with container plants, a small wooden screen beside an existing hedge, or patio curtains paired with a strategically positioned planter can block multiple sightlines while preserving a more open appearance.
The most economical combination addresses the actual viewing angle. For example, a renter with a balcony overlooked from the neighboring building might use a permitted side screen and move seating farther from the railing. A homeowner with a ground-level patio might use a short opaque panel backed by evergreen shrubs. These are examples of design approaches, not guarantees that every angle will be blocked.
Avoid adding every available screening material at once. More panels, plants, and attachments can increase cost, maintenance, weight, and wind exposure. Test one change first, then add the second layer only if visibility remains a problem.
For a patio
Combine outdoor curtains with movable planters around the seating area.
For a narrow side yard
Use a suitable lattice panel with a carefully selected climbing plant.
For a rental balcony
Use permitted freestanding screens and containers after checking balcony weight and building rules.
For a permanent garden boundary
Combine a compliant short fence section with a suitable shrub hedge.
A Simple Three-Step Privacy Plan
First, identify the precise view you want to block. Second, install or reposition the least expensive suitable option. Third, inspect the result from different positions and add a second layer only if necessary.
This staged approach reduces the risk of spending money on a tall fence when a smaller screen would work. It also lets you adjust the layout as plants grow or your outdoor furniture changes.
Step one
Identify the neighboring window, deck, walkway, or seating position that creates the unwanted view.
Step two
Choose a low-cost screen that is suitable for the location, weather, and property rules.
Step three
Check remaining sightlines and decide whether a second layer is worth the additional cost.
How to Measure the Right Height for Privacy
The correct screen height depends on the eye level of the person looking into your yard, the height of the area you want to conceal, and the distance between the two locations. A barrier that blocks a view from a neighboring ground-floor patio may not block a view from an upstairs bedroom.
A useful starting point is to identify the actual viewing line rather than choose a standard fence height. Stand at the place where you need privacy and ask a household member to observe the sightline from another safe, accessible location. If the neighboring viewpoint is inaccessible, use the visible window or deck position as an approximate reference and recognize that the result may be incomplete.
You can use a temporary screen or visual marker to test the proposed height. Do not climb on fences, lean out of windows, or enter a neighbor’s property to measure the angle. If you cannot assess an elevated view safely, use photographs taken from your own property or consult a qualified landscape professional.
Ground-level view
A screen near the seating area may block a direct view without requiring a tall perimeter barrier.
Standing-height view
The top of the barrier must intercept the line between the observer’s eyes and the area being concealed.
Upstairs view
A vertical fence may leave the space visible from above, requiring overhead screening or carefully positioned taller vegetation.
Estimate Materials Before Shopping
For a rectangular screen, multiply the planned width by the planned height to estimate its face area. For example, a panel measuring 6 feet wide and 5 feet high covers 30 square feet before accounting for gaps, framing, or overlaps.
This calculation helps compare material quantities, but it does not establish structural adequacy or determine whether a panel complies with local regulations. Height and support requirements should be checked separately.
Measure twice
Record the width, height, attachment points, and ground conditions before purchasing materials.
Allow for the structure
Include posts, frames, fasteners, and any overlap needed to eliminate unwanted gaps.
Common Mistakes That Make Cheap Privacy Projects Fail
The most common mistake is buying a screen before confirming what it needs to conceal. A decorative panel may look attractive in a product photograph but leave a direct view through its openings. Plants may be too short, too widely spaced, or poorly suited to the local climate. A temporary screen may also become unstable when exposed to wind.
Avoid choosing materials based on purchase price alone. A cheap panel that must be replaced every season can cost more over time than a moderately priced, durable option. Likewise, a hedge may be economical in the long term but unsuitable when immediate privacy is essential.
A privacy project should not create hazards for neighbors, pedestrians, pets, or household members. Poorly secured panels, obstructed drainage, invasive plants, and structures placed across easements can turn a simple improvement into a costly problem.
Ignoring upstairs windows
A short fence may not block elevated views. Evaluate the actual viewing angle before selecting a barrier.
Choosing unsuitable plants
Species that cannot tolerate local weather, container conditions, or available sunlight may fail before they provide useful screening.
Using weak supports
A tall panel or fabric screen can catch wind. Use a suitable structure and follow installation guidance.
Overlooking property rules
Fence heights, attachment permissions, easements, and HOA restrictions can affect which solutions are permitted.
Expecting total privacy
Open lattice, sparse plants, and side curtains may block one direction while leaving other views exposed.
Forgetting maintenance
Plants need water and pruning, while wood, fabric, and natural screening materials require inspection and occasional replacement.
What to Do When Your First Screen Does Not Work
First, determine whether the problem is height, width, transparency, or viewing angle. If people can see through the material, choose a denser screen. If they can see around the edge, reposition the screen or extend it only as much as necessary. If the view comes from above, reconsider the geometry rather than simply making a side panel wider.
If the screen moves in wind, stop using it until its support is corrected. Do not add improvised weights or fasteners without considering the structure and surface. If a permanent fence is involved, consult the applicable local rules before increasing its height.
Problem: visible gaps
Use denser material or a suitable second layer.
Problem: insufficient height
Reassess the sightline and confirm the permitted height before modifying the structure.
Problem: unstable panel
Remove or secure the screen according to its instructions and correct the support before reuse.
Problem: plants grow too slowly
Maintain the plants appropriately and add a temporary screen if immediate coverage is needed.
Privacy and Property Rules in the United States
In the United States, fence and outdoor structure requirements are determined by the applicable state and local rules, property conditions, and sometimes HOA or rental agreements. There is no single nationwide fence-height rule that applies to every residential property. Before installing a tall screen, permanent fence, or attached canopy, verify the requirements that apply to your location.
Check local planning or building department guidance for permits and height restrictions. Review the property survey or other reliable boundary information before digging or attaching a structure near a property line. Use the appropriate utility-location service before excavation. In many areas, homeowners can request utility marking through 811, but procedures and timing vary by state.
If you rent, obtain the required permission before drilling, fastening panels to a building, altering a fence, or planting permanent vegetation. In a condominium or HOA community, balcony screens, visible exterior changes, and permanent landscaping may be subject to additional restrictions.
A privacy screen should not be used to harass, threaten, or deliberately damage neighboring property. If the underlying issue involves a persistent dispute, begin with a calm conversation when safe and appropriate. For unresolved property-line, nuisance, or access disputes, seek guidance from the relevant local authority or a qualified attorney rather than relying on assumptions about privacy rights.
Check municipal rules
Confirm fence height, permit requirements, setbacks, and any special restrictions that apply to your property.
Confirm property boundaries
Do not assume an existing fence is located exactly on the legal boundary.
Follow rental or HOA rules
Ask about restrictions before installing permanent screens, changing exterior structures, or planting along a shared boundary.
Protect access and utilities
Keep easements, utility equipment, drainage routes, and required access areas clear.
When to Seek Professional Advice
A landscape professional can help assess difficult sightlines, plant suitability, and the layout of a small yard. A qualified contractor or structural professional may be appropriate for tall freestanding screens, large shade sails, retaining structures, or installations exposed to strong winds.
If the property boundary is disputed, the proposed screen could affect a shared structure, or the project requires a permit, consult the appropriate local authority or professional before construction. This can prevent avoidable repair costs and disagreements.
Structural concerns
Seek qualified advice when the screen requires substantial anchoring, unusual supports, or installation on an elevated deck.
Boundary disputes
Use reliable boundary information and obtain legal advice when ownership or access is contested.
Research Notes and Next-Question Gap Map
The main reader need is to find inexpensive, practical ways to reduce visibility from neighboring properties. The article addresses that task through immediate screens, natural barriers, DIY construction, measurement guidance, and installation considerations. The estimates are illustrative planning ranges and are not represented as independently tested product prices.
A verified competitive-page audit, live search-demand analysis, and current retailer price comparison are not established by this article. The supplied image list provides image candidates but does not itself establish the accuracy of the gardening, legal, or cost claims. The following gap map separates reasonable follow-up needs inferred from the task from observed research findings.
Question: How tall should a privacy screen be?
Reader stage: planning. Basis: inferred next need because height determines sightline coverage and may affect local compliance. Competitor coverage: not checked. Benefit: prevents buying a screen that is too short. Priority: high. Placement: measurement section. Evidence needed for a site-specific answer: actual viewing geometry and local regulations.
Question: How can renters create privacy without drilling?
Reader stage: choosing an installation. Basis: inferred next need because permanent attachments may not be permitted. Competitor coverage: not checked. Benefit: reduces property damage and permission problems. Priority: high. Placement: freestanding screen and container plant sections. Evidence needed for a specific property: lease and building rules.
Question: What is the cheapest option for an upstairs neighbor’s view?
Reader stage: solving a difficult sightline. Basis: inferred next need because elevated viewing angles change the suitable solution. Competitor coverage: not checked. Benefit: distinguishes side screening from overhead or layered coverage. Priority: high. Placement: measurement and canopy sections. Evidence needed: actual sightline, local structural requirements, and permitted installation options.
Question: What plants provide year-round privacy in my climate?
Reader stage: selecting landscaping. Basis: inferred next need because plant performance varies by climate and mature size. Competitor coverage: not checked. Benefit: avoids plant failure and seasonal privacy gaps. Priority: medium. Placement: container plant, shrub, and grass sections. Evidence needed: regional extension guidance and species-specific growing requirements.
Reader stage: before installation. Basis: inferred next need because rules vary by municipality and property. Competitor coverage: not checked. Benefit: reduces compliance and boundary risks. Priority: high. Placement: property rules section. Evidence needed: current official guidance from the reader’s city or county.
Frequently Asked Questions
Q
What is the cheapest way to block a neighbor’s view?
Rearranging existing outdoor furniture is often the cheapest starting point because it may cost nothing. If you need a physical barrier, consider a small freestanding screen, affordable outdoor curtains, or container plants. The lowest-cost option depends on the size of the area, the viewing angle, and whether you already have suitable materials.
Q
How can I block my neighbor’s view without building a fence?
Use outdoor curtains, movable privacy panels, tall container plants, climbing plants on a trellis, or a combination of these methods. Choose a screen that addresses the actual sightline and check property or building rules before attaching anything. If the view comes from an upstairs window, ground-level screening alone may not be enough.
Q
What plants are best for blocking a neighbor’s view?
Suitable evergreen shrubs, compact screening plants, clumping ornamental grasses, and certain container-grown bamboo varieties can provide privacy. The best choice depends on your USDA hardiness zone, sunlight, soil, mature plant size, and maintenance preferences. Check local invasive plant guidance and nursery recommendations before purchasing.
Q
How do I block a neighbor’s upstairs window from overlooking my yard?
First, identify the exact area visible from the elevated window. A taller screen, carefully positioned plants, or an overhead canopy may help, depending on the viewing angle and local rules. A side fence will not necessarily block a downward view. Check structural safety and permitted heights before installing elevated or overhead screening.
Q
Can I put a privacy screen on my apartment balcony?
Possibly, but you should check your lease, building rules, and any HOA restrictions before installation. Freestanding screens and appropriately sized planters may avoid drilling, but they must remain stable and comply with balcony weight limits. Avoid attaching objects to railings unless permitted and designed for that purpose.
Q
Will a privacy screen work in a windy backyard?
It can, but wind exposure affects the appropriate material and support system. Large solid panels, shade sails, and fabric screens can catch wind and place force on their anchors. Choose products rated for the intended environment, follow installation instructions, and remove or secure temporary screens when required by weather conditions.
Q
How can I create privacy on a tight budget immediately?
Start by changing the seating arrangement and screening the smallest area that needs protection. Add a used freestanding divider or a few suitable container plants if necessary. This targeted approach can reduce upfront spending while helping you determine whether a more permanent solution is worthwhile.
Q
Do I need permission to install a privacy fence in the United States?
Requirements depend on your municipality, property type, fence dimensions, boundary location, and any applicable HOA or rental rules. Check with your local building or planning department before construction. If the boundary is uncertain, obtain reliable property information before digging or placing posts.
✦ Wrapping Up
Conclusion
Finding cheap ways to block neighbor view does not necessarily mean building a tall fence or spending thousands of dollars on landscaping. Outdoor curtains, movable screens, lattice panels, container plants, climbing vines, and strategically positioned furniture can provide useful privacy for a fraction of the cost of a full boundary replacement. The most suitable method depends on the location, the viewing angle, your climate, and whether you need an immediate or long-term solution.
For many American homeowners, the most practical approach is to begin with a small, targeted improvement and evaluate the result before expanding the project. Renters can often start with movable screens or containers, while homeowners with a long-term privacy goal may prefer suitable shrubs or a compliant fence section. Combining two modest solutions can provide better coverage than buying one expensive barrier that does not address the actual sightline.
Before installing a permanent structure, verify local height restrictions, property boundaries, permits, and any HOA or rental requirements. Check wind exposure and structural support, particularly for tall panels, shade sails, and balcony installations. With careful measurement and a realistic budget, you can make an outdoor space feel more private without taking on an unnecessarily large project.
💡 Key Takeaway
Measure the area that needs privacy, identify the exact viewing angle, and start with the least expensive suitable screen. Test the result before adding more materials, and confirm local rules and structural requirements before making permanent changes.
I enjoy sharing simple gardening ideas, lawn care tips, and honest product reviews that help make outdoor work easier. From home gardening guides to helpful tools and lawn care advice, I write easy-to-follow content to help readers create a healthier and better-looking outdoor space without wasting time or money.