

As an Amazon Associate, I earn from qualifying purchases.
Master a few crops, perfect hygiene, and sell fresh to local buyers.
If you want a simple, proven plan for How To Grow And Sell Microgreens, you are in the right place. I have built small systems, sold to chefs, and learned from mistakes. This guide breaks down seeds, gear, steps, safety, pricing, and sales. Follow along, and you will know How To Grow And Sell Microgreens with less guesswork and more profit.

What Are Microgreens and Why They Sell
Microgreens are young greens grown from vegetables, herbs, and grains. You harvest them when the first true leaves appear. They taste bold and look bright. Chefs and home cooks love them for color, crunch, and fresh flavor.
Demand is steady because microgreens add value to plates and smoothies. They are quick to grow and do not need much space. Some studies have found higher vitamin and phytonutrient levels than mature plants. You should still present them as fresh produce, not as a cure.
From a business view, the short grow time is key. Most crops are ready in 7 to 14 days. This speed lets you test, improve, and scale. If you ask How To Grow And Sell Microgreens and make it pay, you need crops that are fast, clean, and popular.
Popular beginner crops include:
- Radish for a pepper kick and great color
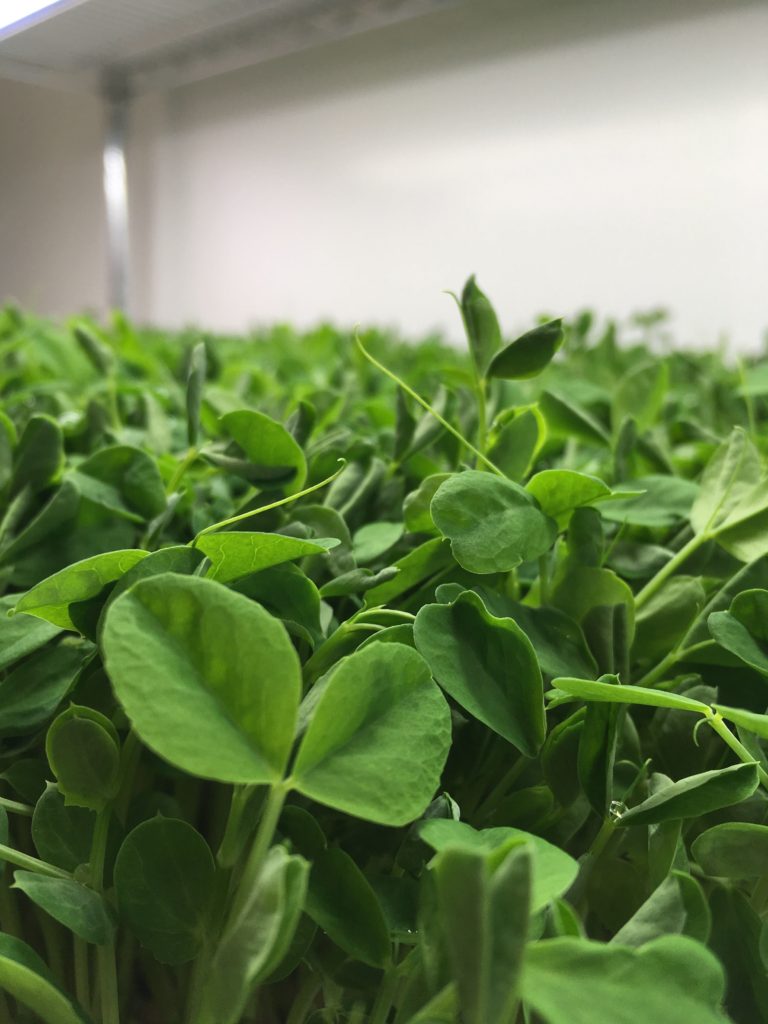
- Pea shoots for sweet crunch and volume
- Sunflower for nutty bite and high yield
- Broccoli for mild flavor and year-round sales
- Basil for summer menus and pesto kits

Tools and Supplies You Need to Start
You can start on a shelf in a spare room. Keep it simple and clean. Here is the core kit I use.
Grow area and hardware:
- Wire racks with casters for airflow and easy cleaning
- LED shop lights in the 4000–6500K range, 30–50W per shelf
- Clip fans for airflow across trays
- Timers for lights, 14–16 hours on, 8–10 hours off
Trays and media:
- 10×20 trays with and without holes for bottom watering
- Growing media like coco coir, a sterile potting mix, or hemp mats
- Spray bottles or a fine mister to start germination
Sanitation and safety:
- Food-safe sanitizer for tools and surfaces
- Clean buckets and brushes used only for the grow area
- Nitrile gloves, hair nets, and paper towels
Seeds and tools:
- High-germination seed from trusted suppliers
- A small scale for seed and harvest weights
- pH test strips if your water is hard
- A harvest knife or stainless scissors
Packaging and cold chain:
- Clamshells or compostable containers
- Stickers or labels with product name, weight, date, and farm info
- A fridge set to 34–38°F for crisp storage
- Cooler bags and ice packs for delivery
Start tight on budget. Most new growers set up for a few hundred dollars. As you learn How To Grow And Sell Microgreens at scale, add racks, lights, and a better wash-and-pack area.

How To Grow And Sell Microgreens: Step-by-Step Production
Here is the process I teach and use. Keep notes and repeat what works. Small changes in water, light, and seed rate can double your yield.
- Plan your batch
- Pick 3 crops to start. I like radish, broccoli, and pea.
- Schedule sow dates so you harvest once or twice a week.
- Set target yields per 10×20 tray.
- Sanitize and prep
- Clean trays and tools. Rinse well.
- Wipe racks and lights. Keep dust away.
- Wash hands. Wear gloves for harvest and packing.
- Hydrate and fill media
- Pre-wet coco or soil until it clumps but does not drip.
- Spread media in a tray with holes, about 0.5–0.75 inches deep.
- Level the surface. Firm it gently.
- Seed rates that work
- Radish: 1.5–2.5 oz per 10×20 tray
- Pea: 6–8 oz per tray, soak 6–8 hours if seeds are hard
- Sunflower: 4–6 oz per tray, pre-rinse and soak 6–8 hours
- Broccoli: 0.8–1.2 oz per tray
- Basil: 0.5–0.8 oz per tray, no soak
- Sow and mist
- Sprinkle seed evenly. Aim for full cover without piles.
- Mist the surface to start germination.
- Blackout and weight
- Place an empty tray on top as a dome or gentle weight.
- Keep in the dark for 2–4 days for most crops.
- Check daily. Mist if the top looks dry.
- Light and airflow
- Move trays under LEDs when shoots are 1–2 inches tall.
- Run lights 14–16 hours per day.
- Run fans for light airflow to keep stems dry and strong.
- Water the smart way
- Bottom water into a tray without holes.
- Start with about 1–2 cups. Adjust by crop and room temp.
- Do not leave standing water in trays.
- Harvest timing
- Radish and broccoli: 7–10 days
- Pea shoots and sunflower: 9–14 days
- Basil: 12–20 days
- Harvest when the first true leaves show and color is bright.
- Cut, cool, and pack
- Chill trays in the fridge for 20–30 minutes before cutting.
- Use a sharp knife. Cut just above the media.
- Spin or pat dry if needed. Pack into cold clamshells.
- Label with product name, net weight, packed-on date, and lot code.
- Store and deliver
- Keep at 34–38°F. Do not freeze.
- Deliver cold in a cooler with ice packs.
- Share care tips with buyers. Fresh sells faster when buyers know how to store it.
Personal notes from my first season:
- My first sunflower trays had fuzzy growth. It was not mold. It was root hairs. I learned to check smell and look for gray fuzz and slime before I tossed a crop.
- Overwatering caused damping-off once. Bottom watering and fans fixed it.
- Chefs want steady stem length and no seed hulls. A gentle brush pass before packing helps.
Why this helps you learn How To Grow And Sell Microgreens fast: the steps are short, the cycles are quick, and you can see fixes in a week.
Quick Q&A (PAA-style)
What is the best beginner microgreen?
- Radish. It is fast, bold, and hard to mess up.
How much light do I need?
- LED shop lights work well. Aim for bright, even light 2–6 inches above the canopy.
Why do my greens fall over?
- They need more airflow and less water. Check for soggy media and raise fans.

Quality, Food Safety, and Compliance
Microgreens are not sprouts. You do not grow them in standing water. You grow them in media and harvest above the roots. Still, food safety is key.
Follow these basics:
- Use clean water and clean tools for every batch.
- Keep pets out of the grow room.
- Sanitize trays, racks, blades, and tables.
- Train anyone who helps. Post simple steps on the wall.
Cold chain matters. Harvest cool. Pack cold. Deliver cold. Keep a simple log for fridge temps. This builds trust and extends shelf life.
Label smart. Include product name, net weight, packed-on date, and contact info. Add a simple lot code by date and rack. If a problem comes up, you can act fast. That is how pros who know How To Grow And Sell Microgreens protect their brand.
Know your rules. Many small farms follow basic Good Agricultural Practices. Some buyers ask for a short food safety plan. Farmers’ markets may have rules on sampling and hand-wash stations. Grocery buyers may need product liability insurance. Check your local health and agriculture rules before you sell.
Shelf life tips:
- Keep product dry and cold.
- Do not wash unless needed. If you wash, dry fast and chill.
- Use breathable packaging or vent holes for pea and sunflower.

Pricing, Sales Channels, and Marketing
Price for value and cost. Do not race to the bottom. The goal is a fair price with steady orders.
Smart pricing ideas:
- Farmers’ market clamshells: 2–4 oz at 4–8 dollars
- Restaurant bulk: per pound or per tray equivalents
- CSA add-ons: small boxes as weekly extras
- Subscription: home delivery at a set weight per week
Sales channels to test:
- Chefs and restaurants for steady, repeat orders
- Farmers’ markets for feedback and cash flow
- Small grocers for brand reach
- Home delivery or subscriptions for direct margin
How to pitch chefs:
- Bring a fresh sample box and a one-page spec sheet.
- List crops, flavor notes, shelf life, pack sizes, and prices.
- Offer set delivery days. Be on time. Be consistent.
Marketing that works:
- Post harvest shots and short reels on social media.
- Share quick recipes and storage tips.
- Ask for reviews and chef tags.
- Build a simple site with a menu, order form, and delivery map.
When you show clear quality, you make it easy to buy. That is a core part of How To Grow And Sell Microgreens and keep loyal clients.

Costs, Yields, and Simple Unit Economics
Know your numbers. It keeps you honest and calm. Here is a simple look per 10×20 tray. These are example ranges and will vary by crop and region.
Typical costs per tray:
- Media: 0.75–1.50 dollars
- Seed: 1.50–6.00 dollars
- Electricity and water: 0.20–0.80 dollars
- Packaging and labels: 0.30–0.80 dollars
- Labor: 10–20 minutes, value your time
Typical yields per tray:
- Broccoli: 5–8 oz
- Radish: 8–12 oz
- Sunflower: 8–16 oz
- Pea shoots: 10–16 oz
Sample math for radish:
- Cost: 4.00 dollars per tray all-in
- Yield: 10 oz
- Price: 1.50 dollars per ounce retail or 20.00–24.00 dollars per pound wholesale
- Gross: 15.00 dollars retail per tray
- Net before labor: 11.00 dollars per tray
You can grow 12–24 trays per rack. That lets a small room make real weekly income. As you learn How To Grow And Sell Microgreens with steady yield, your margins improve too.

Scaling and Operations
Start with one rack. Nail your process. Then add a second rack and a better pack area.
Ways to scale with care:
- Use a crop plan. List sow dates, blackout dates, and harvest days.
- Stagger batches of your top sellers.
- Standardize seed rates and label templates.
- Use color-coded trays by day to cut mix-ups.
- Set delivery routes and times to reduce trips.
- Track waste and adjust sow counts to demand.
Gear upgrades that help:
- A stainless table for harvest and pack
- A salad spinner or spinner basket for fast drying
- A larger fridge or a glass-door merchandiser
- An air purifier to cut dust
Hire slow. Train well. One person can manage dozens of trays with a tight system. This steady approach is how I kept quality high and learned How To Grow And Sell Microgreens without burnout.
Common Mistakes and How To Avoid Them
Here are errors I made so you do not have to.
- Overseeding. Thick mats hold water and rot. Use tested seed rates and adjust in small steps.
- Overwatering. Soggy trays invite disease. Bottom water and let media breathe.
- Poor airflow. Stale air weakens stems. Add small fans and keep them clean.
- Dirty tools. Dull, dirty blades bruise greens. Sanitize and sharpen often.
- No cold chain. Warm greens wilt fast. Chill at harvest and deliver cold.
- Too many crops. Start with three. Add a new one only after two steady cycles.
- Weak brand. Labels, dates, and reply time matter. Buyers want trust and clarity.
Small fixes like these are the backbone of How To Grow And Sell Microgreens at a pro level.

Frequently Asked Questions of How To Grow And Sell Microgreens
How many trays should I start with?
Start with 6–12 trays across two or three crops. This size is easy to manage and lets you learn fast.
Do I need grow lights or can I use a window?
Use LED lights for control and even growth. Windows change with weather and season, which hurts yield.
How long do microgreens last in the fridge?
Most last 5–10 days at 34–38°F when dry and packed well. Some, like basil, prefer slightly warmer temps.
Are microgreens safe to eat raw?
Yes, when grown with clean water, clean tools, and good handling. Follow basic produce safety steps.
What licenses do I need to sell?
Rules vary by city and state. Check local farmers’ market rules, health department guidance, and business registration needs.
Do I have to wash microgreens before selling?
Many growers do not wash to protect shelf life. If you wash, dry fast and keep them cold.
Can I grow organic microgreens at home?
You can use organic seed and media and follow organic practices. For certified organic sales, you need formal certification.
Conclusion
You now have a clear path for How To Grow And Sell Microgreens from seed to sale. Start small, keep it clean, track your numbers, and build trust with steady, cold deliveries. Fix one small thing each week, and growth will compound.
Take the first step today. Pick three crops. Set your sow and harvest dates. Share samples, gather feedback, and refine. If this guide helped, subscribe for more step-by-step playbooks, or leave a comment with your biggest question.