
As an Amazon Associate, I earn from qualifying purchases.
Replace the washer and use Teflon tape to stop a garden hose from leaking. Tighten connections properly for a secure fit.
A leaking garden hose can be frustrating and wasteful. Simple fixes often solve the problem without needing a new hose. Common issues like worn washers or loose connections are easy to address. Replacing the rubber washer in the hose fitting can make a significant difference.
Teflon tape on threads ensures a tight seal and prevents leaks. Regular maintenance helps keep your garden hose in good condition. Ensuring tight connections also prevents water loss and improves efficiency. These steps are cost-effective and prolong the life of your hose. Enjoy a leak-free garden hose with these straightforward solutions.
Causes Of Garden Hose Leakage
Garden hose leaks are a common problem for many homeowners. Leaks can waste water, create messes, and make gardening chores frustrating. Understanding the causes of garden hose leakage can help you fix the problem quickly and efficiently. Here are some common reasons why your garden hose might be leaking:
Worn-out Washers
Worn-out washers are a frequent cause of garden hose leaks. Washers are small rubber rings located inside the hose fittings. They create a watertight seal between the hose and the nozzle or spigot. Over time, these washers can deteriorate due to use and exposure to the elements.
- Cracks and splits: Regular wear and tear can cause washers to crack or split, leading to leaks.
- Flattening: Washers can become flattened from constant pressure, reducing their effectiveness.
- Hardening: Exposure to sun and water can cause washers to harden, making them less flexible.
To check if your washers cause the leak, unscrew the hose fitting and inspect the washer. If it appears damaged, replace it with a new one. Washers are inexpensive and readily available at most hardware stores. Replacing a worn-out washer can often solve your leakage problem instantly.
Damaged O-rings
O-rings are another critical component that ensures a tight seal in garden hoses. These small rubber rings are found in the hose connectors. Damaged O-rings can cause leaks and water wastage.
- Wear and tear: Continuous use can cause O-rings to wear out, leading to cracks and breaks.
- Improper installation: Incorrectly installed O-rings can get pinched or twisted, causing leaks.
- Chemical exposure: Exposure to harsh chemicals can degrade the rubber, making it brittle.
Inspect the O-rings regularly for any signs of damage. If you find a damaged O-ring, replace it with a new one. Ensure you use the correct size for your hose to maintain a proper seal. Replacing damaged O-rings can prevent leaks and prolong the life of your garden hose.
Loose Connections
Loose connections between the hose and its attachments are another common cause of leaks. These leaks occur when the hose fittings are not tightly secured to the fixture, nozzle, or sprinkler.
- Thread wear: Threads on the hose fittings can wear out over time, preventing a secure connection.
- Improper tightening: Not tightening the fittings enough can leave gaps for water to escape.
- Cross-threading: Incorrectly threading the fittings can damage the threads, causing leaks.
To fix loose connections:
- Check the hose fittings and ensure they are tightly secured.
- Use a wrench to tighten the connections if necessary gently.
- Be careful not to overtighten, as this can damage the fittings.
Ensuring tight and secure connections can help prevent leaks and maintain a reliable watering system.
Read Also: How to Clean a Garden Hose?
Types Of Garden Hose Leaks
Garden hoses can be a gardener’s best friend, but leaks can turn them into a nightmare. Understanding the types of garden hose leaks can help you fix them quickly and efficiently. Here, we will discuss different leaks, including those at the faucet end, spray nozzle end, and in the middle of the hose.
Leak At The Faucet End
A leak at the faucet end is common and can cause water wastage. This leak often occurs due to a loose connection, a worn-out washer, or a damaged hose end.
To fix this leak, follow these steps:
- Inspect the connection: Ensure the hose is securely attached to the faucet. Tighten if necessary.
- To replace the washer, Turn off the water supply and unscrew the hose from the faucet. Remove the old washer and insert a new one.
- Check for damage: Look for cracks or damage at the hose end. If damaged, consider replacing the hose.
Replacing the washer is often the most effective solution. Here’s a quick guide:
| Step | Description |
|---|---|
| 1 | Turn off the water supply. |
| 2 | Unscrew the hose from the faucet. |
| 3 | Remove the old washer. |
| 4 | Insert the new washer. |
| 5 | Reattach the hose to the faucet. |
Leak At The Spray Nozzle End
Leaks at the spray nozzle end can be frustrating. These leaks often happen because of a faulty nozzle, a loose connection, or a damaged washer.
Here are steps to fix it:
- Check the connection: Ensure the nozzle is tightly attached to the hose. Tighten if needed.
- Inspect the washer: Unscrew the nozzle and check the washer inside. Replace it if it looks worn out.
- Examine the nozzle: Look for cracks or damage in the nozzle. Replace the nozzle if necessary.
A quick nozzle check can help:
- Turn off the water supply.
- Unscrew the nozzle.
- Inspect the washer and replace it if needed.
- Check the nozzle for cracks.
- Reattach and test for leaks.
Often, simply replacing the washer or the nozzle can solve the problem.
Leak In The Middle
A leak in the middle of the hose is often caused by a puncture or wear and tear. A hose repair kit can fix this type of leak.
Steps to fix a middle leak:
- Identify the leak: Turn on the water and locate the exact spot.
- Turn off the water: Ensure the water supply is off before repairing.
- Cut the hose: Use a sharp knife to remove the damaged section.
- Insert the repair kit: Follow the instructions on the repair kit to join the hose pieces.
- Secure the connection: Tighten any clamps or fittings provided in the kit.
- Test the repair: Turn on the water to check for leaks.
Using a repair kit for a middle leak is straightforward and manageable, making the repair process easier for you.
| Step | Description |
|---|---|
| 1 | Identify the leak. |
| 2 | Turn off the water. |
| 3 | Cut out the damaged section. |
| 4 | Insert the repair kit. |
| 5 | Secure the connection. |
| 6 | Test the repair. |
Repairing a middle leak can save you from buying a new hose.
Tools And Materials Needed
Leaky garden hoses can be a nuisance, but fixing them is more accessible. The right tools and materials make all the difference. Gather everything you need to ensure a smooth and efficient repair process. Here are the essential tools and materials to stop your garden hose from leaking.
New Washers
Washers are tiny rubber rings that fit inside the hose connectors. They create a tight seal to prevent leaks. Over time, these washers can become worn out or damaged.
Replacing old washers with new ones is a quick and inexpensive fix. Here’s what you need to know about using new washers:
- Check the current washer: Remove the connector and look inside to see if the washer is cracked or misshapen.
- Buy the right size: Washers come in different sizes, so ensure you get the correct one for your hose.
- Install the new washer: Place the new washer inside the hose connector.
New washers are available at hardware stores. Always keep a few extra washers on hand for future repairs.
O-ring Kit
O-rings are another crucial component for preventing leaks. They are often found in the hose nozzle and other attachments. Like washers, O-rings can degrade over time.
An O-ring kit contains various sizes of O-rings, making it easy to find the right one. Here’s how to use an O-ring kit:
- Inspect the O-ring: Look for signs of wear or damage in the existing O-ring.
- Select the right size: Use the kit to find an O-ring that matches the old one.
- Replace the O-ring: Remove the old O-ring and replace it with the new one from the kit.
Keeping an O-ring kit handy ensures you can quickly address any leaks.
Teflon Tape
Teflon tape, also known as plumber’s tape, is a must-have for anyone fixing a leaky garden hose. This thin, white tape helps create a watertight seal on threaded connections.
Using Teflon tape is simple:
- Clean the threads: Make sure the threads on the hose and connector are clean and dry.
- Wrap the tape: Wrap the Teflon tape around the threads clockwise.
- Connect the hose: Screw the hose and connector together, ensuring a snug fit.
A small roll of Teflon tape can go a long way in preventing leaks.
Adjustable Wrench
An adjustable wrench is essential for tightening and loosening hose connectors. It provides a firm grip and can be adjusted to fit various sizes.
Here’s how to use an adjustable wrench:
- Set the size: Adjust the wrench to fit the size of the connector.
- Grip the connector: Place the wrench on it and turn it to tighten or loosen.
- Avoid over-tightening: Tighten just enough to stop the leak, but avoid over-tightening, which can cause damage.
An adjustable wrench is a versatile tool every gardener should have.
Pliers
Pliers are handy for gripping and twisting, especially when dealing with stubborn connectors. They come in various types, but needle-nose pliers are handy.
To use pliers effectively:
- Grip firmly: Use the pliers to grip the connector firmly.
- Twist gently: Apply gentle pressure to twist the connector without damaging it.
- Use with care: Pliers can scratch or dent soft metals, so use them with care.
Keep a pair of pliers in your garden shed for quick and easy hose repairs.
Screwdriver
A screwdriver is necessary for removing and replacing clamps on the hose. It’s also useful for tightening screws on hose attachments.
Here’s how to use a screwdriver for hose repairs:
- Choose the right type: Use a flathead or Phillips screwdriver, depending on the screws.
- Loosen clamps: Turn the screws counterclockwise to loosen the clamps.
- Tighten screws: Turn the screws clockwise to tighten them securely.
A screwdriver is a simple but essential tool for maintaining your garden hose.
Fixing A Leak At The Faucet End
Is your garden hose leaking at the faucet end? This common issue can waste water and reduce water pressure. Fixing a leak at the faucet end is simple and doesn’t require many tools. Follow these steps to stop the leak and get back to watering your garden efficiently.
Turn Off The Water Supply
Before starting any repair, always turn off the water supply to prevent water from spraying everywhere. Find the main water valve near the faucet or inside your home. Turn the valve clockwise to shut off the water.
Steps to turn off the water supply:
- Locate the main water valve.
- Turn the valve clockwise.
- Ensure no water flows from the faucet.
Once the water is off, you can safely work on the hose. This step is crucial to avoid any mess or accidental water wastage.
Remove The Hose From The Faucet
Next, remove the hose from the faucet. Unscrew the hose by turning the coupling counterclockwise. If the hose is stuck, use pliers to loosen it.
Tools you may need:
| Tool | Purpose |
|---|---|
| Pliers | To loosen a stuck hose |
| Rag | To clean the hose end |
After removing the hose, inspect the faucet and end for any visible damage or debris. Clean the area with a rag to ensure a smooth reattachment later.
Replace The Washer
A worn-out washer is a common cause of leaks. To fix this, replace the washer inside the hose coupling. Use a flat-head screwdriver to remove the old washer.
Steps to replace the washer:
- Remove the old washer using a screwdriver.
- Check the size of the washer.
- Get a new washer of the same size.
- Insert the new washer into the hose coupling.
Ensure the new washer fits snugly inside the coupling. An adequately fitted washer will create a seal, preventing water from leaking.
Reattach The Hose To The Faucet
Finally, reattach the hose to the faucet. Screw the hose coupling back onto the faucet, turning it clockwise. Hand-tighten the coupling, but use pliers for a more secure fit if it feels loose.
Steps to reattach the hose:
- Align the hose coupling with the faucet threads.
- Screw the coupling clockwise.
- Hand-tighten the coupling.
- Use pliers if necessary for a tighter fit.
Once the hose is reattached, turn the water supply back on. Check for any leaks around the faucet and hose connection. If there are no leaks, your hose is ready for use again!

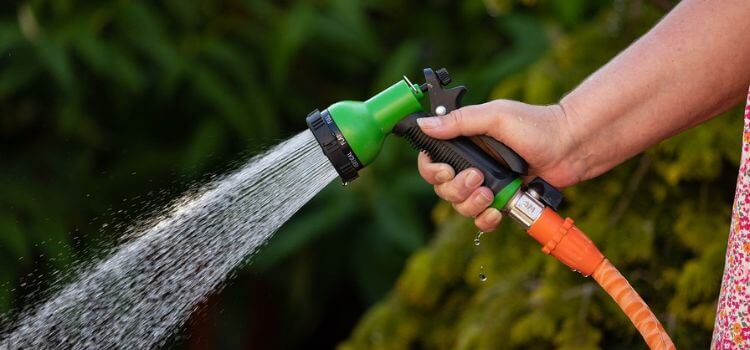
Fixing A Leak At The Spray Nozzle End
Has your garden hose started leaking at the spray nozzle end? This common issue can waste water and reduce your gardening efficiency. Fixing a leak at the spray nozzle end is simple and requires only a few basic steps. Follow this guide to get your garden hose back in top shape!
Turn Off The Water Supply
Before starting any repairs, always turn off the water supply. This prevents water from spraying everywhere and makes it easier to work on the hose. Locate the main valve connected to your hose and turn it clockwise to shut off the water.
For added safety, you can also release any built-up pressure in the hose:
- Detach the hose from the faucet.
- Hold the hose end up to let the remaining water drain out.
- Press the spray nozzle trigger to release any pressure.
Once the water supply is off and the pressure is released, you can proceed to the next step.
Remove The Spray Nozzle
Next, you’ll need to remove the spray nozzle from the hose. This step allows you to inspect the components and locate the source of the leak.
Follow these simple steps to remove the spray nozzle:
- Grip the hose firmly with one hand.
- Use your other hand to twist the spray nozzle counterclockwise.
- Continue twisting until the nozzle is completely detached.
With the nozzle removed, you can easily see if a damaged O-ring or another issue causes the leak.
Replace The O-ring
A worn-out O-ring is the most common cause of leaks at the spray nozzle end. The O-ring is a small rubber ring that creates a seal between the hose and the nozzle. Over time, it can wear out and cause leaks.
Here’s how to replace the O-ring:
- Locate the O-ring inside the nozzle connection.
- Use a small flat-head screwdriver to pry out the old O-ring gently.
- Purchase a replacement O-ring of the same size from a hardware store.
- Please insert the new O-ring into the nozzle connection to ensure it sits properly.
Replacing the O-ring should stop the leak and restore the hose’s functionality.
Reattach The Spray Nozzle
With the new O-ring in place, it’s time to reattach the spray nozzle. This final step ensures that your hose is ready for use without any leaks.
Follow these steps to reattach the nozzle:
- Align the nozzle with the hose end.
- Twist the nozzle clockwise until it is snug.
- Make sure the connection is tight to prevent any leaks.
After reattaching the nozzle, turn on the water supply to test the hose. If there are no leaks, you have successfully fixed the issue!
Following these steps, you can quickly fix a leak at the spray nozzle end of your garden hose. This simple repair saves water and ensures your hose works efficiently.
Fixing A Leak In The Middle Of The Hose
Leaking garden hoses can be frustrating. They waste water and reduce the efficiency of your gardening efforts. Fixing a leak in the middle of the hose is straightforward. You can restore your hose to perfect working condition by following a few simple steps.
Locate The Leak
First, you need to locate the leak. Fill the hose with water and look for wet spots. Run your hand along the hose to feel for any moisture. Leaks often occur at weak points or where the hose has been bent or kinked.
Here are some steps to help you find the leak:
- Please turn on the water and let it flow through the hose.
- Inspect the entire length of the hose for any visible water.
- Feel along the hose with your hand to detect moisture.
- Mark the leaking spot with a marker or tape.
For a more precise location, you can also use a bucket of water:
- Fill a bucket with water.
- Submerge the hose in the bucket, section by section.
- Look for bubbles which indicate the leak.
Cut The Hose At The Leak
Once you have located the leak, the next step is to cut the hose at the leak. Ensure you have the right tools:
- Sharp utility knife or scissors
- Cutting board or any solid surface
Follow these steps to cut the hose:
- Lay the hose on the cutting board.
- Use the utility knife or scissors to make a clean cut at the leak spot.
- Ensure the cut is straight and even.
Making a clean cut is crucial. It helps ensure a tight fit with the hose mender, while a jagged cut may cause further leaks.
Insert A Hose Mender
After cutting the hose, you need to insert a hose mender. Hose menders come in different sizes. Make sure you choose one that matches the diameter of your hose.
Here are the steps to insert the hose mender:
- Separate the two halves of the hose mender.
- Insert the barbed end of one half into one end of the cut hose.
- Push it in firmly to ensure a tight fit.
- Repeat with the other half of the hose mender on the other end of the cut hose.
The hose mender should fit snugly inside the hose, not loose. A good fit prevents leaks and ensures durability.
Tighten The Clamps
The final step is to tighten the clamps around the hose mender. Clamps secure the hose mender in place and prevent leaks.
Follow these steps to tighten the clamps:
- Place a clamp over each end of the hose where it meets the hose mender.
- Use a screwdriver or wrench to tighten the clamps.
- Ensure the clamps are tight enough to hold the hose securely.
- Check for any remaining leaks by turning the water back on.
Properly tightened clamps will hold the hose and mender firmly together. This ensures a leak-free connection.
Following these steps, you can quickly fix a leak in the middle of your garden hose. Enjoy a hassle-free gardening experience!
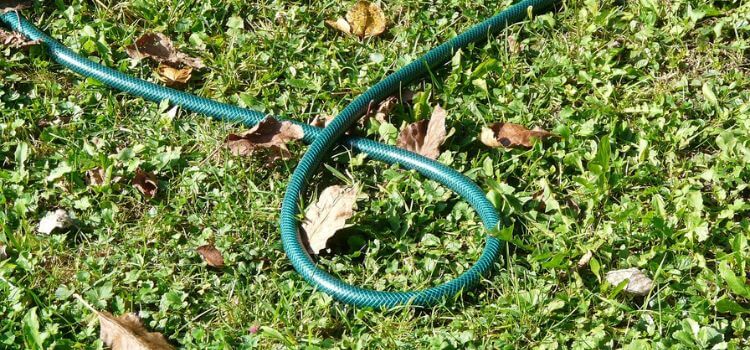
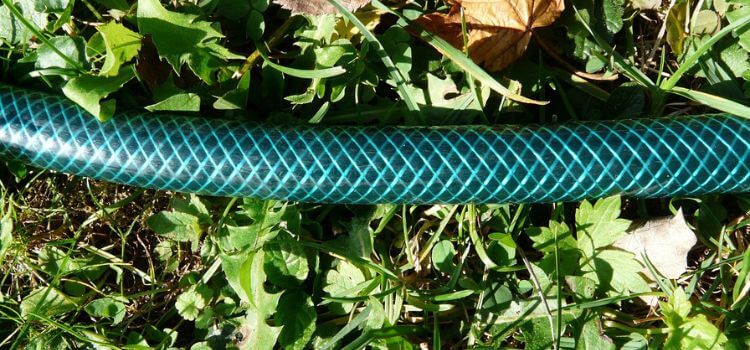
Preventing Garden Hose Leaks
Garden hoses are essential for maintaining a beautiful garden, but leaks can be frustrating. Preventing garden hose leaks is crucial for keeping your watering system efficient. Here are some practical tips to ensure your hose remains leak-free for longer.
Proper Storage
Storing your garden hose properly prevents wear and tear. Follow these tips to extend the life of your hose:
- Coil the hose neatly: When not in use, coil the hose in a circular pattern. This prevents kinks and tangles.
- Use a hose reel: A hose reel keeps your hose organized and off the ground, reducing exposure to sharp objects.
- Keep it dry: After use, drain the water from the hose. Store it in a dry place to avoid mould and mildew.
- Avoid direct sunlight: Prolonged exposure to UV rays weakens the hose material. Store it in a shaded area or indoors.
Regular Maintenance
Regular maintenance ensures your garden hose stays in good condition. Here are some maintenance tips:
- Inspect for damages: Check your hose regularly for cracks, holes, or worn-out areas. Replace damaged sections immediately.
- Clean the hose: Rinse the hose with clean water to remove dirt and debris. Use a mild soap solution if necessary.
- Check fittings: Ensure that hose fittings are tight and secure. Replace worn-out washers to prevent leaks at connection points.
- Winter storage: In cold climates, store the hose indoors during winter. Freezing temperatures can cause the hose to crack.
Avoiding Kinks And Twists
Kinks and twists can cause leaks and reduce water flow. Here are ways to avoid them:
- Uncoil the hose fully: Before use, uncoil the hose completely to prevent twists.
- Use a hose guide: A hose guide helps manoeuvre the hose around corners and obstacles without kinking.
- Choose a kink-resistant hose: Some hoses are designed to resist kinking. Invest in a high-quality hose for fewer issues.
- Store the hose properly: As mentioned earlier, coiling the hose correctly and using a hose reel can prevent kinks.
These tips can prevent garden hose leaks and ensure a smooth watering experience.
Frequently Asked Questions
Use rubber washers for tight seals. Inspect for cracks regularly. Tighten connections properly. Store the hose correctly to avoid kinks.
Silicone-based lubricants are best for garden hose threads. They prevent rust and ensure smooth connections. Avoid petroleum-based products. Use a small amount for optimal results.
Your garden hose may leak at the tap due to a worn washer, loose connection, or damaged hose fitting. To fix it, tighten the connection or replace the washer. Ensure the hose and tap threads match.
Ensure the hose washer is intact and fits snugly. Attach the hose to the faucet tightly. Check for leaks and adjust.
Conclusion
Fixing a leaking garden hose doesn’t have to be complicated. Use quality materials and follow these simple steps. Regular maintenance can prevent future leaks and extend the hose’s life. Addressing issues early, you can keep your garden healthy and your hose functioning efficiently.
Enjoy a hassle-free gardening experience!