As an Amazon Associate, I earn from qualifying purchases.
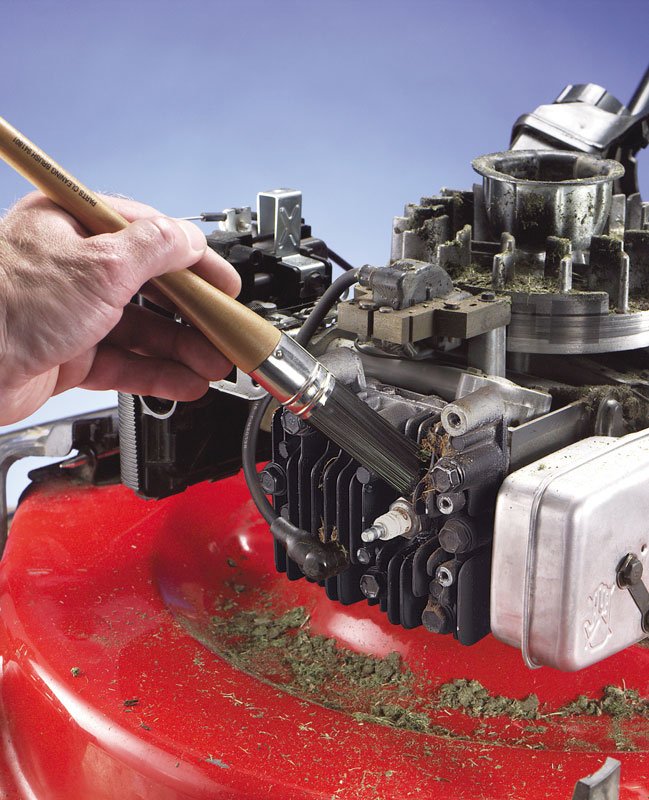
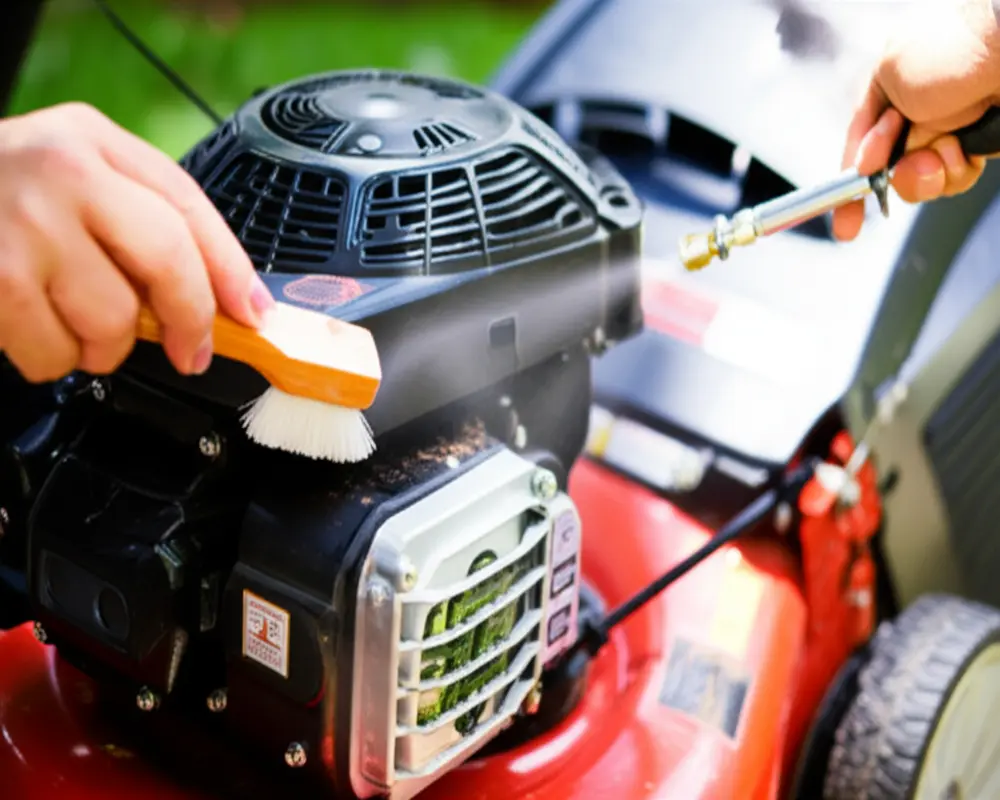
A lawn mower engine cleaner is a product used to remove grease, oil residue, dirt, and other buildup from suitable engine surfaces. Choose a cleaner made for the part you need to clean, and use it only as directed. For routine care, a soft brush, a dry cloth, and careful removal of loose grass may be all your mower needs.
In American yards, a lawn mower may cut cool-season grass in the Northeast, thick St. Augustine grass in Florida, or tall fescue across parts of the Midwest. Each mowing session can leave grass bits, dust, and moisture around the engine. Over time, oil leaks and dirt can add a sticky layer that makes routine checks harder.
The right lawn mower engine cleaner can help remove grime from suitable metal surfaces, but not every cleaner is safe for every engine part. A general degreaser, a carburetor cleaner, and a cleaner for an engine’s outer surfaces serve different purposes. Using the wrong product can harm plastic, rubber, paint, electrical parts, or protective coatings.
Start by finding the source of the mess and checking your mower‘s owner’s manual. If you see dry grass on the engine cover, remove it with a brush or cloth. If you see oily residue, find out whether it comes from a spill or an active leak before cleaning it away. A clean engine is useful, but fixing the cause of recurring buildup matters more.
Lawn mower engine cleaner is a broad term for products that help remove dirt and residue from an engine or nearby parts. Depending on its formula, a cleaner may loosen oily grime, dissolve certain deposits, or remove residue from a specific component. The words on the label matter more than the general product name.
Most home lawn mower cleaning jobs involve one of three tasks: removing ordinary dirt from the outside of the engine, removing grease and oil from suitable surfaces, or cleaning a specific fuel-system part. Each task needs a different approach. A product made for one task may be unsuitable for another.
A cleaner does not repair worn seals, restore damaged wires, fix a clogged air filter, or correct poor fuel flow. It can help with maintenance, but it should not replace diagnosis when a mower runs poorly or leaks fluid.
Source: howtocleaneasily.com
Engine degreaser
A degreaser helps loosen grease and oily grime from surfaces that the product label lists as compatible. Check its instructions before using it on painted covers, plastic housings, rubber parts, or aluminum.
Carburetor cleaner
Carburetor cleaner is intended for suitable carburetor parts and deposits. Some formulas are aggressive toward certain materials, so do not spray it across the whole engine or into an assembled component without checking the manual.
General-purpose cleaner
A general-purpose cleaner may suit light dirt on approved exterior surfaces. It is not automatically safe for engine compartments, electrical parts, or fuel-system components.
Dry cleaning tools
A soft brush, lint-free cloth, and vacuum suitable for the task can remove loose debris without adding liquid. These tools are often the best starting point for normal maintenance.
Do You Need a Special Engine Cleaner?
Not always. If the engine has a light coating of dust and dry grass, start with a brush and cloth. If a greasy film remains, choose a cleaner whose label allows use on the affected material. A special chemical product is useful only when it solves a problem that simpler cleaning cannot handle.
If you cannot identify the material or the dirty component, pause before spraying. Look up the engine model and mower manual, then confirm which products and cleaning methods the manufacturer allows.
For dry debris
Use a brush or cloth first and keep debris away from the air intake and other openings.
For oily grime
Use a compatible degreaser only on approved exterior surfaces and follow the product label.
For fuel-system deposits
Use the procedure specified for the exact engine or carburetor. Do not assume an exterior degreaser will clean internal fuel passages.
Why Cleaning a Lawn Mower Engine Matters
Regular cleaning helps you spot problems and keep engine cooling areas clear. Many small gasoline engines rely on airflow around cooling fins and under engine shrouds to carry heat away. Thick grass clumps and packed dirt can interfere with that airflow, so removing debris is a useful maintenance step.
A clean exterior also makes it easier to inspect the mower. Fresh oil on an otherwise clean surface is easier to notice than oil spread through an old layer of dirt. That can help you tell whether a leak is new, although cleaning alone cannot identify its exact source.
Cleaning can also reduce the amount of grass and dirt carried into a garage or shed. However, a shiny engine is not proof that the mower is in good mechanical condition. Oil level, air-filter condition, blade condition, fuel quality, and other routine checks still matter.
Source: www.homedepot.com
Clear cooling areas
Remove grass and dust from accessible cooling openings and the outside of the engine. Follow the manual for any deeper cleaning beneath covers.
Make leaks easier to find
Once a dirty surface is clean and dry, inspect it again after operation when the engine has cooled. New residue may point to an active leak that needs attention.
Support routine maintenance
A clean exterior helps you reach inspection points and see labels, fasteners, and visible damage.
Avoid needless chemical use
Routine brushing can remove many deposits without exposing seals, wires, coatings, or nearby surfaces to a solvent.
Can a Dirty Engine Overheat?
Packed debris can contribute to overheating when it blocks cooling airflow. This is one reason to inspect the engine after mowing wet or tall grass. The exact cooling design varies, so use the manual to locate the areas that must remain clear.
Overheating can also result from low oil, a damaged cooling fan, blocked air passages, or a mechanical fault. If the engine repeatedly runs too hot, stops unexpectedly, or smells strongly of burning material, stop using it and investigate the cause rather than relying on cleaner alone.
Check accessible vents
Remove loose grass and leaves without pushing debris deeper into the engine.
Inspect before restarting
Make sure tools, cloths, and loose material have been removed from the engine area.
How to Choose the Right Lawn Mower Engine Cleaner
Choose a cleaner by matching its intended use to the surface and residue you need to remove. Read the product label and the mower or engine manual before you buy or apply anything. If either source rules out the proposed use, choose another method.
The term engine cleaner does not guarantee that a product is safe for every engine material. Solvents can affect some plastics, rubber compounds, painted finishes, and electrical insulation. Even products sold for automotive use may have limits that matter on small engines.
Consider where the residue sits, how heavy it is, and whether the area contains fuel lines or electrical connections. If the product requires rinsing, check whether the manufacturer permits that method for the part in question. When rinsing is not allowed or the risk is unclear, use a dry method or seek model-specific guidance.
Source: centralspares.co.uk
Check material compatibility
Look for explicit instructions covering metal, aluminum, plastic, rubber, paint, and electrical components where relevant. Do not rely on a product’s name alone.
Read application instructions
Confirm whether the product must be sprayed onto a cloth, applied directly, wiped off, or rinsed. Follow any stated limits on dwell time and drying.
Review safety warnings
Check ventilation requirements, protective equipment, flammability, first-aid instructions, and storage rules before use.
Avoid unnecessary additives
Do not pour an exterior engine cleaner into the fuel tank or crankcase unless the exact product is expressly intended for that use and the engine manufacturer permits it.
Engine Degreaser Versus Carburetor Cleaner
An engine degreaser targets grease and oily residue on suitable external surfaces. Carburetor cleaner targets deposits in or on compatible carburetor components. The products can contain different solvents and may have different material restrictions.
If the engine will not start, runs unevenly, or stalls, do not assume the carburetor needs spraying. Old fuel, a blocked fuel filter, a dirty air filter, a faulty ignition system, or other issues can produce similar symptoms. Diagnose the problem before taking apart or cleaning the fuel system.
Use degreaser for approved exterior grime
Keep the product away from openings and components that its label excludes.
Use carburetor cleaner only for the intended component
Follow the engine service procedure and avoid spraying an assembled carburetor blindly.
Choose a dry method when uncertain
A brush and cloth are a safer starting point than an unverified solvent on an unknown material.
What You Need Before Cleaning the Engine
Prepare the mower and work area before opening a cleaner. Park on a level surface in a well-ventilated place, away from flames, pilot lights, cigarettes, and sparks. Keep children and pets away from the work area, and have the product label available while you work.
The engine must be fully cool before you clean it. Hot metal can cause burns and may ignite a flammable cleaner. Never apply a solvent to a running engine or use the mower to heat a cleaner so that it evaporates faster.
Gather only the tools the task requires. A soft brush and lint-free cloth will handle many jobs. Use a compatible cleaner, gloves, and eye protection when called for by the label. If the manual specifies a particular method, follow that procedure instead of improvising.
Source: cordlessandportables.com
Owner’s manual
Use the manual to identify the engine, find safe cleaning areas, and check restrictions on water, solvents, and removal of covers.
Soft brush and cloth
Use these to lift loose grass and wipe accessible exterior surfaces without scratching them.
Compatible cleaner
Keep the original label or instructions nearby so you can follow the correct application and drying procedure.
Protective equipment
Wear the gloves and eye protection specified by the cleaner label. Use suitable clothing and footwear for the work.
Waste collection supplies
Use absorbent material to collect small spills and follow local rules for disposal of contaminated rags, used fuel, and chemical waste.
Make the Mower Safe
For a gasoline mower, switch off the engine, remove the key if fitted, and allow all hot parts to cool. Disconnect the spark plug lead when the manufacturer’s procedure calls for it, and keep the lead away from the plug. This helps prevent an accidental start while you work.
For a riding mower, remove the key and follow the parking and battery-disconnection instructions in the manual. Battery isolation steps differ by model. If the mower has electric starting, safety interlocks, or electronic controls, do not guess which connector to remove.
For a battery-powered mower, remove the battery pack and follow the manufacturer’s service instructions. Do not assume that turning off the switch makes every electrical component safe to handle.
Prevent unexpected movement
Park on level ground, set the parking brake on a riding mower, and secure the machine according to its manual.
Wait for all hot parts to cool
Do not touch the muffler, exhaust shield, or other hot components.
Keep fuel vapors away from ignition sources
Work with good ventilation and never clean near an open flame or a running engine.
Step-by-Step Guide to Cleaning a Lawn Mower Engine
A safe cleaning job starts with dry debris removal, followed by limited use of a compatible cleaner only where needed. You do not need to soak the engine to make it clean. Work slowly so dirt and liquid do not enter openings or reach sensitive components.
Source: gardenitemreviews.com
Step 1: Identify the dirty area
Check whether you are dealing with dry grass, dust, grease, spilled oil, or residue near the carburetor. Identify any nearby wires, air intakes, fuel lines, and openings before applying a product.
Step 2: Remove loose debris
Use a soft brush or cloth to remove loose grass and dust from accessible exterior surfaces. Brush away from air intakes and openings instead of pushing debris inside.
Step 3: Read the cleaner label
Confirm that the product is suitable for the material and residue. Check whether it must be applied to a cloth, sprayed from a distance, wiped off, or allowed to dry.
Step 4: Apply a small amount
Use only the amount needed on the approved surface. Avoid overspray and keep cleaner off electrical connectors, ignition parts, air filters, belts, bearings, and other excluded components.
Step 5: Wipe away loosened grime
Use a clean cloth to lift residue rather than spreading it over a larger area. Change to a clean section of cloth as it collects dirt.
Step 6: Remove remaining residue as directed
Follow the label for wiping, rinsing if permitted, and drying. Do not add water just because the cleaner is difficult to remove.
Step 7: Inspect the engine
Look for trapped grass, wet areas, loose wires, damaged hoses, and signs of an oil or fuel leak. Make sure the area is clean and dry before reassembly.
Step 8: Refit parts and prepare for use
Reinstall any covers or parts you removed according to the manual. Reconnect the spark plug lead or battery only when the work is complete and the correct procedure allows it.
How to Remove Grass and Dust
Dry grass is often easiest to remove before it mixes with oil or moisture. Brush it from the engine cover, accessible cooling areas, and nearby surfaces. Use gentle pressure around fins and plastic parts so you do not bend or break them.
If the mower has grass packed beneath a shroud, do not force tools into the opening. The shroud may need to be removed to clean the area properly, and the manufacturer’s instructions may specify how to do this. If access requires working near the flywheel, fan, or other moving components, use the correct service procedure or ask a repair shop.
Use gentle strokes
Avoid sharp metal tools that can damage cooling fins or puncture a hose.
Keep openings clear
Do not push grass toward the air intake, carburetor throat, or other engine openings.
How to Remove Oil and Grease
Oily grime needs more care than dry dust. First, check whether oil was spilled during service or is coming from a gasket, seal, drain plug, or other area. If the oil level is low or you see an active leak, stop and address the cause before returning the mower to service.
For a small spill on a compatible exterior surface, absorb as much oil as possible with a cloth or suitable absorbent material. Apply an approved degreaser only if needed, and follow its instructions. Keep liquid out of the air intake, electrical parts, and openings in the engine housing.
After cleaning, inspect the area again when it is dry. If fresh oil appears, check the oil level using the method in the manual and arrange a repair if you cannot find the source. Never run the mower with an oil level below the required range.
A fresh oily film may indicate a leak that needs repair, not another round of degreasing.
How to Clean Around the Carburetor
The outside of a carburetor may collect dust and oily residue, but internal fuel passages require a different service method. Do not spray a general engine cleaner into the carburetor throat or fuel system. A product that is safe for exterior metal may not be suitable for seals, diaphragms, coatings, or other internal parts.
If the mower starts and then stalls, surges, or refuses to start, check simple causes first. Look at the fuel condition, air filter, spark plug, and other items listed in the troubleshooting section of the manual. If the symptoms point to a blocked carburetor, use the exact service procedure for the engine model.
Carburetor work can involve fuel, flammable vapors, small springs, gaskets, and delicate passages. If you are unsure how to remove or clean the component, a qualified small-engine technician can prevent damage and help identify the actual fault.
Clean only accessible approved surfaces
Use a compatible product and keep it out of fuel lines and openings unless the service procedure expressly calls for it.
Avoid blind spraying
Spraying cleaner into an assembled carburetor is not a reliable substitute for diagnosis or correct cleaning.
Which Engine Parts Should You Never Soak?
Avoid soaking the engine compartment or flooding parts with cleaner or water. Modern mowers combine metal, plastic, rubber, electrical connections, and lubricated moving parts. Liquid that reaches the wrong place can create a new problem while you are trying to remove the old one.
The safest approach is to clean only the surface you can identify and access. If the cleaner label does not clearly allow use on that part, keep it away. Follow the mower manual whenever it provides a more specific warning or procedure.
Source: www.pinterest.com
Air filter
Do not saturate a paper air filter with degreaser or water. Foam filters may have a specific cleaning and oiling procedure, while other filter types may need replacement. Follow the engine manual.
Ignition system
Avoid spraying ignition coils, spark plug connections, and related electrical components. Moisture or solvent can interfere with operation or harm materials.
Belts and pulleys
Keep degreaser off belts and friction surfaces unless the manufacturer expressly permits the product. Solvents may affect belt materials and traction.
Bearings and lubricated joints
Do not wash away grease or lubricant from bearings, pivot points, and other moving parts. Re-lubrication may be required if a service procedure exposes them.
Fuel lines and seals
Use only products confirmed compatible with the relevant materials. Some solvents can soften, swell, or damage certain rubber and plastic parts.
Battery and electrical connections
Keep cleaner away from battery terminals, electronic controls, connectors, and exposed wiring. Follow the manual for battery removal and cleaning.
Exhaust and hot surfaces
Never apply flammable cleaner to a hot muffler or exhaust area. Wait until the engine is cool and follow the label’s ignition precautions.
Is It Safe to Wash a Lawn Mower Engine With Water?
A broad spray of water is not the best default for cleaning a small engine. Water can enter air intakes, electrical connectors, and other areas that should stay dry. Some mower designs allow limited rinsing of specific exterior areas, but that does not mean the whole engine can be washed.
If the manufacturer permits water on a particular surface, use the stated method and keep the spray away from excluded components. Never use a pressure washer on the engine unless the manufacturer specifically authorizes the method. High-pressure water can force moisture and debris into seals, bearings, and electrical connections.
For most routine engine cleaning, dry brushing and controlled wiping create less risk. If the mower has heavy buildup beneath covers, consult the manual before attempting deeper cleaning.
Prefer controlled cleaning
Apply cleaner to a cloth when the label allows this method and wipe the intended surface without flooding the area.
Let approved wet-cleaned areas dry
Follow the manufacturer’s drying instructions and do not start the mower while parts are wet or solvent vapors remain.
Troubleshooting After Cleaning
If the mower still runs poorly after cleaning, do not keep adding chemicals. Exterior cleaning removes surface grime, but it cannot correct every fuel, ignition, lubrication, or mechanical problem. Work through the likely causes in a safe order and stop if you find a leak or damaged part.
Before testing the mower, confirm that all cleaner has been removed or has dried as directed. Refit covers, restore any disconnected leads or batteries according to the manual, and remove cloths and tools from the engine area. If the cleaner label calls for a longer drying period, follow that requirement.
Source: rethority.com
Engine will not start
Check the fuel level and condition, ignition switch, safety controls, and spark plug according to the manual. Cleaning the exterior will not clear every internal fuel-system blockage.
Engine runs unevenly
Inspect the air filter and fuel supply. If the symptoms began after cleaning, consider whether liquid or cleaner reached an intake or electrical connection. Do not restart repeatedly while a fault remains unexplained.
Engine overheats
Let the engine cool and check accessible cooling areas for packed grass. Confirm the oil level and look for other signs of damage. Seek service if overheating returns.
Oil appears again
Inspect the area after it is clean and dry. Check the oil level and look for a leak. Do not run the engine if oil is low or a serious leak is present.
Smoke or a strong chemical odor appears
Switch off the engine if it is safe to do so, keep clear of hot surfaces, and let the mower cool in a well-ventilated place. Follow the cleaner label and seek help if the cause is uncertain.
How to Tell Whether Cleaning Worked
A successful cleaning leaves the intended surface free of loose grass, visible dirt, and the residue you set out to remove. It should not leave wet cleaner in openings, damaged coatings, loosened wires, or oily patches that were not there before.
After reassembly, the mower should operate according to its normal instructions without new warning signs. Do not run it just to test a cleaning job if you suspect a fuel leak, electrical fault, low oil, or damage. Those conditions need attention first.
Check the work area
Look for remaining debris, pooled liquid, loose parts, and any tools left near the engine.
Check fluid levels and visible hoses
Use the manual’s checks and look for cracks, wet spots, or signs of leakage before use.
Stop if a new fault appears
If the mower starts smoking, leaks fuel, or makes an unusual noise, shut it down safely and investigate before mowing again.
Common Lawn Mower Engine Cleaning Mistakes
Most cleaning problems come from using too much liquid, choosing an incompatible chemical, or treating a symptom without finding its cause. A careful, limited cleaning job is usually more useful than spraying the whole engine compartment. Read the label before you begin, not after something goes wrong.
Source: bestsowftware.com
Spraying the entire engine
Wide spraying can send cleaner into air intakes, electrical connections, seals, and other sensitive areas. Target only the surfaces that need cleaning.
Using the strongest solvent available
A strong solvent is not automatically more suitable. It may damage paint, plastic, rubber, or protective coatings. Choose by compatibility, not by perceived strength.
Cleaning while the engine is hot
Hot parts can burn you or ignite a flammable product. Wait for the engine and exhaust to cool fully.
Ignoring a leak
Repeated cleaning hides the visible residue without fixing the source. Identify and repair the leak before returning the mower to service.
Using a pressure washer without approval
High-pressure water can force liquid into protected areas and damage components. Follow the mower manufacturer’s approved cleaning method.
Starting the mower before it is ready
Residual cleaner, wet electrical parts, loose tools, or an incorrectly refitted cover can create hazards. Finish the inspection and follow all drying instructions first.
Pouring exterior cleaner into the fuel tank
Engine degreaser is not a fuel additive. Do not add it to gasoline or engine oil unless the exact product is designed for that use and the manufacturer approves it.
What Should You Do if Cleaner Gets Into an Opening?
Do not start the engine to burn off the product. Keep the mower switched off and follow the cleaner’s label and engine manual for the affected area. If liquid has entered the air intake, carburetor, electrical system, or another internal opening, the correct response depends on the product and engine design.
If you cannot confirm a safe recovery procedure, contact the engine manufacturer or a qualified small-engine repair shop. Tell them the cleaner’s name, the affected part, and whether the engine was running when the exposure occurred. This information helps them choose the right next step.
Stop and identify the product
Keep the container or label available so its ingredients and safety directions can be checked.
Avoid improvised flushing
Do not pour more solvent, gasoline, or water into the opening in an attempt to remove the cleaner.
How Often Should You Clean a Lawn Mower Engine?
Clean the engine when debris or grime begins to interfere with inspection, cooling, or routine care. The right interval depends on mowing conditions, grass type, weather, and the engine design. A mower used often on damp, tall grass may need more frequent debris removal than one used on a dry, small lawn.
Check the engine area as part of regular maintenance rather than waiting for heavy buildup. Remove loose grass after mowing when the machine is off and cool. Follow the maintenance schedule in the manual for deeper inspections, filter service, and other tasks.
Chemical cleaning usually does not need to be part of every mowing session. Use a degreaser when a compatible surface has oily residue that dry cleaning cannot remove. If the engine stays reasonably clean, there may be no need for a chemical product at all.
Source: danpromdoo.com
After mowing in wet conditions
Once the mower is off and cool, check for damp clumps of grass and remove accessible debris before it dries into a hard layer.
During routine service
Inspect the engine exterior, cooling areas, air filter housing, and visible fuel and oil lines according to the manual.
Before seasonal storage
Remove grass and dirt, check for leaks, and complete the storage steps recommended for the mower and its fuel system.
After an oil spill or repair
Clean compatible exterior surfaces so fresh leaks or new damage are easier to spot during later inspections.
Seasonal Care for American Lawns
In much of the United States, spring mowing begins after grass starts growing again. Before the season gets busy, check for old debris, rodent damage, cracked hoses, and signs of oil or fuel leaks. A quick inspection can reveal problems that developed while the mower sat in storage.
During hot summer weather, tall or damp grass can leave extra debris around the engine. Let the machine cool before removing it, and keep the cooling areas clear. In regions with long growing seasons, inspect the engine more often if you mow frequently.
Before winter storage, clean the exterior and follow the manual’s instructions for fuel, oil, batteries, and storage conditions. Do not assume that engine cleaner can preserve fuel or protect internal parts. Storage preparation is a separate maintenance task.
Spring
Inspect the engine and remove old debris before regular mowing begins.
Summer
Check for grass buildup more often during periods of rapid growth or wet mowing conditions.
Fall and winter storage
Clean accessible surfaces and follow the manufacturer’s full storage procedure.
A Simple Decision Guide for Engine Cleaning
The best cleaning method depends on what you see, not on how dirty the mower looks as a whole. Use this table to choose a sensible first step. If a problem involves a leak, internal engine parts, or an unknown chemical exposure, stop and consult the manual or a repair professional.
Source: cordlessandportables.com
Dry grass on the engine cover
First choice: a soft brush and dry cloth. Use no chemical unless a residue remains and the product is approved for that surface.
Dust around cooling openings
First choice: carefully brush away loose material without forcing debris inside. Follow the manual for cleaning beneath shrouds.
Grease on an approved metal surface
First choice: absorb excess residue, then use a compatible degreaser if needed. Keep it away from excluded components.
Dirty carburetor exterior
First choice: gentle wiping and the specific service instructions. Use carburetor cleaner only when the product and procedure allow it.
Engine will not start
First choice: follow the troubleshooting steps in the manual. Do not assume that exterior cleaning or spraying carburetor cleaner will solve the problem.
Oil or fuel keeps appearing
First choice: stop using the mower if the leak is significant or creates a hazard. Identify and repair the source before cleaning again.
When Is Professional Service the Better Choice?
Seek qualified service when the engine has a persistent oil or fuel leak, repeated overheating, internal contamination, damaged wiring, or a fault you cannot identify. Carburetor removal, work near rotating engine parts, and repairs involving fuel systems may require tools and procedures beyond basic home maintenance.
Professional help is also sensible when a cleaner has entered the engine, the mower behaves differently after cleaning, or the manual does not explain how to reach the affected area. Stop using the mower if continued operation could cause damage or expose you to fire, burns, or moving parts.
Fuel leak
Do not start the engine. Keep the mower away from ignition sources and arrange safe repair.
Repeated overheating or shutdown
Stop operation and have the cooling system and engine condition checked if basic maintenance does not resolve the issue.
Internal contamination
Ask a qualified technician how to handle cleaner or water that entered an intake or other internal opening.
Frequently Asked Questions
Q
What Is the Best Cleaner for a Lawn Mower Engine?
The best cleaner is one approved for the exact surface and residue you need to remove. A compatible engine degreaser may help with oily grime, while a brush and cloth may be enough for dry grass and dust. Always check the product label and mower manual before use.
Q
Can I Use Car Engine Degreaser on a Lawn Mower?
Possibly, but only if the product label allows use on the materials and surfaces found on your mower. Automotive degreasers can affect some plastics, rubber, paint, and electrical components. Apply the product only as directed and avoid spraying the entire engine.
Q
Can I Spray Carburetor Cleaner on the Whole Lawn Mower Engine?
No. Carburetor cleaner is intended for particular fuel-system cleaning tasks, and its formula may damage other materials. Do not spray it over wiring, plastic covers, rubber parts, the air filter, or other excluded areas. Follow the exact engine service procedure.
Q
Can I Clean a Lawn Mower Engine Without Removing It?
Yes. Most routine cleaning involves brushing and wiping accessible exterior surfaces while the engine remains installed. If debris is trapped beneath a cover, check the manual before removing parts. Avoid forcing tools or liquids into hidden areas.
Q
Is It Safe to Use a Pressure Washer on a Lawn Mower Engine?
Do not use a pressure washer on the engine unless the manufacturer specifically permits it. High-pressure water can force moisture into electrical connections, seals, bearings, and air openings. Dry brushing and controlled wiping are generally better starting methods.
Q
Will Engine Cleaner Fix a Lawn Mower That Will Not Start?
Not usually if the problem comes from stale fuel, a blocked fuel passage, a faulty spark plug, a dirty air filter, or another mechanical issue. Engine cleaner removes suitable surface deposits but does not repair defective parts. Follow the mower’s troubleshooting guide to identify the cause before using a specialized cleaner.
Q
How Long Should I Wait Before Starting the Mower After Cleaning?
Wait until all treated areas are dry and the cleaner’s label says it is safe to proceed. The required time depends on the product, the amount used, ventilation, and the surface. Never start the engine while flammable vapors remain or while liquid is trapped in an intake or electrical component.
Q
Can I Put Engine Cleaner in the Lawn Mower Gas Tank?
Do not put an exterior engine degreaser in the fuel tank. It is not designed to serve as fuel, and it may damage the fuel system or interfere with engine operation. Use only fuel additives that are expressly intended for the engine and approved by the manufacturer.
✦ Wrapping Up
Conclusion
Lawn mower engine cleaner can help remove stubborn grease and oil residue, but it is not needed for every cleaning job. Dry grass and dust often come away with a soft brush and cloth. When a chemical cleaner is necessary, choose one that suits the surface and follow the label and engine manual.
Safe engine cleaning starts with a cool, switched-off machine and a clear work area. Keep liquid away from sensitive parts, avoid unapproved pressure washing, and allow all treated surfaces to dry as directed. Inspect the mower after cleaning, and do not overlook a leak or a new operating problem.
A clean engine is easier to inspect and maintain, but cleaning cannot replace repairs or routine service. If grime keeps returning, find its source. If a chemical enters an opening or the engine develops a serious fault, stop and seek model-specific advice.
💡 Key Takeaway
Before your next mowing session, let the engine cool, remove loose grass with a soft brush, inspect for fresh oil or fuel leaks, and check the manual before applying any lawn mower engine cleaner.
I enjoy sharing simple gardening ideas, lawn care tips, and honest product reviews that help make outdoor work easier. From home gardening guides to helpful tools and lawn care advice, I write easy-to-follow content to help readers create a healthier and better-looking outdoor space without wasting time or money.