
As an Amazon Associate, I earn from qualifying purchases.
If you’ve ever tried to start your Weedeater and struggled with the primer bulb, you may be wondering how to bypass primer bulb on Weedeater. I’ve been there myself, and trust me, it’s more common than you think. The primer bulb is an important part of starting your Weedeater, but sometimes it gets clogged or damaged, making it difficult or impossible to use.
When that happens, bypassing the primer bulb is a simple fix that can get your Weedeater running again without a hassle. In this guide, I’ll walk you through the steps I’ve used to bypass the primer bulb on my own Weedeater, saving time and frustration.
Whether you’re dealing with a broken primer bulb or just need a quick workaround, these steps are easy to follow and will help you get your equipment back to work in no time. Let’s get started!
What is weedeater
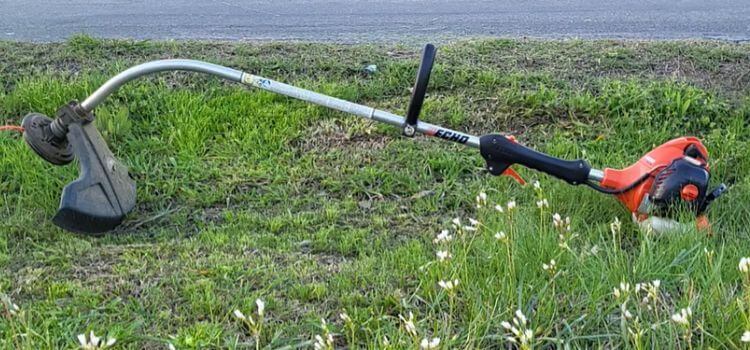
A Weedeater is a trimmer to trim grass, weeds, and small shrubs. It is a lightweight and easy-to-use garden tool with a long, flexible shaft and an electric motor that allows the user to operate it efficiently. Weedeater trimmers are versatile and can be used on various surfaces, allowing the user to access hard-to-reach areas.
Weedeater trimmers are powered by a small gas engine requiring a primer bulb to start the engine. Over time, the primer bulb can become clogged and inefficient. If you are having difficulty creating your Weedeater, it may be due to a faulty primer bulb. Bypassing the primer bulb and getting your Weedeater started is possible.
What is a Weedeater Primer Bulb?
A Weedeater needs a priming bulb to start the engine. The primer bulb is a small rubber bulb filled with fuel and air. When the user presses down on the primer bulb, it causes the fuel and air to mix and create a spark that starts the engine.
The primer bulb is an essential part of the Weedeater’s starting process and is often called a “choke” bulb because it helps control the fuel-air mixture as the engine is running.
👉You May Read Also: Why Composting Tools are Essential for Eco-Friendly Gardening
Why Bypass the Primer Bulb?
The primer bulb is an essential component of a weedeater, as it helps to create the necessary pressure for fuel to be delivered to the carburetor. However, these bulbs can become cracked or damaged over time, causing issues with starting and running your Weedeater.
Bypassing the primer bulb eliminates the need to rely on this component, allowing you to continue using your Weedeater without replacing the bulb. It also saves you time and money on repairs or replacements.
8 Steps How to Bypass Primer Bulb
If you have a Weedeater and are looking for a way to bypass the primer bulb on your machine, unfortunately, it can become clogged or worn out over time, making it difficult to start your Weedeater. Follow these eight steps you need to take to get your primer bulb up and running again.
Step 1: Gather Your Tools
Before you begin, confirm you have all the tools and materials for this project. You will need:
- A flathead screwdriver
- A pair of needlenose pliers
- New fuel line (if required)
- A couple of wire cutters
- Gasoline-resistant sealant (if required)
Once you have all the supplies, you can begin the process of bypassing the bulb. Ignoring the primer bulb on a weedeater can be a challenging process. However, you can rerun your Weedeater with the right supplies and patience. Additionally, you can avoid this problem by regularly cleaning the air filter and checking the primer bulb for any signs of clogging or damage.
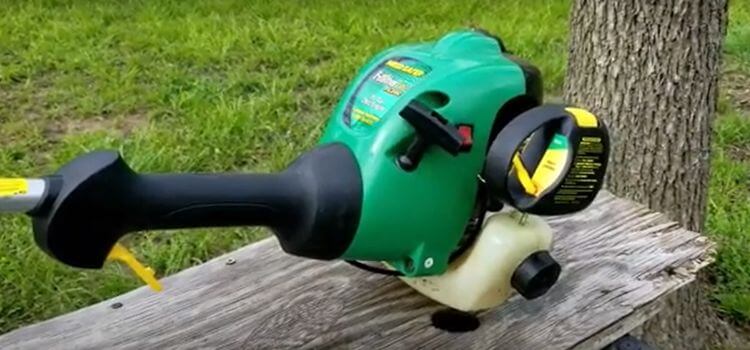
Step 2: Locate the Primer Bulb
The primer bulb is generally located on the side of the Weedeater near the carburetor. It is a small, circular rubber bulb with two fuel lines attached. Disconnect the fuel line from the primer bulb and attach the zip ties to secure the fuel line to the frame.
Now, you can connect the fuel line directly to the carburetor. Use the needle nose pliers to unscrew the nut from the fuel line, and then the flathead screwdriver will tighten it onto the carburetor. Then, pull the nut and reconnect the air filter cover.
Bypassing the primer bulb on a weed eater can be time-consuming, so it is vital to have the necessary supplies and be patient to get your weed eater running again.
Step 3: Disconnect the Fuel Lines
Using your pliers, gently remove the two fuel lines from the primer bulb. Be careful not to damage or break the lines, as you need them later. Now, you can connect the fuel line straight to the carburetor.
Use the needle nose pliers to unscrew the nut from the fuel line and a flathead screwdriver to tighten it onto the carburetor. Make sure that the fuel line is correctly connected to the carburetor. Then, pull the nut and reconnect the air filter shell.
Step 4: Remove the Primer Bulb
Using a screwdriver, unscrew and remove the primer bulb from its housing. Set it aside for now.
Step 5: Return the Fuel Lines (Optional)
Check if your fuel lines are damaged or blocked; this is an excellent time to replace them with new ones. Cut the old fuel lines and attach the new ones to the carburetor using pliers.
Step 6: Clean and Seal Any Leaks (Optional)
If you notice any leaks or cracks in the Weedeater’s fuel lines or primer bulb housing, use gasoline-resistant sealant to seal them. This step is essential to ensure no fuel leaks and causes a fire hazard.
Step 7: Test the Weedeater
With the primer bulb bypassed, attempt to start the Weedeater as usual. You have successfully avoided the primer bulb if it starts and runs properly.
Step 8: Start Your Weedeater
Now that you have bypassed the primer bulb, it’s time to start your Weedeater. Ensure the fuel tank is filled with fresh gasoline and all connections are secure.
Pull the starter rope a few times until the engine starts. If it doesn’t start, try manually priming the carburetor by running a small amount of gasoline into it.
Congratulations, you have successfully bypassed the primer bulb on your Weedeater! Now, you can enjoy a well-maintained lawn without any starting issues.
Additional Tips
Use a high-quality replacement part designed for your weedeater model when replacing the primer bulb.
- Always disconnect the spark plug before attempting any repairs on your Weedeater.
- Regularly clean and maintain your Weedeater to prevent potential issues in the future.
- If you are unsatisfied with bypassing the primer bulb alone, it is always best to seek professional help or consult the Weedeater’s manual.
While bypassing the primer bulb may be a quick solution, it is essential to properly maintain and repair any issues with your Weedeater to ensure safe and efficient operation.
So, returning the primer bulb as soon as possible rather than relying on a bypass method is always recommended. We hope this guide has been helpful and you can successfully start your Weedeater without a functioning primer bulb.
FAQ
The purpose of a primer bulb is to pull fuel into the carburetor so the engine can start.
To avoid the primer bulb, you will need to disconnect the fuel line from the carburetor and attach it directly to the fuel tank. Then, start the engine and let it warm up.
Ignoring the primer bulb can cause the engine to run too rich or lean. It can lead to engine damage.
Yes, missing the primer bulb without damaging the engine is possible. However, ensuring the fuel line is connected correctly and the engine is warmed up before starting is essential.
Yes, replacing the fuel filter when missing the primer bulb is needed.
Conclusion
Bypassing the primer bulb on a Weedeater is moderately simple. Following the instructions in this guide, you can easily avoid the primer bulb and get your Weedeater up and running again. However, it is essential to note that bypassing the primer bulb may void any warranty that is provided with the Weedeater. Before trying this repair, please check with the manufacturer to ensure you are not voiding any warranties.
Last Updated on February 1, 2025 by
I enjoy sharing simple gardening ideas, lawn care tips, and honest product reviews that help make outdoor work easier. From home gardening guides to helpful tools and lawn care advice, I write easy-to-follow content to help readers create a healthier and better-looking outdoor space without wasting time or money.