As an Amazon Associate, I earn from qualifying purchases.
To grow microgreens at home, spread suitable seeds over moist growing mix in a shallow, clean tray. Keep the mix damp, provide gentle light after germination, and harvest the young shoots when their first true leaves begin to appear. Many types are ready in about 7 to 21 days.
You do not need a backyard, greenhouse, or sunny garden bed to grow fresh greens. In an American apartment, a small kitchen counter, spare shelf, or bright room can provide enough space for a simple microgreen garden. Even during a cold Midwest winter or a hot Southern summer, you can grow these tender shoots indoors and keep your growing conditions under control.
Microgreens are young vegetable and herb plants harvested soon after their seed leaves open. They are more developed than sprouts, which are often eaten with their seeds and roots, but younger than baby greens grown for larger leaves. Popular choices include radish, broccoli, mustard, pea, sunflower, and cabbage microgreens. Each has its own flavor, growth rate, and growing needs.
The basic process is simple: choose seeds intended for edible shoots, prepare a clean tray, add a suitable growing medium, sow the seeds, and manage moisture and light. The biggest challenges are usually excess water, poor airflow, unsuitable seeds, and contamination. A few careful habits can help you grow a healthy crop without buying expensive equipment.
You can start a small microgreen garden with a few basic supplies. Most beginners can use ordinary household items for the first crop, provided those items are clean, food-safe, and suitable for growing plants. A dedicated indoor growing kit is optional rather than essential.
The key is to create a stable place for the seeds to sprout and for the young plants to grow. Think of the tray as a tiny garden bed. It needs enough room for roots, a steady supply of moisture, and access to air and light.
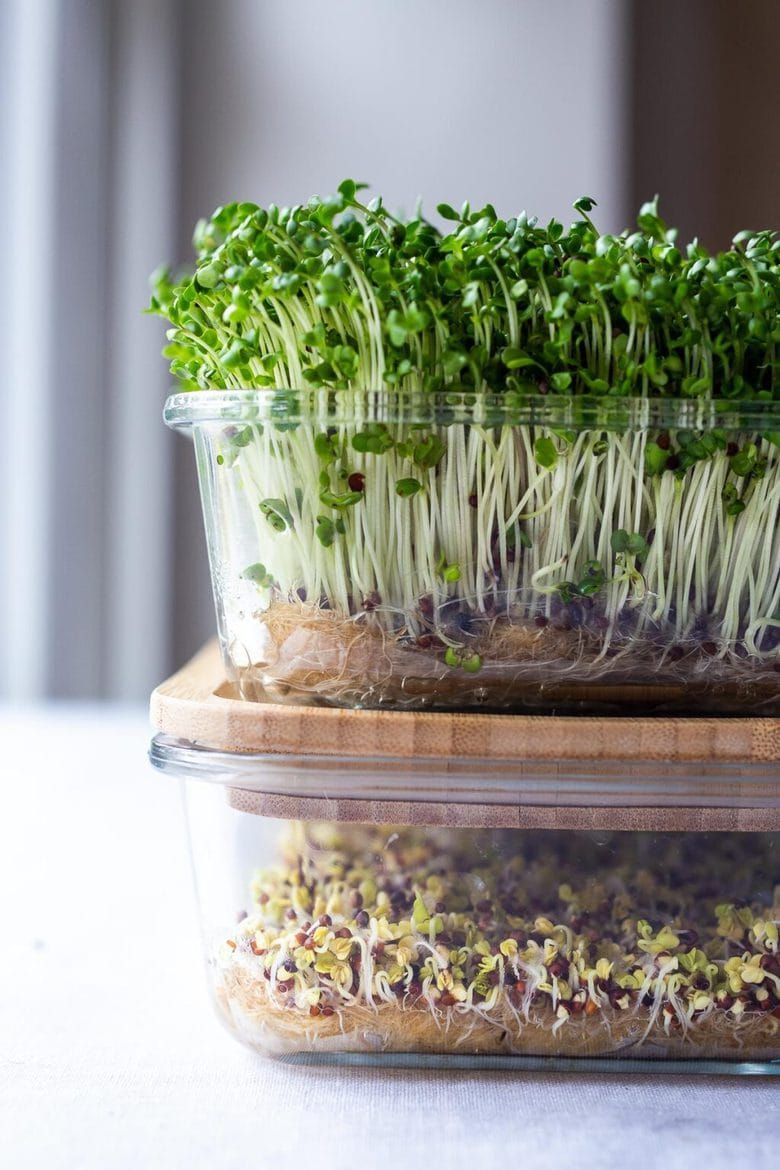
Source: herbivoreskitchen.com
Shallow growing tray
Choose a clean tray about 1 to 2 inches deep. A tray with drainage holes works well when placed over a second tray that catches excess water. Avoid containers that previously held chemicals or other unsafe substances.
Microgreen seeds
Buy seeds labeled for microgreens or edible shoots from a reliable supplier. Select varieties intended for food production, and follow the supplier’s guidance for growing and handling them.
Growing medium
Use a clean seed-starting mix or a growing medium sold for microgreens. It should hold moisture while allowing air to reach the roots. Ordinary garden soil is often heavy, messy, and more likely to contain unwanted organisms.
Clean water
Use potable water suitable for drinking. Avoid water that may contain unsafe contaminants, especially because microgreens are often eaten raw.
Light source
A bright window may work for some crops, but a suitable grow light provides more consistent coverage. Keep the light at the distance recommended by its manufacturer and adjust it as the plants grow.
Clean scissors
Use clean, sharp scissors to harvest the shoots above the growing medium. Cutting the plants rather than pulling them helps keep growing mix off the edible parts.
Do You Need Special Microgreen Equipment?
No. A basic tray, growing medium, seeds, water, and an appropriate light source are enough for many small home crops. A spray bottle can help moisten the surface during sowing, while a second tray makes bottom watering easier.
A timer can simplify lighting if you use a grow light. A thermometer may also help if your room becomes very hot or cold. However, avoid buying several accessories before you know which crops you enjoy and how much space you want to devote to them.
Low-cost setup
Use one clean tray with drainage holes, a catch tray, seed-starting mix, and a small amount of seed.
More controlled setup
Add an adjustable grow light and a timer if natural light is weak or inconsistent.
Choose the Best Microgreens for Beginners
Start with one or two varieties instead of sowing every type of seed at once. Different plants germinate at different speeds and may need different soaking, covering, or watering methods. A simple first crop makes it easier to spot problems and learn what works in your home.
Radish, broccoli, and mustard are useful starting choices because they often grow quickly and have a clear flavor. Peas and sunflowers produce larger shoots, but their seeds may need soaking and their crop can take longer. Seed supplier instructions are a useful guide because varieties within the same plant group can differ.
Source: gardendust.com
Radish
Radish microgreens usually grow quickly and have a crisp texture with a peppery taste. They can be a good first choice when you want a crop that develops in a short period.
Broccoli
Broccoli microgreens have a mild, fresh flavor that works well in sandwiches, salads, and grain bowls. Use seeds sold for edible microgreen production.
Mustard
Mustard produces tender shoots with a spicy taste. A small amount can add a sharp note to salads and wraps.
Peas
Pea shoots have a mild, sweet flavor and a tender texture. Choose suitable pea seeds and follow directions for soaking and sowing.
Sunflower
Sunflower microgreens have sturdy stems and a nutty flavor. Use seeds intended for edible shoots, not seeds treated for planting in ornamental gardens.
Cabbage and kale
These crops can produce mild, leafy microgreens. Their growth rate and harvest time depend on the variety and the conditions in your growing space.
Should You Mix Different Microgreen Seeds?
You can grow a mixed tray, but it is easier to manage varieties with similar germination times and moisture needs. A fast-growing radish may be ready before a slower crop has developed enough leaves. This can make a mixed tray harder to harvest evenly.
For your first attempt, grow each variety in its own tray or divide a tray into clearly separated sections. Once you understand the growth patterns, experiment with blends designed for microgreens.
Best for learning
Grow one variety per tray so you can learn its normal appearance, growth rate, and watering needs.
Best for variety
Use a seed blend made for microgreens, and check that its varieties have compatible growth times.
Step 1: Prepare a Clean Growing Tray
Start by washing your hands and cleaning the tray, catch tray, and any tools you plan to use. Remove dirt and plant debris from reused containers, then wash and sanitize them using a method suitable for food-contact equipment. Follow the sanitizer label, including any required contact time and rinsing instructions.
Place the tray on a level surface where water will not damage a counter or shelf. If the tray has drainage holes, set it inside a second tray that can collect runoff. Good drainage helps prevent the growing medium from staying saturated.
Source: urbangreensproject.org
Add the Growing Medium
Fill the tray with roughly 1 to 1.5 inches of clean growing medium, adjusting the depth to suit the crop and tray. Spread the medium evenly without pressing it into a hard layer. Roots need contact with the medium, but they also need air and room to develop.
Moisten the medium before sowing. It should feel damp throughout without releasing water when gently squeezed. If water pools on the surface, let the excess drain before you add the seeds.
Too little medium
A very thin layer may dry quickly and give roots little room to anchor.
Too much water
A waterlogged layer can reduce air around the roots and encourage decay.
Can You Grow Microgreens Without Soil?
Yes. Some growers use clean fiber mats or other commercial hydroponic growing media instead of a soil-based mix. These materials can make harvesting cleaner, but they must hold enough water and support the crop until harvest.
A growing mat does not remove the need for careful sanitation. Use a product intended for edible plants, follow its instructions, and avoid materials that may shed unsafe fibers or release unknown chemicals.
Seed-starting mix
Often easy to find and useful for beginners, although it can cling to roots and stems during harvest.
Commercial growing mats
Can simplify cleanup and provide a uniform surface, but the mat must suit the crop and be kept evenly moist.
Step 2: Sow the Seeds Evenly
Spread the seeds across the surface of the moist growing medium. Aim for an even layer rather than a thick pile. Seeds that overlap heavily can compete for space and trap moisture, which may increase the risk of poor airflow and mold.
The correct seed quantity depends on the crop, seed size, and tray dimensions. Follow the seed supplier’s sowing rate when one is available. If you are unsure, begin with a modest amount and adjust the density after observing your first harvest.
Source: www.pinterest.com
Should You Soak Microgreen Seeds First?
Some large seeds, such as many peas and sunflowers, are commonly soaked before sowing. Small seeds such as broccoli and radish generally do not need this step. Soaking seeds that form a sticky gel, such as chia or basil, can make them difficult to spread evenly.
Use clean drinking water and follow the seed supplier’s instructions for soaking time. Do not leave seeds soaking for longer than recommended, and do not assume that soaking makes contaminated seeds safe to eat.
Small seeds
Usually spread directly over the moist growing medium without soaking.
Large seeds
May benefit from a short soak if the supplier recommends it.
Gel-forming seeds
Often need to be sown without soaking so they remain easier to handle.
Do Microgreen Seeds Need to Be Covered?
Many microgreen seeds germinate well when left on the surface, while some larger seeds may benefit from a light covering or gentle contact with the medium. Follow the directions for the specific variety rather than burying every seed.
If the crop benefits from a short blackout period, place a clean, suitable cover over the tray for the recommended time. Check moisture daily, provide airflow, and remove the cover when the shoots are ready for light. Do not keep seedlings covered for too long in a warm, damp space.
Small surface-sown seeds
Press them gently against the medium so they make contact without being buried deeply.
Larger seeds
Use a light covering only when appropriate for the variety.
Step 3: Manage Germination and Early Growth
After sowing, keep the growing medium damp while the seeds germinate. Check the tray at least once each day, since small containers can dry out faster than a garden bed. Use a gentle mist if the surface starts to dry, but avoid spraying so heavily that seeds wash into one corner.
Many crops sprout within a few days, although the timing varies by species, seed age, temperature, and moisture. Some varieties grow well under a short blackout period, while others do not need one. Watch the seeds and follow crop-specific instructions rather than relying on one fixed schedule for every tray.
Source: artofit.org
When Should You Remove the Cover?
Remove the cover when the crop has germinated and the shoots are ready for light, according to the variety’s instructions. If a cover is used for a short blackout period, check the tray daily. Do not wait for the shoots to become long, pale, and weak before exposing them to light.
Some seedlings may still carry their seed coats as they emerge. This can be normal, but the plants should continue developing as they receive light and fresh air. If growth is patchy, check moisture, seed distribution, and the conditions around the tray.
Healthy early growth
Shoots emerge across most of the tray and gradually develop upright stems and open seed leaves.
Weak or stretched growth
Long, pale stems may point to insufficient light or an overly long blackout period.
Uneven germination
Check whether seeds were spread evenly and whether parts of the tray dried out or remained waterlogged.
Step 4: Give Microgreens the Right Light
Once the shoots emerge, give them enough light to grow sturdy stems and healthy green leaves. A bright window may work if it provides strong, consistent light for much of the day. In many American homes, however, winter daylight, shaded windows, and short days make an indoor grow light more reliable.
A basic full-spectrum white LED grow light can support many common microgreen crops. Follow the manufacturer’s recommended hanging distance and schedule because light output differs between fixtures. A powerful light may need to sit farther away than a low-output lamp, so there is no single distance that works for every setup.
As a practical starting point, many home growers provide around 12 to 16 hours of light per day, then adjust based on the crop, fixture, and plant response. Give the plants a dark period rather than leaving lights on around the clock. A timer can make the schedule easier to maintain.
Source: www.pinterest.com
How to Tell Whether Microgreens Need More Light
Microgreens that receive too little light may develop long, thin stems, lean strongly toward a window, or appear pale. If the tray looks healthy on one side but weak on the other, light coverage may be uneven. Move the tray or adjust the fixture to improve coverage.
Excessive light intensity can also cause trouble. Leaves may look bleached, dry, or stressed, especially if the light adds heat to a small growing area. Increase the distance or reduce intensity according to the light’s instructions, and check the room temperature.
Long, leaning stems
Increase or improve light exposure, and rotate the tray if natural light comes from one direction.
Pale leaves
Check light levels, seedling age, moisture, and temperature before changing several conditions at once.
Dry or bleached leaf tips
Check for excessive light intensity, heat, or drying of the growing medium.
Can Microgreens Grow in a Window Without a Grow Light?
Yes, some microgreens can grow on a bright windowsill. An unobstructed south-facing window in much of the United States may provide stronger light than a shaded north-facing window, although season, latitude, nearby buildings, and glass all affect the result.
Watch how the plants respond rather than judging the window by how bright it looks to your eyes. If stems become long or lean sharply toward the glass, add a suitable grow light or move the tray to a brighter location.
Good window conditions
The tray receives consistent light, shoots remain reasonably compact, and leaves develop their expected color.
Poor window conditions
Seedlings stretch, lean, or become pale despite regular watering.
Step 5: Water Microgreens Without Making Them Soggy
Microgreens need steady moisture, but wet roots and crowded stems can create problems. The goal is to keep the growing medium evenly damp, not flooded. How often you water depends on tray depth, room temperature, airflow, the crop, and the type of growing medium.
Check the medium instead of watering by the clock alone. If the surface looks dry but the lower layer remains moist, a light mist may be enough. If the whole tray feels dry, add water carefully and let excess moisture drain away.
Source: www.pinterest.com
How to Bottom-Water Microgreens
Bottom watering is a useful way to deliver moisture without repeatedly wetting the leaves and stems. Place the growing tray in a clean catch tray and add a small amount of water to the lower tray. Allow the growing medium to absorb what it needs, then pour away any water that remains.
Do not leave the growing tray sitting in standing water for long periods. Saturated growing medium can deprive roots of air and encourage decay. Clean the catch tray regularly and keep water away from electrical equipment used for lighting.
Add a little water
Pour potable water into the lower tray without flooding the growing surface.
Wait for absorption
Give the medium time to draw up moisture, checking whether the surface has become evenly damp.
Drain the excess
Remove leftover water instead of allowing the tray to remain submerged.
How Much Water Do Microgreens Need?
There is no universal volume because trays and growing media vary. A small, shallow tray may need far less water than a wide tray in a warm room. Use the condition of the medium as your guide and make small adjustments rather than adding a large amount at once.
If the growing medium repeatedly dries out, check whether the light or a nearby heat source is increasing evaporation. If it stays wet for days, improve drainage and airflow, and reduce the amount of water you add.
Medium dries too fast
Check tray depth, room heat, airflow, and the moisture-holding ability of the medium.
Medium stays saturated
Drain standing water, check the drainage holes, and reduce watering.
Step 6: Maintain Airflow and Watch for Problems
Good airflow helps the growing surface dry between watering and reduces the damp conditions that favor some plant diseases. Keep trays away from cramped corners and avoid placing them where leaves remain wet for long periods. Gentle room circulation can help, but a strong fan should not dry out the seedlings.
Crowded sowing, excess water, contaminated supplies, and warm, stagnant air can all contribute to poor growth. Inspect the tray daily and deal with problems early. Do not try to rescue a questionable crop by simply adding more water or covering it again.
Source: thebetterindia.com
Microgreen Mold or Root Hairs: How to Tell the Difference
Young roots often develop fine, white root hairs that can look like fuzzy growth. These hairs are commonly concentrated close to individual roots and may become less noticeable after watering. Mold can spread between seeds or across the growing medium and may appear as a web-like layer, sometimes with an unusual odor.
Appearance alone cannot always identify the cause with certainty. If you see spreading fuzzy growth, slimy stems, discolored tissue, or a sour or rotten smell, do not eat the crop. Discard the affected tray, clean the growing area and equipment, and review your seed source, sowing density, moisture, and airflow before starting again.
Possible root hairs
Fine white hairs appear around roots and are not accompanied by slimy stems or a rotten smell.
Possible mold or decay
Fuzzy growth spreads across the medium, stems become slimy, or the tray develops an unpleasant odor.
When uncertain
Do not taste the crop to test it. Discard questionable greens and clean the equipment before reuse.
Why Are My Microgreens Falling Over?
Some shoots naturally bend as their seed leaves open, but widespread collapse can signal trouble. Weak light may cause stretched stems, while excess water and poor airflow can contribute to stem decay. Seeds sown too densely may also compete for light and trap moisture.
Check the growing medium first. If it is soaked, drain it and improve airflow. If the stems are long and weak, correct the light conditions. When stems are slimy, damaged, or affected by spreading growth, discard the crop rather than trying to save it.
Weak light
Provide better coverage or use an appropriate grow light.
Excess water
Improve drainage and allow the medium to remain damp rather than saturated.
Overcrowding
Reduce seed density in the next tray and use the supplier’s recommended sowing rate.
Step 7: Know When to Harvest Microgreens
Most microgreens are ready when their seed leaves have opened and the shoots have reached a useful height. Depending on the crop and growing conditions, harvest may take about 7 to 21 days from sowing. Some varieties mature sooner, while others need more time to develop the flavor and texture you prefer.
Use the seed supplier’s harvest guidance as a starting point, then judge the crop by its development. Seed leaves, also called cotyledons, are the first leaves to appear. Many growers harvest around this stage or when the first true leaves begin to emerge, depending on the variety and intended use.
Source: www.pinterest.com
How to Harvest Microgreens Cleanly
Wash your hands and prepare clean scissors and a clean container. Cut the shoots just above the growing medium, taking care not to drag the blades through soil or other growing material. Harvest only the amount you plan to use soon, since freshly cut greens are often best in small batches.
Avoid pulling up whole plants unless you intend to use the roots and can clean them safely. Cutting above the medium helps keep dirt and fibers off the edible parts. If debris lands on the shoots, remove it carefully and do not use greens from a tray with signs of mold or decay.
Harvest at the right stage
Look for healthy, upright shoots with developed seed leaves and a flavor that suits your meal.
Cut above the medium
Use clean scissors to reduce contact between edible shoots and the growing material.
Use a clean container
Collect the greens in a clean bowl or food-safe container, then refrigerate them promptly.
Can You Regrow Microgreens After Cutting?
Some plants may send out additional growth after cutting, but most microgreen crops are managed as a single harvest. Their small root systems and short growing period mean the second crop may be thin, uneven, or less appealing than the first.
For dependable results, plan to sow a fresh tray for your next harvest. If you want plants that provide repeated cuttings, consider growing suitable pea shoots or baby greens according to their own growing instructions instead of expecting every microgreen variety to regrow well.
For a reliable supply
Start a new tray before the current crop is finished so the next batch can develop while you use the first.
For repeat harvests
Choose crops and growing methods specifically suited to repeated cutting.
How to Store and Eat Homegrown Microgreens
Microgreens are delicate, so handle them gently after harvest. Remove visible debris, discard damaged shoots, and store sound greens in a clean food-safe container in the refrigerator. Dry the greens carefully if they are wet, since excess moisture can speed up spoilage.
If you wash microgreens before storage, use clean running water and dry them thoroughly with a clean salad spinner or paper towels. Do not use soap or household cleaning products on edible plants. For the best texture, harvest close to the time you plan to eat them.
Source: askmilton.tv
How Long Do Microgreens Last in the Refrigerator?
Storage life varies by variety, harvest condition, temperature, and how much moisture remains on the leaves. Some well-handled microgreens may stay in good condition for several days, but there is no guaranteed shelf life for every crop. Check them each time you prepare a meal.
Discard greens that develop slime, an unpleasant smell, or visible mold. Refrigeration slows spoilage but does not make contaminated produce safe. Keep the refrigerator at 40 degrees Fahrenheit or below, and do not leave harvested greens at room temperature for extended periods.
Store them dry
Remove excess surface moisture and use a clean container to limit spoilage.
Keep them cold
Refrigerate promptly and maintain a refrigerator temperature of 40 degrees Fahrenheit or below.
Inspect before eating
Discard any greens with signs of spoilage, even if they have been refrigerated.
Easy Ways to Use Microgreens in Everyday Meals
Microgreens can add flavor, color, and texture to many familiar meals. Mild broccoli or cabbage shoots can complement sandwiches and grain bowls, while radish and mustard add a sharper taste. Pea shoots work well in salads, wraps, and dishes that benefit from a fresh, green finish.
Use microgreens as a finishing ingredient rather than cooking them for a long time. Their tender leaves can wilt quickly. Add them to eggs, soups, or roasted vegetables just before serving if you want to preserve their texture.
Breakfast
Add a small handful to scrambled eggs, avocado toast, or a breakfast sandwich just before serving.
Lunch
Layer microgreens into wraps, sandwiches, and grain bowls for extra crunch and fresh flavor.
Dinner
Use them as a garnish for soups, roasted vegetables, pasta, or rice dishes.
Salads
Combine several varieties with other washed greens and a dressing that complements their flavor.
Food Safety: What Home Growers Should Know
Microgreens are often eaten raw, which means harmful germs may reach the plate without a cooking step to reduce them. Seeds can carry harmful bacteria even when they look clean, and warm, moist growing conditions can allow germs to multiply. Rinsing harvested greens does not reliably remove every pathogen.
Start with seeds sold for edible sprout or microgreen production from a reputable supplier. Follow any handling and sanitation instructions, use potable water, clean your hands and equipment, and keep harvested greens refrigerated. These steps lower risk but cannot guarantee that a raw crop is free of harmful germs.
Sprouts and microgreens are not identical, but both may involve conditions that create food-safety concerns. Sprouts are commonly grown in water and eaten with the seed and root, while microgreens are generally grown on a medium and cut above it. Neither method makes contaminated seed safe by default.
People at higher risk of foodborne illness, including young children, older adults, pregnant people, and those with weakened immune systems, should take particular care with raw produce. For those groups, cooked vegetables may be a safer choice than raw homegrown microgreens. Follow current public health advice when deciding how to serve them.
Source: sowrightseeds.com
Can You Eat Microgreens Straight From the Tray?
Eating shoots directly from the growing tray is not a good food-safety habit. The medium, tray surface, hands, and standing water can all introduce unwanted contaminants. Harvest with clean tools, keep the edible shoots away from the growing medium, and handle them as you would other fresh produce.
Washing can remove some surface dirt, but it is not a substitute for clean seeds, sanitation, proper storage, and careful growing practices. If a tray has visible mold, slimy growth, or a bad smell, discard the crop rather than washing it and hoping it is safe.
Use suitable seed
Choose seed intended for edible shoots and follow the supplier’s food-safety guidance.
Keep equipment clean
Wash hands, trays, tools, and food containers before use.
Avoid questionable crops
Discard greens with signs of mold, decay, or unexplained discoloration.
Common Microgreen Growing Problems and Their Solutions
When a crop struggles, change one or two conditions at a time rather than replacing everything at once. Begin by checking moisture, light, airflow, and seed quality. These factors explain many of the common problems in a small indoor microgreen garden.
Keep brief notes about the variety, sowing date, light schedule, and harvest date. A simple record helps you repeat successful crops and spot patterns when something goes wrong. Over time, you can adjust sowing density and watering to suit your home.
Source: artofit.org
Seeds are not germinating
Check the seed’s age and storage history, confirm that the variety is suited to your method, and keep the medium evenly moist. Very cold conditions, excessive heat, or waterlogged media can interfere with germination.
Seeds germinate in patches
Improve seed distribution and check for dry areas or uneven medium depth. Make sure the tray sits level so moisture does not collect only at one end.
Shoots are tall and thin
Provide more suitable light, reduce an overly long blackout period, and avoid crowding the seedlings.
Leaves turn yellow
Check light, moisture, airflow, and temperature. Yellowing can have several causes, so inspect the whole tray before changing one condition.
The growing medium smells sour
Stop watering, inspect for decay, and discard the crop if the odor is accompanied by slimy stems or suspicious growth. Clean the tray and correct drainage before restarting.
The surface dries too quickly
Check the room temperature and light heat, and make sure the growing medium can hold moisture. Water carefully without leaving the tray saturated.
Microgreens taste unusually bitter or strong
Some crops naturally have a sharp taste. Harvest at the recommended stage, check the seed variety, and use smaller amounts until you learn its flavor.
A Simple Weekly Growing Routine
A small routine can prevent many growing problems. Check the tray each morning, confirm that the medium is damp rather than soaked, and look for any unusual growth or odor. Keep the light schedule steady and remove excess water from the catch tray.
As harvest approaches, prepare clean scissors and a food-safe container. Start the next tray when you know you can use the harvest and have room to care for both batches. Staggered sowing can provide a steadier supply without requiring a large indoor garden.
Daily
Check moisture, light, airflow, and the appearance of the shoots.
Before harvest
Inspect the crop, clean your tools, and prepare a suitable storage container.
After harvest
Refrigerate sound greens promptly, clean reusable equipment, and discard used growing medium appropriately.
How Long Does It Take to Grow Microgreens?
Many microgreens are ready to harvest in about one to three weeks, but the exact timing depends on the variety and growing conditions. Radish and mustard often develop quickly, while pea and sunflower shoots may need more time. Treat harvest ranges as estimates rather than fixed deadlines.
The table below gives broad planning ranges for common crops. Seed age, room temperature, sowing density, light, and the preferred harvest stage can change the result. Follow the supplier’s directions when they differ from these general ranges.
Source: urbangreensproject.org
Typical Microgreen Growing Times
Use these ranges to plan your first sowing. The clock starts when you sow the seeds, not when the first shoots appear. A crop that grows slowly in a cool room may need longer than the same variety grown under suitable, steady conditions.
Radish: about 7 to 12 days
Often a quick crop with a peppery taste and clear early growth.
Mustard: about 7 to 14 days
Usually develops quickly and produces a spicy flavor.
Broccoli: about 8 to 14 days
Often ready while the shoots are tender and the seed leaves are open.
Cabbage: about 8 to 14 days
Can provide mild, tender shoots in a short growing cycle.
Peas: about 10 to 21 days
Larger shoots may need extra time, depending on the variety and desired size.
Sunflower: about 8 to 14 days
May need seed preparation and enough time for sturdy shoots to develop.
How to Keep a Steady Supply of Fresh Microgreens
If you enjoy microgreens, sowing small batches at intervals is often more useful than planting a large tray all at once. This approach spreads out the harvest and reduces the chance of having more greens than you can eat. It also lets you test new varieties without wasting much seed or growing medium.
For example, you might sow a small radish tray on Sunday and another tray several days later. Adjust the interval after you learn how quickly each crop grows in your home. The goal is to have the next batch approaching harvest as the current batch is used.
Source: herbivoreskitchen.com
Plan Your First Month
Begin with one tray and a quick-growing crop. Once you can manage its moisture, light, and harvest, add a second variety. This lets you build skill gradually while keeping the setup small and easy to clean.
Week 1
Sow radish or broccoli seeds and learn how quickly the growing medium dries in your space.
Week 2
Check the first crop’s growth, maintain light and airflow, and sow a second tray if you have room.
Week 3
Harvest the first tray when it reaches the desired stage and inspect the results.
Week 4
Repeat the method that worked best, adjusting seed density or watering based on what you observed.
Frequently Asked Questions
Q
Can I grow microgreens indoors all year?
Yes. Indoor growing lets you produce microgreens throughout the year, including during cold winters and hot summers in the United States. Maintain suitable room conditions, consistent light, and careful watering. An adjustable grow light can help when daylight is weak or changes with the seasons.
Q
Do microgreens need fertilizer?
Most microgreens are harvested so young that seeds supply much of the energy needed for early growth. A clean growing medium, appropriate moisture, and suitable light are usually more important than adding fertilizer. Avoid applying fertilizer unless the growing system and crop instructions specifically call for it.
Q
Can I use regular vegetable garden seeds?
Use seeds intended for edible shoots or microgreen production whenever possible. Seeds sold for ornamental planting may be treated with products not intended for food crops. Check the label and supplier’s instructions, and do not use treated seed for edible microgreens.
Q
Are microgreens healthier than mature vegetables?
Microgreens can contain useful nutrients, but their nutrient content varies by plant species, growing conditions, and harvest stage. They should not be treated as universally more nutritious than mature vegetables. Eating a range of vegetables and other nutritious foods is a more reliable way to support a balanced diet.
Q
Why do my microgreens smell bad?
A sour, rotten, or otherwise unpleasant smell may indicate excess moisture, decaying plant material, or microbial growth. Do not eat the crop if it smells bad, has slimy stems, or shows spreading fuzzy growth. Discard it, clean the tray and tools, and improve drainage and airflow before trying again.
Q
Can I grow microgreens without sunlight?
Yes, provided you use a suitable artificial light source after germination. A grow light can support healthy growth when natural sunlight is unavailable. Follow the fixture’s guidance for distance and duration, and watch for stretched stems or signs of excessive heat.
Q
How often should I water microgreens?
Check the growing medium daily and water whenever it begins to dry. The exact frequency depends on the crop, tray, room temperature, airflow, and medium. Keep the medium damp rather than soaked, and remove standing water from the catch tray.
Q
Can children help grow microgreens?
Children can help spread seeds, check moisture, and observe growth with adult supervision. Adults should handle sanitation, electrical equipment, scissors, and food-safety decisions. Because young children are at higher risk of serious foodborne illness, avoid serving them raw microgreens if public health guidance advises against raw produce for their age or risk group.
✦ Wrapping Up
Conclusion
Learning how to grow microgreens at home is a simple way to start indoor food gardening. With a clean tray, suitable seeds, a good growing medium, steady moisture, and enough light, you can raise tender shoots in a small space. Most common varieties need only a short growing period, so you do not have to wait months for a harvest.
Start with one quick-growing crop such as radish or broccoli and observe how it responds to your home’s conditions. Keep the medium damp, improve airflow, and use a suitable light source when needed. Harvest with clean tools, store the greens safely, and discard any crop that shows signs of mold or decay.
As you gain experience, try pea shoots, sunflower, mustard, or a blend suited to microgreen growing. Small, staggered sowings can provide a steady supply without taking over your kitchen. The best setup is the one you can keep clean, manage easily, and use to grow greens you enjoy eating.
💡 Key Takeaway
For your first crop, choose radish or broccoli seeds intended for edible microgreens, prepare one clean tray with moist growing medium, sow the seeds evenly, and check moisture and growth every day. Give the shoots suitable light after germination, then harvest with clean scissors when they reach the desired stage.
I enjoy sharing simple gardening ideas, lawn care tips, and honest product reviews that help make outdoor work easier. From home gardening guides to helpful tools and lawn care advice, I write easy-to-follow content to help readers create a healthier and better-looking outdoor space without wasting time or money.