As an Amazon Associate, I earn from qualifying purchases.
You can grow your own sprouts in a clean glass jar with food-safe sprouting seeds, fresh water, and a few minutes of daily care. Soak the seeds, drain them well, rinse and drain them twice daily, and harvest when the sprouts reach your preferred size. Because warm, damp conditions can also support harmful bacteria, start with seeds sold for sprouting, keep your equipment clean, and understand that rinsing cannot make contaminated seeds safe.
Fresh sprouts can bring a crisp bite to sandwiches, salads, grain bowls, and wraps without taking up a garden bed or a sunny windowsill. For people across the United States, from small city apartments to homes with large backyards, sprouting offers a simple way to grow a small amount of fresh food indoors throughout the year. You do not need potting soil, outdoor space, or special grow lights to get started.
The basic process is simple, but safe sprouting takes more care than filling a jar with seeds and water. Sprouting seeds need moisture and warmth to begin growing, and those same conditions can allow harmful bacteria to multiply. Choose seeds intended for sprouting, use clean equipment, drain every batch well, and follow food safety guidance for handling and eating raw sprouts.
This guide explains how to choose seeds, prepare a jar, soak and rinse the seeds, recognize healthy growth, and store a finished batch. It also covers common problems, different sprout varieties, and the extra precautions needed for children, older adults, pregnant people, and anyone with a weakened immune system.
Sprouts are young shoots that develop when seeds begin to germinate. A seed absorbs water, its outer coat softens, and a small root emerges. As growth continues, a young stem and sometimes tiny leaves appear.
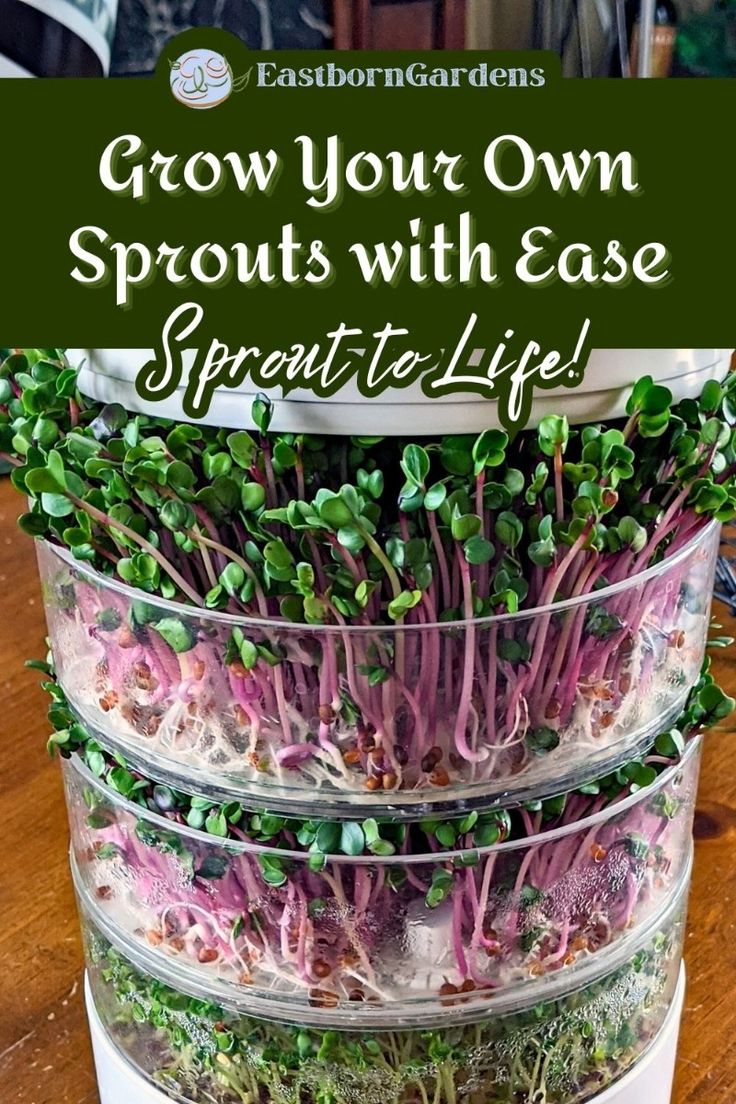
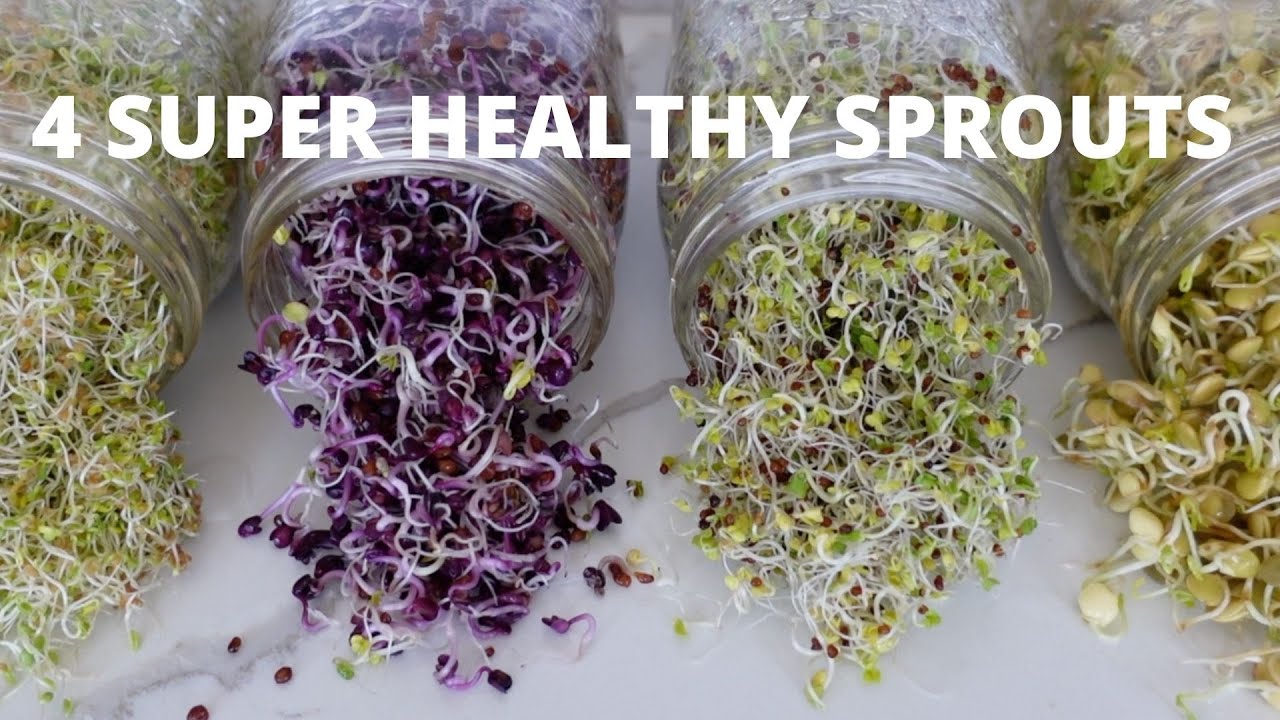
Common edible sprouts include mung bean, lentil, alfalfa, broccoli, radish, and clover sprouts. Each has a different taste and texture. Mung bean sprouts are often crisp and mild, while radish sprouts have a peppery bite and alfalfa sprouts are delicate.
Home sprouting is different from growing microgreens. Sprouts are usually harvested soon after germination, often with the seed and root still attached. Microgreens grow longer, develop leaves, and are generally cut above the growing medium when harvested.
A jar makes it easy to grow a small amount in a kitchen, even during a cold American winter or a hot summer when outdoor gardening is less convenient. Still, growing sprouts at home does not remove the risk of contamination that may already be present on seeds.
Source: i.ytimg.com
Small space
A jar can fit on a clean kitchen counter or shelf away from direct sunlight and heat sources.
Short growing time
Many common varieties germinate within a day or two and reach a harvestable stage in roughly three to seven days, depending on the seed and conditions.
Flexible use
Different varieties can add crunch, mild flavor, or a peppery taste to meals.
Low equipment needs
You can begin with a food-safe glass jar, a suitable lid, clean water, and seeds intended for sprouting.
What You Need to Grow Your Own Sprouts
Gather your supplies before you begin. Clean equipment and the right seeds matter more than buying an expensive sprouting kit. A simple setup works well for beginners as long as it allows water to drain freely and air to reach the seeds.
Source: i.pinimg.com
Food-safe sprouting seeds
Choose seeds packaged for edible sprouting from a supplier that follows appropriate food safety controls. Avoid seeds treated with fungicides or other chemicals that make them unsuitable for food.
Glass jar
Use a clean, wide-mouth jar made for food storage. A quart-size jar can work for a small batch, but the amount of seed must leave enough room for the sprouts to expand.
Breathable lid or mesh cover
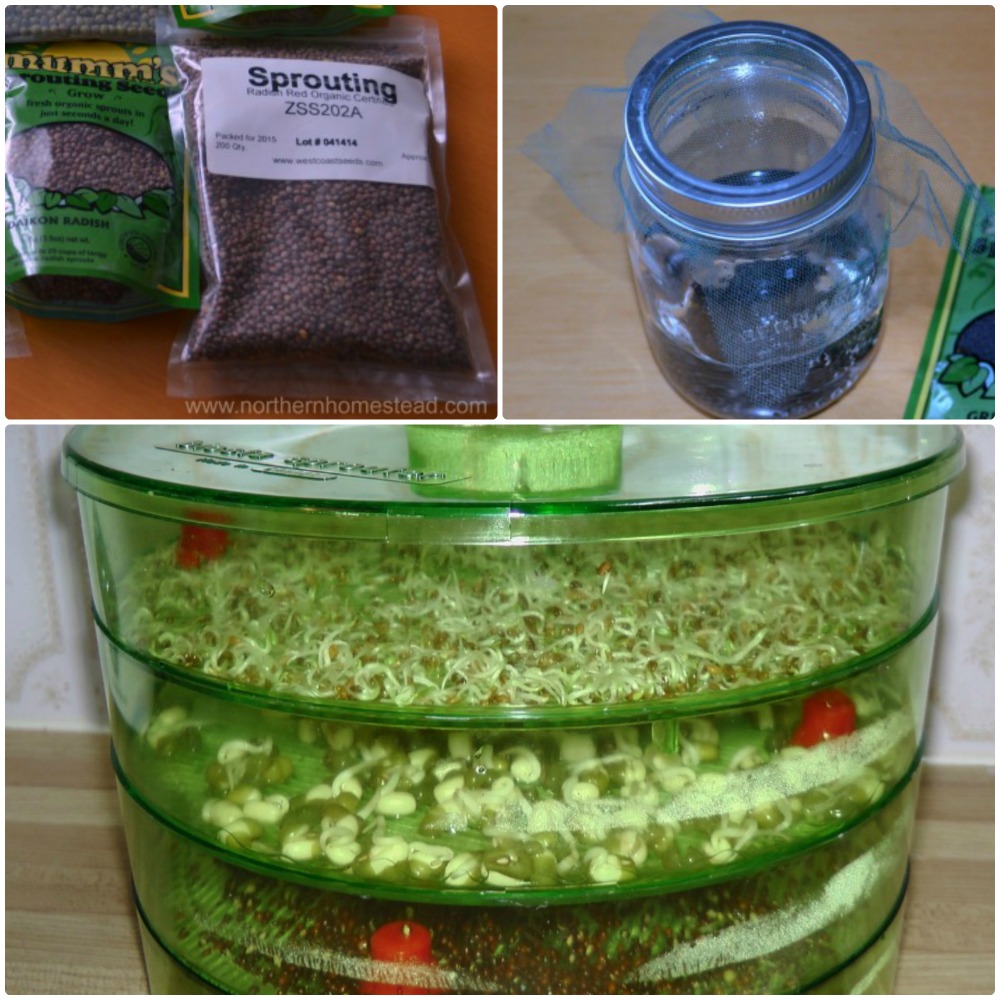
A purpose-made sprouting lid or clean, food-safe mesh secured firmly over the opening helps water drain while allowing air to enter.
Potable water
Use water that is safe to drink for soaking and rinsing. Follow local water advisories if your tap water is under a boil notice or is otherwise unsafe.
Clean draining space
A rack or clean dish drainer can hold the jar at an angle with its opening facing down, allowing excess water to escape without sealing the jar.
Clean hands and work surface
Wash your hands before handling seeds, and clean the work surface and utensils that will touch them.
Do You Need Soil or Sunlight?
No. Most jar-grown sprouts germinate without soil because the seed contains stored energy for early growth. They also do not need direct sunlight during the short sprouting period. Indirect room light is adequate for many varieties, although light exposure and variety can affect color and appearance.
The absence of soil does not mean sprouts are sterile. Bacteria can be present on seeds before soaking, and moisture can help those bacteria multiply. Good equipment hygiene, appropriate seed sourcing, and safe handling are essential.
Skip garden soil
Do not add potting mix or garden soil to a jar-sprouting setup.
Avoid direct heat
Keep the jar away from ovens, radiators, and hot windowsills where temperatures may rise too much.
Allow airflow
Do not close the jar with an airtight lid while the seeds are wet.
Which Seeds Are Best for Beginners?
Start with one variety of seed rather than mixing several types in your first batch. Different seeds may need different soaking times, rinsing schedules, and days to harvest. A single variety makes it easier to learn what normal growth looks like and spot changes that may signal a problem.
Buy seeds intended for food sprouting. Seeds sold for planting in ornamental or vegetable gardens may have been treated with chemicals or handled under conditions that do not meet the needs of food production. A label that simply says organic does not guarantee that seeds are free from harmful pathogens.
Source: i.pinimg.com
Mung beans
These produce thick, crisp sprouts often used in cooked Asian dishes. They are a common beginner option, although they still require careful handling and thorough cooking for the safest use.
Alfalfa
Alfalfa produces fine, mild sprouts that are often added to sandwiches and salads. Because they are commonly eaten raw, food safety deserves particular attention.
Broccoli
Broccoli seeds produce small sprouts with a fresh, slightly peppery flavor. Choose a food-grade sprouting product and follow its directions.
Radish
Radish sprouts develop a sharper flavor than alfalfa and can add a peppery note to cooked dishes or other foods.
Lentils
Lentils can germinate into sturdy sprouts. Use a variety intended for sprouting and cook the finished sprouts thoroughly before eating.
Clover
Clover produces fine sprouts with a mild taste. As with alfalfa, do not assume that a fresh appearance makes raw sprouts safe.
How Much Seed Should You Use?
Follow the seed supplier’s instructions for the amount to place in your jar. A common beginner mistake is to add too many seeds because they look sparse at the start. As seeds absorb water and grow, they take up much more room and may become crowded.
For example, a small amount of seed can expand to fill much of a quart-size jar after several days. The exact yield depends on seed size, variety, and growing conditions, so use the package directions rather than relying on one fixed measurement for every type.
Leave room to expand
Choose a seed quantity that allows air to circulate through the growing sprouts.
Check the jar size
Larger seeds and beans may need more room than small seeds such as alfalfa.
Start small
A small first batch is easier to rinse, drain, inspect, and use before it deteriorates.
How to Grow Your Own Sprouts in a Jar
The jar method is straightforward: clean the equipment, soak the seeds, drain them, and rinse and drain them on a regular schedule. The steps below explain the basic process for many common sprouting seeds, but the seed supplier’s directions take priority when soaking times or care requirements differ.
Before starting, remember that home sprouting has a food safety risk. Pathogens such as Salmonella and certain strains of E. coli may be present on seeds and can multiply during germination. Rinsing is part of routine care, not a way to guarantee that sprouts are safe to eat raw.
Source: mommypotamus.com
Step 1: Clean your equipment
Wash your hands with soap and water. Clean the jar, lid, draining rack, and nearby work surface. Use equipment that can be thoroughly cleaned and rinsed, and follow any applicable manufacturer directions for sanitizing it.
Step 2: Measure the seeds
Add the amount recommended on the seed package. Avoid filling the jar with dry seeds, since they will expand as they absorb water.
Step 3: Soak the seeds
Cover the seeds with potable water according to the supplier’s directions. Many common varieties need several hours of soaking, often overnight, but some seeds require a shorter or different treatment.
Step 4: Drain the water
Pour out all soaking water through the mesh lid. Drain the jar thoroughly so water does not collect at the bottom.
Step 5: Rinse the seeds
Add fresh potable water, gently swirl the seeds, and pour the water away. Avoid rough handling that damages tender seeds or emerging roots.
Step 6: Drain again
Turn the jar upside down at an angle on a clean rack. Check that water can flow out freely and that the jar is not resting in a pool of water.
Step 7: Repeat the routine
Rinse and drain the seeds about twice daily, or as directed by the supplier. Use clean hands and fresh water each time, and do not leave the seeds soaking between rinses unless the instructions specifically call for it.
Step 8: Watch the growth
Check the seeds daily for normal germination, adequate drainage, and signs of spoilage. Keep the jar in a clean location away from direct sun and excessive heat.
Step 9: Harvest at the right stage
Follow the variety’s recommended growing period and harvest when the shoots have reached the desired size. Many common sprouts are ready in about three to seven days, but growth times vary.
Step 10: Prepare the sprouts for eating
Handle the harvest with clean utensils and refrigerate it promptly if it will not be cooked and eaten right away. For better food safety, cook sprouts thoroughly rather than serving them raw.
What Should Healthy Sprouts Look Like?
Healthy germinating seeds usually show a small, pale root emerging from the seed coat. As growth continues, the roots lengthen and the sprouts become fuller. Depending on the variety and lighting, the shoots may be white, cream, pale green, or another normal color for that seed.
Fine root hairs can appear along young roots and may look like a fuzzy coating. They can be confused with mold, so appearance alone is not a reliable safety test. If you cannot confidently distinguish normal growth from possible mold or spoilage, discard the batch rather than eating it.
Normal germination
Small roots emerge, the seeds swell, and shoots lengthen over time.
Good drainage
The jar has no standing water after draining, and the seeds are moist rather than sitting in a pool.
Warning signs
A rotten or unusual odor, slimy texture, visible mold, or unexplained discoloration means the batch should be discarded.
Should You Rinse More Often?
Rinsing more often is not automatically safer. The key is to follow the seed supplier’s directions, use potable water, and drain the seeds fully after every rinse. Excessive handling can also introduce contamination from hands, utensils, or nearby surfaces.
If your room is unusually hot or the jar repeatedly develops standing water, review the setup rather than relying on extra rinsing alone. Improve drainage, move the jar away from heat, and discard a batch that shows signs of spoilage.
Keep a regular schedule
Use a consistent routine, usually morning and evening for common varieties, unless package instructions specify otherwise.
Do not skip drainage
Water trapped around seeds creates a poor growing environment and can encourage spoilage.
How Long Do Sprouts Take to Grow?
Most common jar-grown sprouts are ready within a few days, but there is no single harvest day that works for every variety. Seed size, seed quality, room temperature, and the supplier’s instructions all affect the rate of germination.
Use the following table as a broad planning guide, not as a guarantee. The ranges describe common home-sprouting expectations and can differ from the directions supplied with a particular seed product.
Source: i.pinimg.com
Mung bean
Often takes roughly three to five days to develop into a harvestable sprout, depending on the desired length and the growing method.
Alfalfa
Often takes around four to seven days to reach a small, leafy sprout stage.
Broccoli
Often takes about three to six days, depending on temperature, seed quality, and the preferred stage.
Radish
Often takes around three to six days, with the exact timing affected by seed variety and room conditions.
Lentil
May develop a visible root within a day or two and be ready after several days, depending on the variety and the supplier’s guidance.
How Temperature Changes Growth
Seeds generally germinate more quickly within a suitable temperature range. A cool kitchen may slow growth, while an overly warm location can increase spoilage risk and support the growth of harmful bacteria. Do not try to speed up sprouting by placing the jar beside a heater or in direct afternoon sun.
A stable indoor location is usually more useful than constant changes in temperature. If a batch grows slowly, first check the seed’s recommended conditions, the freshness of the seed, and whether you followed the correct soaking and draining routine.
Cool room
Germination may take longer than the package estimate.
Warm room
Growth may speed up, but high temperatures can also raise spoilage concerns.
Unstable conditions
Repeated changes in heat and moisture can make growth less predictable.
How to Store Freshly Grown Sprouts
Harvested sprouts are moist, tender, and highly perishable. Handle them with clean utensils, keep them out of the temperature danger zone, and refrigerate them promptly if they will not be cooked and eaten right away. Do not leave a harvest sitting on the counter while you prepare other meals.
A refrigerator slows bacterial growth but does not eliminate pathogens that may already be present. Refrigeration is therefore a storage step, not a way to make contaminated sprouts safe. Thorough cooking remains the safer choice.
Source: northernhomestead.com
Use a clean container
Transfer the sprouts to a clean food-storage container with a lid. Avoid reusing a container that has held raw meat or other foods without proper cleaning.
Refrigerate promptly
Keep the refrigerator at 40 degrees Fahrenheit or below, consistent with standard USDA consumer guidance for chilled food.
Avoid long storage
Use sprouts promptly and follow the seed supplier’s or a reliable food safety authority’s storage advice. There is no universal safe storage period for every homegrown batch.
Discard questionable sprouts
Do not taste a batch to check whether it has spoiled. Throw it away if you notice an unusual smell, sliminess, visible mold, or other signs of deterioration.
Can You Freeze Sprouts?
Freezing may change the texture of fresh sprouts, making them softer after thawing. If you want to preserve a larger batch, cooking the sprouts thoroughly before freezing may be more practical for soups, stir-fries, and other cooked meals.
Freezing does not reliably destroy all harmful bacteria, so it should not be used as a substitute for safe seed sourcing, clean preparation, or thorough cooking.
For cooked meals
Cook the sprouts thoroughly, cool them promptly, and freeze them in a suitable food container.
For crisp raw-style dishes
Freezing is unlikely to preserve the same crisp texture as fresh sprouts.
Food Safety: How to Reduce Risks When Growing Sprouts
Food safety is the most important part of home sprouting. The conditions that encourage seeds to germinate, including warmth and moisture, can also support the growth of harmful bacteria. Contamination may occur before the seeds reach your kitchen, and normal-looking sprouts are not proof that a batch is safe.
The U.S. Food and Drug Administration warns that raw and lightly cooked sprouts have been linked to foodborne illness. The safest approach for consumers is to cook sprouts thoroughly. People at increased risk of serious foodborne illness should avoid raw or lightly cooked sprouts, including sprouts grown at home.
Source: i.pinimg.com
Choose suitable seeds
Purchase seeds from a supplier that specifically markets them for food sprouting and uses appropriate food safety practices. This reduces avoidable risks but does not guarantee a pathogen-free product.
Clean hands and equipment
Wash hands before handling seeds and sprouts. Clean jars, lids, racks, utensils, and work surfaces before use and after contact with the batch.
Use safe water
Soak and rinse seeds with potable water. Follow local public health instructions during water advisories.
Drain thoroughly
Prevent standing water and avoid sealing wet seeds in an airtight container.
Prevent cross-contamination
Keep sprouts and equipment away from raw meat, poultry, seafood, dirty produce, and contaminated surfaces.
Cook thoroughly
Cook sprouts throughout rather than merely warming them. Add them early enough to a stir-fry, soup, or other dish so the entire portion receives adequate heat.
Discard suspect batches
Throw away sprouts that show mold, sliminess, or an unusual odor. Do not attempt to rescue them by rinsing, trimming, or cooking.
Who Should Avoid Raw Sprouts?
Raw or lightly cooked sprouts pose a greater concern for people who are more likely to develop severe foodborne illness. This includes young children, older adults, pregnant people, and people with weakened immune systems.
For these groups, avoiding raw sprouts is safer than relying on washing, home-grown status, or appearance. Thorough cooking reduces risk, but anyone with a specific medical concern should follow advice from their healthcare professional.
Pregnant people
Avoid raw or lightly cooked sprouts and choose thoroughly cooked alternatives.
Young children and older adults
Choose sprouts that have been cooked thoroughly rather than served raw in sandwiches or salads.
People with weakened immune systems
Avoid raw or lightly cooked sprouts and seek individualized advice if needed.
Does Washing Make Raw Sprouts Safe?
No. Washing can remove some surface material, but it cannot reliably eliminate harmful bacteria that may be present on or within seeds and sprouts. Rinsing during growth is intended to manage moisture and support germination, not to sterilize the crop.
Vinegar, lemon juice, salt water, and other household treatments should not be treated as reliable ways to make contaminated sprouts safe. Use good hygiene and safe handling, but rely on thorough cooking for better protection.
Do not rely on appearance
A fresh smell and bright color cannot prove that sprouts are free from pathogens.
Do not rely on home remedies
Household soaking mixtures are not a substitute for established food safety practices.
Common Sprouting Problems and How to Fix Them
Most sprouting problems come from unsuitable seeds, incorrect soaking, poor drainage, overcrowding, or inconsistent care. Check the simplest causes first, but do not try to save a batch that may be contaminated. When in doubt, discard it and start again with clean equipment and fresh seeds.
Source: i.pinimg.com
Seeds are not sprouting
Possible causes include old seeds, seeds that are not intended for sprouting, an unsuitable temperature, or an incorrect soaking method. Check the package directions and try a fresh batch if the seeds remain inactive.
Seeds smell sour or rotten
An unusual or rotten odor can indicate spoilage. Discard the entire batch, clean the jar and equipment thoroughly, and review the drainage and care routine before starting again.
The jar has standing water
The jar may not be tilted enough, or the lid may be blocking drainage. Improve the angle and ensure the opening remains unobstructed. Discard the batch if it shows signs of spoilage.
Sprouts are slimy
A slimy texture is a warning sign. Do not wash the sprouts and attempt to eat them. Discard the entire batch and clean the equipment.
Visible mold appears
Discard the whole batch rather than removing only the affected area. Clean and dry the equipment before reuse, and review seed quality, moisture, and airflow.
Growth is uneven
Some seeds may be older or less viable than others, or the seeds may be crowded. Follow the recommended seed quantity and use a fresh, suitable seed supply.
Roots look fuzzy
Fine root hairs may be normal on some sprouts, but mold can be difficult to identify. If the appearance is uncertain or accompanied by a bad odor, slime, or unusual discoloration, discard the batch.
Sprouts turn brown
Possible causes include damage, drying, poor storage, or spoilage. Do not assume the color change is harmless. Discard the batch if the cause is unclear or other warning signs are present.
Why Do Sprouts Sometimes Fail After a Good Start?
Seeds may begin to germinate and then deteriorate if they remain too wet, become crowded, or sit in a warm location with poor airflow. A jar that looked fine on the first day can develop problems later, so check the batch each time you rinse it.
Do not respond to every problem by adding more water. Seeds need moisture, but they also need drainage and air. A well-drained jar and a consistent routine are more useful than soaking the sprouts repeatedly.
Review the method
Check soaking time, rinsing frequency, drainage, and the recommended seed quantity.
Check the location
Move the jar away from direct sun, hot appliances, and areas exposed to dirt or food splashes.
Start fresh when needed
Discard a spoiled or questionable batch rather than trying to repair it.
How to Use Homegrown Sprouts in Everyday Meals
Homegrown sprouts can add texture and fresh flavor to many meals. Since raw sprouts carry a food safety risk, plan to cook them thoroughly before serving, especially when feeding people at higher risk of foodborne illness.
Add sprouts to hot dishes near the end of cooking only when the cooking method still heats the entire portion thoroughly. A quick toss in a warm pan may not be enough. For soups, casseroles, and stir-fries, include them early enough to cook through.
Source: i.pinimg.com
Vegetable stir-fries
Cook mung bean or lentil sprouts with vegetables and a suitable sauce until the sprouts are thoroughly heated throughout.
Soups and broths
Add sprouts to simmering soup and cook them thoroughly before serving.
Grain bowls
Use thoroughly cooked and cooled sprouts as part of a bowl with rice, grains, vegetables, and a protein source.
Egg dishes
Cook sprouts with eggs until both the sprouts and eggs are fully cooked.
Cooked wraps and sandwiches
Use thoroughly cooked sprouts in a warm filling rather than adding them raw to a cold sandwich.
Can You Mix Different Sprout Seeds?
You can combine different sprouts in a meal, but growing several seed types together in one jar is harder to manage. Their soaking times, seed sizes, growth rates, and harvest stages may differ. One variety may be ready while another is still developing.
For a beginner, growing each variety in its own jar gives better control. Once you understand the needs of each seed type, you can decide whether a mixed batch is practical and follow instructions that account for all the varieties involved.
Grow separately
Use separate jars when seed types have different soaking or growing requirements.
Combine after cooking
Mix thoroughly cooked sprouts into one dish to enjoy different textures and flavors.
Frequently Asked Questions
Q
Can you grow sprouts without sunlight?
Yes. Most jar-grown sprouts can germinate without direct sunlight because the seed stores energy for early growth. Keep the jar in a clean indoor location with suitable room conditions, away from excessive heat. Sprouts still need good drainage and airflow.
Q
Can you grow sprouts in a regular Mason jar?
Yes. A clean, food-safe Mason jar can work when fitted with a breathable mesh lid or another suitable draining cover. Do not use an airtight lid while the seeds are wet. Tilt the jar so excess water can escape and air can circulate.
Q
How often should you rinse sprouts?
Many common sprouting seeds are rinsed about twice a day, but the seed supplier’s directions should guide the schedule. Use potable water, handle the seeds with clean hands, and drain the jar thoroughly after each rinse. Rinsing does not guarantee that sprouts are free from harmful bacteria.
Q
Are homegrown sprouts safe to eat raw?
Not necessarily. Harmful bacteria can be present on seeds and multiply during sprouting, even when the finished sprouts look and smell fresh. The safer option is to cook sprouts thoroughly. Young children, older adults, pregnant people, and people with weakened immune systems should avoid raw or lightly cooked sprouts.
Q
How do you know when sprouts are ready to harvest?
Look for the growth stage recommended for the seed variety and check the supplier’s estimated harvest time. Many common sprouts are ready in about three to seven days, although some grow faster or slower. Do not use size or appearance alone to judge food safety.
Q
Why do my sprouts smell bad?
A rotten, sour, or otherwise unusual odor can signal spoilage, often associated with poor drainage, unsuitable conditions, or contamination. Discard the entire batch rather than rinsing it and trying again. Clean the jar and lid thoroughly before starting a new batch.
Q
Can you use regular garden seeds for sprouting?
Do not assume that garden seeds are suitable for food sprouting. Some are treated with chemicals or are not produced and handled for this use. Choose seeds specifically sold for edible sprouting and follow the supplier’s instructions.
Q
Can you grow sprouts all year?
Yes. Jar sprouting can be done indoors throughout the year because it does not require a garden bed or direct sun. Keep the setup away from excessive heat, maintain good drainage, and use a consistent care routine. Seasonal changes in indoor temperature may affect how quickly the seeds grow.
✦ Wrapping Up
Conclusion
Learning how to grow your own sprouts takes little space and only a few basic supplies. Choose food-safe sprouting seeds, use a clean jar with a breathable lid, follow the recommended soaking time, and rinse and drain the seeds on a steady schedule. Most common varieties develop quickly, so you can observe the process day by day and learn how each seed grows.
The most useful habit is to treat food safety as part of every step. Use potable water, prevent standing water, keep hands and equipment clean, and discard any batch that appears spoiled. Remember that healthy-looking sprouts can still carry harmful bacteria, and cooking them thoroughly is safer than eating them raw.
💡 Key Takeaway
To begin, buy a small packet of seeds specifically intended for food sprouting, clean a wide-mouth glass jar and breathable lid, and follow the package directions for soaking and rinsing. Start with one variety, inspect it at every rinse, and plan to cook the finished sprouts thoroughly before eating.
I enjoy sharing simple gardening ideas, lawn care tips, and honest product reviews that help make outdoor work easier. From home gardening guides to helpful tools and lawn care advice, I write easy-to-follow content to help readers create a healthier and better-looking outdoor space without wasting time or money.