As an Amazon Associate, I earn from qualifying purchases.
Harden off organic seedlings by exposing them to outdoor conditions over 7 to 14 days. Start with short periods in a sheltered, shady spot, then increase sunlight, wind exposure, and time outside. Protect tender plants from frost, extreme heat, and strong winds before transplanting them into your garden.
Across the United States, spring planting dates vary widely. Gardeners in Florida may set out warm-season crops long before gardeners in Minnesota can safely plant outdoors. Even in one state, local frost dates, elevation, and sudden weather changes can affect when young vegetable plants are ready for the garden.
Seedlings raised indoors need time to adjust to life outside. A tomato plant grown under lights may look strong, yet its leaves can scorch in direct sun, and its soft stems may bend in the wind. hardening off helps the plant adjust to brighter light, moving air, changing temperatures, and less sheltered growing conditions.
Organic seedlings benefit from the same gradual process as conventional seedlings. The key is to protect the plant while it adapts, maintain steady moisture, and avoid rushing the transition. With a simple daily routine, you can prepare tomatoes, peppers, lettuce, kale, and other vegetables for outdoor life while reducing the risk of transplant shock.
Hardening off is the gradual process of preparing indoor-grown seedlings for outdoor growing conditions. It helps plants adjust to direct sunlight, wind, cooler nights, and changes in humidity. Instead of moving a tender seedling straight from a protected room to an exposed garden bed, you give it time to adapt.
Indoor growing conditions are often steady. Grow lights provide a predictable amount of light, air movement may be limited, and room temperatures change less than outdoor temperatures. Outside, sunlight can be much stronger, wind can pull moisture from leaves, and temperatures may rise or fall quickly.
Hardening off does not mean making a plant struggle or withholding water to toughen it. It means introducing normal outdoor conditions at a pace the plant can handle. A healthy seedling should remain firm and continue growing as it adjusts.
The term organic describes the growing approach, not a separate hardening method. Seedlings raised with organic potting mixes, compost-based growing media, or permitted organic fertilizers still need the same careful transition. Choose suitable organic inputs when needed, but focus first on light, temperature, water, and shelter.
Source: microfarmguide.com
Stronger leaves
Gradual exposure helps leaves adjust to brighter outdoor light and reduces the risk of sudden sun damage.
Better stem support
Gentle air movement encourages seedlings to adapt to breezes that would otherwise bend or damage tender stems.
A smoother transplant
Prepared seedlings are better equipped to handle the changes in light, moisture, and temperature that occur after planting.
Why Indoor-Grown Seedlings Need Time to Adjust
Leaves develop in response to the conditions around them. A plant grown under indoor lights may not be ready for the intensity of midday sun. Sudden exposure can cause pale patches, brown edges, or dry areas on the leaves.
Wind adds another challenge. It increases water loss and can damage weak stems, especially when seedlings sit in small cells or lightweight pots. Outdoor air also changes how quickly potting mix dries, so a watering routine that worked indoors may no longer be enough.
Light
Increase sun exposure gradually, paying special attention to strong afternoon sun.
Air movement
Begin in a sheltered location and introduce gentle breezes before exposing plants to stronger wind.
Temperature
Match outdoor exposure to the crop’s temperature needs and avoid damaging cold.
When Should You Start Hardening Off Seedlings?
Start hardening off about one to two weeks before you plan to transplant your seedlings. The exact timing depends on the crop, local weather, plant health, and the conditions in your garden. A calm stretch of mild weather makes the process easier than a week of storms or sharp temperature swings.
For many gardeners in the United States, the process begins near the local spring planting window. Gardeners in warm regions may prepare cool-season crops earlier, while those in colder regions may need to wait longer before moving heat-loving vegetables outside. Your local frost dates are a useful guide, but they do not guarantee that every night will be safe.
Check your weather forecast before starting. Look at daytime highs, overnight lows, wind, rain, and the chance of frost. If a cold front or heat wave is approaching, delay the start or keep seedlings sheltered until conditions improve.
Seedlings should also be healthy enough to handle the transition. Plants with firm stems, several true leaves, and a well-developed root system are usually better candidates than weak, recently germinated sprouts. True leaves are the leaves that grow after the first pair of seed leaves, which are called cotyledons.
Source: ourlittlesuburbanfarmhouse.com
Tomatoes and peppers
Begin when outdoor conditions are mild, and keep plants protected from frost and cold nights. Peppers generally prefer warmer conditions than many other common vegetables.
Lettuce and brassicas
Lettuce, kale, broccoli, and cabbage often tolerate cooler conditions than warm-season crops, but seedlings still need gradual light and wind exposure.
Cucumbers and squash
These warm-season crops are sensitive to cold. Start their transition when the weather is suitable, and avoid exposing them to chilly conditions.
Herbs
Treat each herb according to its needs. Basil is sensitive to cold, while some hardy perennial herbs can tolerate cooler weather.
Use Local Weather and Frost Information
Find your area’s typical last spring frost date through a local cooperative extension office or a trusted regional gardening resource. Use that date as a planning aid rather than a fixed planting command. A forecasted frost, unusually cold soil, or prolonged wet weather can still make planting risky.
The temperature requirements of the crop matter as much as the calendar. Cool-season plants and warm-season plants do not share one universal planting date. Check the needs of each crop before deciding when to begin the transition.
Check overnight lows
Do not leave tender seedlings outside overnight simply because daytime temperatures are warm.
Watch wind and heat
Delay longer exposure during strong winds or sudden hot weather.
Assess the garden bed
Soil that is cold, waterlogged, or difficult to work may delay transplanting even when the air feels mild.
What You Need Before You Begin
You do not need special equipment to harden off organic seedlings. A sheltered outdoor area, a way to move trays, and a reliable watering method are usually enough. The goal is to control exposure while keeping plants easy to inspect.
Choose a spot that is protected from strong wind and receives shade at first. A covered porch, sheltered patio, or area beside a building may work. Avoid places where rainwater collects, pets can knock over trays, or afternoon sun suddenly reaches plants that have not adjusted.
Keep a tray or flat under small pots so they can be carried together. A lightweight cover can provide protection from unexpected cool conditions, but it must allow enough airflow. Do not wrap seedlings in airtight plastic or leave them in a closed container that can overheat.
Use clean containers and tools, and inspect the plants before taking them outside. Remove fallen leaves, look for pests, and check for signs of disease. Starting with healthy seedlings makes it easier to tell whether later damage comes from weather or an existing problem.
Source: marioncountymastergardeners.com
A sheltered outdoor location
Choose a spot with shade and limited wind for the first few sessions.
Water and a watering can
Keep the potting mix evenly moist without leaving the roots in standing water.
Weather information
Check temperatures, wind, rain, and frost risk before every outdoor session.
Plant labels
Mark each crop so you can apply the right exposure schedule and avoid mixing up temperature-sensitive plants.
Check Moisture Before Moving Plants
Feel the potting mix before setting the tray outside. If it is dry near the surface and the pots feel light, water as needed before exposure. If the mix is already wet, let excess water drain instead of adding more.
Small seedling cells contain little growing medium and can dry much faster than garden soil. Wind and sun speed that process. During hardening off, check the pots at least daily and more often during hot or breezy weather.
Avoid drought stress
Do not use wilting as a method for toughening seedlings.
Allow drainage
Make sure containers have open drainage holes and do not sit in pooled water.
How to Harden Off Organic Seedlings Step by Step
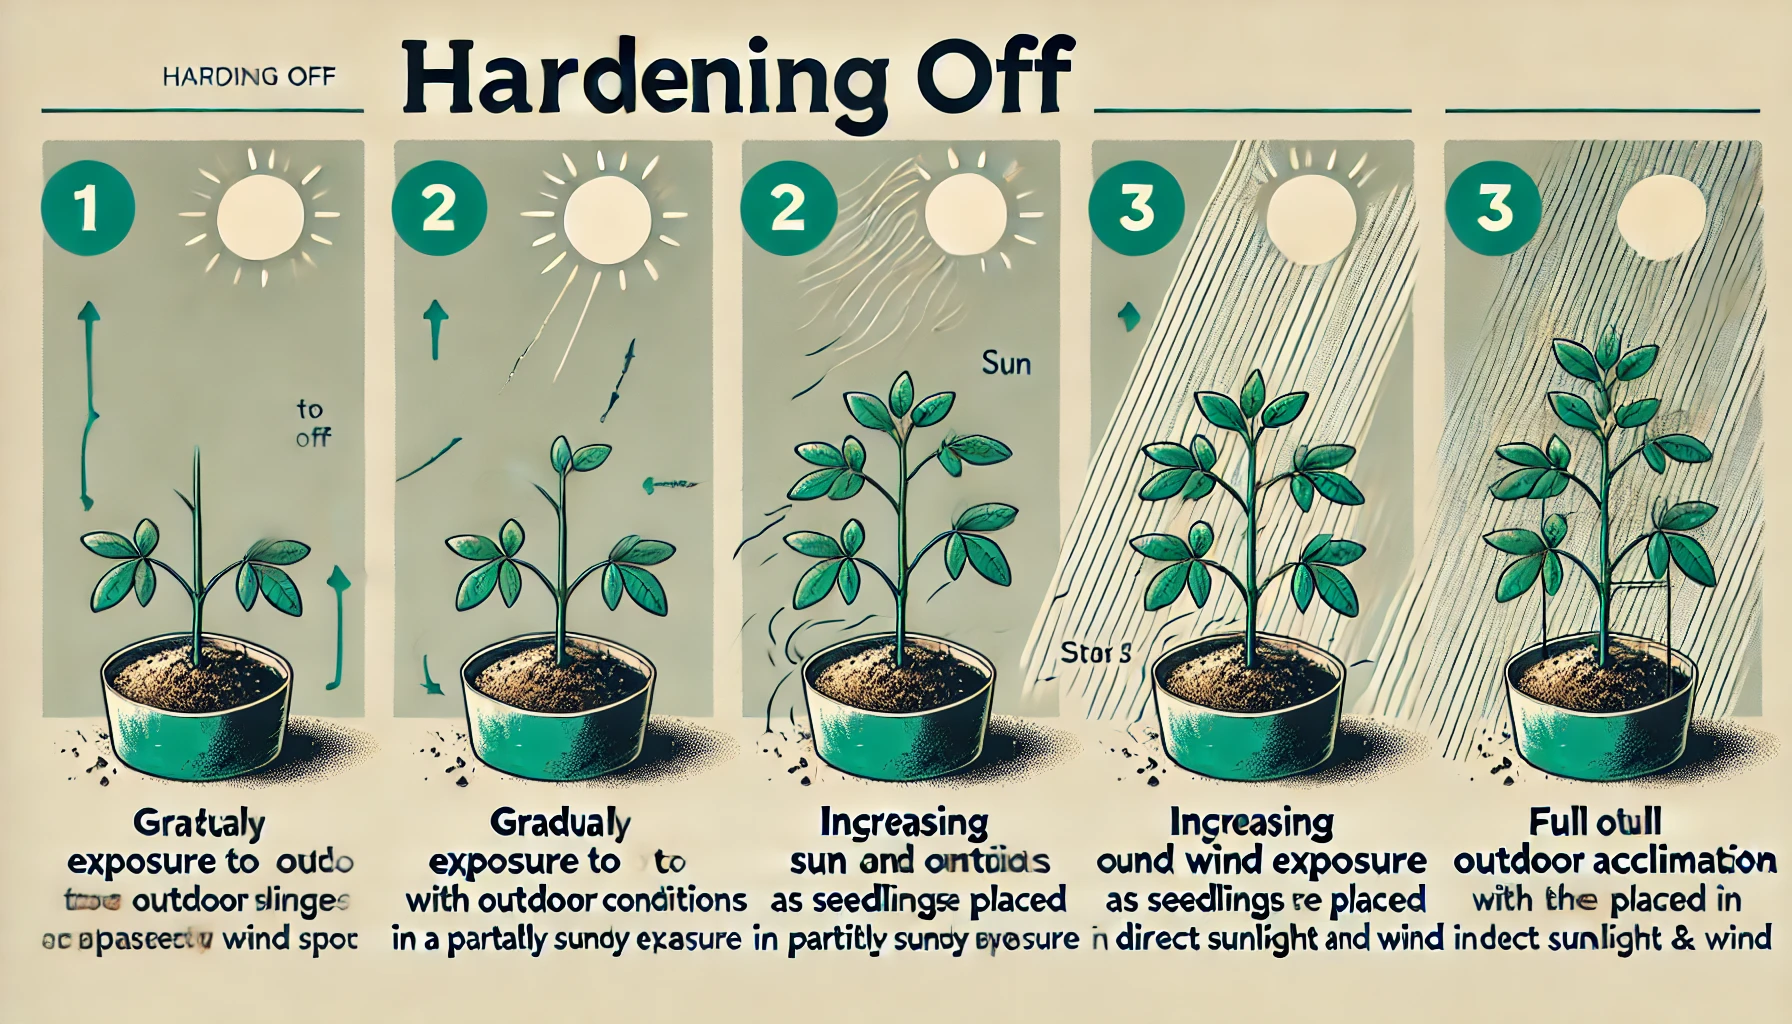
Follow a gradual schedule over 7 to 14 days, but let the plants and weather determine the pace. The schedule below is a starting point, not a strict rule. If seedlings show stress, return to a gentler stage before increasing exposure again.
Move the trays outside during a mild part of the day. Early morning or late afternoon may be easier than the hottest part of the afternoon, depending on your local conditions. Bring tender seedlings indoors or into a suitable protected area when exposure becomes too cold, windy, or intense.
Source: i.pinimg.com
Days 1 and 2: Begin in shade
Place seedlings outside for about one to two hours in a sheltered, shaded area. Keep them away from strong wind and direct midday sun. Bring them back inside afterward.
Days 3 and 4: Extend the time
Increase outdoor time to about two to four hours if the plants remain firm and healthy. Introduce gentle morning sun for a short period, then return them to shade.
Days 5 and 6: Add more sunlight
Allow a few more hours outdoors and gradually increase direct sun exposure. Check the leaves and potting mix during the session, especially if the day becomes warmer than expected.
Days 7 and 8: Increase exposure
Leave the seedlings outside for much of the day when conditions are suitable. Give them a mix of sun and shade appropriate to the crop, and avoid exposed, windy locations.
Days 9 and 10: Approach normal conditions
Let plants experience most of the light and gentle air movement they will encounter in the garden. Continue to protect tender crops from cold nights and extreme weather.
Days 11 through 14: Finish if needed
Use additional days when seedlings are delicate, the weather changes often, or sun exposure needs a slower increase. Transplant only when the plants and garden conditions are ready.
A Practical Daily Hardening Schedule
The table below gives approximate outdoor exposure times for a mild-weather week. It assumes healthy seedlings that have been growing indoors and a sheltered location. Shorten or repeat a stage if plants wilt, develop pale patches, or face an abrupt change in weather.
Exposure time is only one part of the schedule. A seedling may tolerate six hours in cool morning light but struggle during two hours of intense afternoon sun. Increase the intensity of conditions as carefully as the duration.
Days 1 to 2
One to two hours in shade and shelter.
Days 3 to 4
Two to four hours outside, including brief gentle morning sun.
Days 5 to 6
Four to six hours, with more sun if the crop and weather permit.
Days 7 to 8
Six to eight hours or most of the day, with suitable shelter available.
Days 9 to 14
A full day outdoors when conditions are safe, with extra time for sensitive plants or unsettled weather.
When Should Seedlings Stay Outside Overnight?
Leave seedlings outside overnight only after they have adjusted to daytime exposure and the expected low temperatures suit the crop. Cold-tolerant crops may handle cool nights that would harm tomatoes, peppers, cucumbers, or basil. Check crop-specific guidance instead of applying one temperature threshold to every plant.
A forecast without frost does not guarantee that a tender plant will be comfortable outdoors. Cold wind, wet growing medium, and a sudden temperature drop can add stress. If you are unsure, bring tender seedlings into a protected place and continue the process the next day.
Cool-season crops
Many brassicas and lettuce tolerate cooler conditions, although young plants still need protection from severe cold.
Warm-season crops
Tomatoes, peppers, eggplants, cucumbers, and basil need warmer conditions and should not be exposed to frost.
Adjust the Process for Different Vegetable Crops
Different vegetables respond differently to cold, sunlight, and root disturbance. Use the general schedule as a framework, then adjust it to suit each crop. Grouping plants by temperature needs can make daily care easier, but keep the most sensitive plants in a protected location.
Cool-season vegetables often tolerate lower temperatures than warm-season vegetables. However, tolerance of cool air does not mean a plant can move from dim indoor light to full outdoor sun without adjustment. Every indoor-grown seedling benefits from a gradual change in light and wind exposure.
Source: i.pinimg.com
Tomatoes
Increase sunlight gradually and avoid cold exposure. Tomatoes can suffer when conditions are too cold, even if they have been hardened off properly.
Peppers and eggplants
Give these warmth-loving crops a sheltered transition. Delay planting if nights or soil remain too cold.
Lettuce and spinach
These cool-season crops can often begin hardening off in mild spring weather. Protect them from intense sun if they have grown under low indoor light.
Broccoli, kale, and cabbage
Gradually expose seedlings to outdoor conditions and protect them from severe cold, drying wind, and heavy rain.
Cucumbers and squash
Avoid cold conditions and handle the root ball gently. These crops can be sensitive to root disturbance, so do not keep them in small containers longer than needed.
Basil
Use a warm, sheltered location and bring plants inside when nights are too cool. Basil is more cold-sensitive than many common garden herbs.
Hardening Off Seedlings in Hot Climates
In hot parts of the southern United States and the Southwest, intense sun and dry wind may pose a greater risk than cool weather. Start with shade and gentle morning light, then increase exposure while watching for leaf scorch and rapid drying.
If temperatures rise sharply during the day, choose a milder weather window. Hardening off does not require exposing plants to heat stress. A covered porch or temporary shade cloth can help during the early stages, provided air can circulate freely.
Use morning sun first
Introduce direct light during cooler hours before exposing seedlings to stronger afternoon sun.
Check containers often
Warm, dry air can pull moisture from small pots quickly.
Hardening Off Seedlings in Cool Climates
In northern states and higher elevations, the safe planting window may arrive later, and spring weather can change quickly. Use sheltered daytime sessions and bring tender crops inside when nights become too cold.
If the forecast turns cold during the hardening period, pause the schedule rather than trying to complete it on time. The goal is a healthy plant at transplanting, not a fixed number of outdoor hours.
Watch the forecast
Delay exposure during frost, cold snaps, or strong winds.
Protect against sudden changes
Keep trays ready to move so plants can return to shelter quickly.
Watering and Feeding During Hardening Off
Keep seedlings evenly moist throughout the transition. Outdoor conditions may cause pots to dry faster, but frequent watering is not always needed. Check the growing medium and water when the plants need it, allowing excess water to drain.
Avoid leaving trays in standing water for long periods. Waterlogged roots may receive too little oxygen, which can weaken seedlings and make recovery harder. At the same time, do not let small root balls dry out completely during hot or windy conditions.
Most healthy seedlings do not need a new fertilizer treatment simply because they are being hardened off. If plants are already growing in a suitable seed-starting mix and receive appropriate nutrition, focus on moisture and environmental adjustment. Extra fertilizer will not prevent sunburn, frost injury, or wind damage.
For organic seedlings, use only inputs appropriate for the crop and follow the product label. Compost, organic fertilizers, and other soil amendments serve different purposes and are not interchangeable. Avoid adding strong homemade fertilizer mixtures or concentrated liquids to stressed seedlings, as these may damage roots or create an imbalance.
Source: i1.wp.com
Check the root zone
Feel the growing medium rather than relying on a fixed watering schedule.
Water before severe drying
Give the roots enough moisture before a longer outdoor session, especially when the forecast is warm or windy.
Skip unnecessary feeding
Do not use extra fertilizer as a substitute for gradual acclimation.
Should You Reduce Water Before Transplanting?
Do not deliberately dry seedlings to toughen them. A slight change in watering frequency may occur naturally as outdoor conditions change, but the root ball should not be allowed to become severely dry.
Before transplanting, water as needed so the root ball holds together and the roots are hydrated. Avoid planting seedlings with either bone-dry or saturated growing medium. Good moisture management supports establishment without leaving roots short of air.
Before outdoor exposure
Check the growing medium and water if needed.
During exposure
Inspect plants and pots for wilting or rapid moisture loss.
Before planting
Make sure the root ball is moist but not dripping wet.
Signs Your Seedlings Are Ready for the Garden
A hardened seedling should remain reasonably firm outdoors, tolerate the light it will receive in its final location, and recover normally after a day outside. It should not show repeated severe wilting, widespread bleached patches, or major stem damage. Look at the whole plant rather than judging readiness by height alone.
Root health matters too. A plant with a healthy root system can usually hold its growing medium together when removed from the container. Roots circling heavily around the pot may signal that the plant needs prompt transplanting, but a badly root-bound seedling still needs careful handling.
Choose a mild part of the day to transplant, such as late afternoon or a cloudy period, when conditions are suitable. Water the planting area and the seedling as needed, then place the root ball at the proper depth for that crop. Follow crop-specific guidance because tomatoes and many other vegetables do not all need identical planting methods.
After planting, water thoroughly enough to settle the soil around the roots. Apply mulch where appropriate, leaving room around stems and following the crop’s needs. A temporary shade cover can help reduce stress during warm, bright weather, but remove or adjust it so plants receive suitable light and airflow.
Source: i.pinimg.com
Firm leaves and stems
Plants should not repeatedly collapse or wilt during ordinary outdoor exposure.
No major sun damage
Leaves should not develop spreading bleached or scorched areas after exposure.
Suitable weather
The forecast should match the crop’s needs, including overnight temperatures and wind.
Healthy roots
The root ball should be sufficiently developed to handle transplanting without unnecessary root damage.
What to Do After Transplanting
Continue checking soil moisture after planting. Garden soil may hold water differently from seed-starting mix, so feel the soil near the root zone before watering again. Wind, heat, rainfall, and soil texture all affect how often newly planted seedlings need water.
Watch for new growth over the following days. Some mild, short-lived drooping can occur after transplanting, but persistent wilting, spreading leaf damage, or a collapsing stem suggests a problem that needs attention. Protect the plant from further stress while you identify the cause.
Water the root zone
Direct water toward the soil around the plant instead of relying only on light surface sprinkling.
Protect from extremes
Use suitable temporary shade or shelter during severe heat, wind, or an unexpected cold spell.
Monitor new growth
Look for firm leaves and fresh growth as signs that the plant is settling in.
Common Hardening-Off Problems and How to Fix Them
Most hardening-off problems begin when exposure increases too quickly or weather conditions change unexpectedly. The first response should be to reduce stress, not add fertilizer or other treatments. Move affected seedlings into suitable shelter, check their moisture, and decide whether to repeat an earlier stage.
The appearance of damaged leaves can help narrow down the cause, but one symptom rarely proves exactly what happened. Consider recent sunlight, wind, temperature, watering, and signs of pests or disease before deciding on a remedy.
Source: treecarezone.com
Leaves turn pale or white
Possible cause: sudden exposure to strong sunlight. Move seedlings to bright shade and resume with shorter periods of gentler light once they recover.
Leaf edges turn brown and dry
Possible causes: rapid moisture loss, wind, heat, or sun injury. Check the growing medium, provide shelter, and reduce exposure until conditions improve.
Seedlings wilt outdoors
Possible causes: dry roots, excessive heat, wind, or root damage. Move plants to shade, check moisture, and allow them to recover before trying again.
Stems bend or break
Possible cause: excessive wind or weak stems. Move plants to a sheltered place and increase exposure to air movement more slowly.
Growth slows after transplanting
Possible causes: normal adjustment, cold soil, damaged roots, poor moisture balance, or other growing conditions. Check the root zone and weather before changing fertilizer.
Can You Save Seedlings That Have Been Sunburned?
Mildly sunburned seedlings may recover if their growing points and stems remain healthy. Move them into bright shade, maintain suitable moisture, and avoid more direct sun until they show signs of recovery. Damaged leaf areas will not return to their original color, so judge progress by the condition of new growth.
Severe damage may not be reversible, especially if most leaves or the growing point have been injured. Do not remove every damaged leaf at once unless it is dead or diseased. Remaining healthy leaves help the plant make energy while it recovers.
Reduce light intensity
Return plants to shade or gentle morning light.
Maintain steady moisture
Keep the root ball moist without waterlogging it.
Restart gradually
When new growth looks healthy, begin with shorter exposure periods.
What If the Weather Turns Bad Midway?
Pause the schedule when strong wind, heavy rain, extreme heat, or cold makes outdoor exposure unsafe for the crop. Keep the plants in a suitable protected place until conditions improve. You may need to repeat a stage rather than continue from the number of days already completed.
A longer hardening period is usually preferable to damaging seedlings just to meet a planned planting date. If the garden bed is not ready, keep plants in suitable light and containers while watching for roots that become crowded.
Frost or cold snap
Move tender crops into a protected location and wait for suitable conditions.
Strong wind
Use a sheltered area and resume with gentle airflow.
Heat wave
Use shade and cooler exposure periods, and check moisture more often.
Organic Practices That Support Healthy Seedlings
Healthy organic seedlings start with sound growing practices before the hardening process begins. Use a clean seed-starting mix, suitable containers, and enough light to prevent weak, stretched growth. Good early care makes the outdoor transition easier to manage.
Use mature, well-made compost where it suits the growing system, but do not assume that compost alone provides every nutrient a seedling needs. Seed-starting mixes vary in nutrient content, and very young plants have small root systems. Follow the needs of the crop and the growing medium rather than adding amendments without a clear reason.
Inspect plants for aphids, whiteflies, leaf spots, and other signs of trouble before setting trays outdoors. Outdoor conditions expose seedlings to insects and pathogens that may not have been present indoors. Separate plants with suspicious symptoms until you can assess the problem.
Choose organic pest controls only when needed, and use products according to their labels and permitted uses. Organic does not mean harmless to every plant or insect. Avoid spraying stressed seedlings in hot sunlight, and do not apply an untested homemade mixture that may burn leaves.
Source: gardenary-data.s3.amazonaws.com
Provide adequate light indoors
Keep seedlings from becoming excessively tall and weak before the outdoor transition.
Use clean equipment
Wash reusable trays and tools between batches when disease is a concern.
Build healthy soil
Prepare the garden bed with suitable organic matter and soil care before transplanting.
Use pest controls carefully
Identify the problem first, then select a suitable treatment and follow its label.
Does Organic Certification Change the Hardening Process?
The basic hardening process is the same for certified organic and noncertified seedlings. The main difference is how inputs and production practices are managed when certification rules apply. A gardener who intends to sell certified organic produce should confirm that seed, growing media, fertilizers, and pest-control products meet the applicable program requirements.
For home gardeners, choosing organic seeds and suitable growing inputs can support an organic gardening approach, but those choices do not make plants immune to weather injury. Gradual exposure and crop-appropriate planting conditions remain essential.
Focus on plant needs
Light, moisture, temperature, and wind determine the basic hardening schedule.
Check input requirements
Follow applicable organic production rules when growing for certified organic markets.
Frequently Asked Questions
Q
How long does it take to harden off organic seedlings?
Most indoor-grown vegetable seedlings need about 7 to 14 days of gradual outdoor exposure. Hardy crops may adjust more quickly in mild weather, while delicate seedlings and plants facing variable conditions may need longer. Let plant health and weather guide the schedule rather than following a rigid deadline.
Q
Can I harden off seedlings in one day?
A single day is generally not enough to prepare indoor-grown seedlings for full outdoor exposure. Sudden changes in sunlight, wind, and temperature can damage leaves and roots. Begin in shade, increase exposure in stages, and allow extra time if the plants show stress.
Q
Should I bring seedlings inside every night?
During the early stages, bringing tender seedlings inside or into a protected area at night is a sensible choice. Later, they may remain outside overnight when they have adjusted and the forecast suits the crop. Tomatoes, peppers, cucumbers, and basil need protection from frost and unsuitable cold conditions.
Q
Can I harden off seedlings on a cloudy day?
Yes. A mild, cloudy day can be a good time to start because sunlight is less intense than it is under clear skies. However, clouds do not eliminate wind, cold, or the risk of drying. Continue to check the forecast and protect plants from unfavorable conditions.
Q
Do seedlings need fertilizer while hardening off?
Usually, no extra fertilizer is needed solely because seedlings are being hardened off. Focus on proper light, moisture, and gradual exposure. If plants show signs of a nutrient problem, assess the growing medium and growing conditions before applying a suitable fertilizer.
Q
Can I harden off seedlings in a greenhouse or cold frame?
Yes, provided the plants experience a gradual change in conditions. Open vents or doors as appropriate to increase airflow, and gradually expose plants to the light and temperatures they will encounter outdoors. Greenhouses and cold frames can heat up quickly, so monitor temperatures and avoid leaving tender seedlings in excessive heat.
Q
What should I do if my seedlings wilt during hardening off?
Move the seedlings to shade and shelter, then check the moisture in the root ball. Water if the growing medium is dry, and allow excess water to drain if it is saturated. Once the plants recover, restart with shorter sessions and gentler conditions. Persistent wilting may indicate root damage, disease, or another problem that needs closer inspection.
✦ Wrapping Up
Conclusion
Hardening off organic seedlings is a simple but essential step between indoor seed starting and outdoor planting. By giving young vegetables 7 to 14 days to adjust to stronger light, moving air, and changing temperatures, you can reduce avoidable stress and prepare them for life in the garden.
Start in shade, increase exposure gradually, keep the root ball moist, and check the weather each day. Adjust the schedule to the crop and your local conditions, especially when growing tender vegetables in areas with cold springs or intense early-season heat.
Once seedlings tolerate outdoor conditions and the soil and forecast suit their needs, transplant them carefully and water the root zone. A patient approach helps protect the time and effort you invested in raising your plants from seed.
💡 Key Takeaway
Choose a mild day to begin. Place your healthy seedlings outdoors in a sheltered, shaded spot for one to two hours, check their moisture, and repeat the process daily while slowly increasing light and exposure. Transplant only when the plants and weather are ready.
I enjoy sharing simple gardening ideas, lawn care tips, and honest product reviews that help make outdoor work easier. From home gardening guides to helpful tools and lawn care advice, I write easy-to-follow content to help readers create a healthier and better-looking outdoor space without wasting time or money.