As an Amazon Associate, I earn from qualifying purchases.
To install metal landscape edging, mark the border, dig a narrow trench, position the edging at the desired height, connect the sections, secure them with compatible stakes, and backfill firmly. Check alignment and stability before adding mulch, gravel, or soil.
Across the United States, metal landscape edging helps homeowners create clean borders between lawns, flower beds, gravel paths, driveways, and mulched planting areas. It is especially useful for defining front-yard landscaping, organizing backyard gardens, and separating grass from decorative stone. Steel and aluminum edging are common options, but the best choice depends on the intended use, soil conditions, desired appearance, and installation method.
Most small residential edging projects are manageable for a homeowner with basic landscaping tools. The key is to plan the finished grade before digging, choose an edging system designed for the intended shape, and follow its installation instructions. Some products are driven into a narrow soil slot, while others require a trench, separate stakes, connectors, or fasteners. Treating every metal edging system the same can lead to bent sections, loose joints, or uneven borders.
This guide explains how to install metal landscape edging in typical U.S. residential yards, including straight runs, curves, corners, and uneven ground. It also covers tool selection, safe cutting, drainage considerations, common installation problems, and maintenance. The instructions are general guidance rather than a substitute for the manufacturer’s specifications or local utility-location requirements.
Metal landscape edging is a narrow strip or formed section of metal installed along a landscape boundary. It creates a physical and visual separation between adjoining materials, such as turf and mulch, lawn and gravel, or planting beds and walkways. Depending on its design, it can also help contain loose landscape materials and maintain the shape of a garden bed.
Unlike thick concrete or masonry borders, many metal edging systems have a relatively slim profile. When installed near the finished soil level, they can create a defined boundary without becoming a prominent feature in the yard. Their effectiveness depends on the edging’s height, thickness, support system, installation depth, and the amount of pressure placed against it.
Source: ahlcorten.com
Steel edging
Steel is generally rigid and suitable for long straight runs and clearly defined borders. Flexible versions can follow gradual curves. Standard steel can corrode, while galvanized and weathering-steel products have different protective characteristics.
Aluminum edging
Aluminum is lightweight and often easier to handle than steel. It can be suitable for lawn and garden borders, but thinner sections may bend or deform under impact or pressure.
Weathering steel edging
Weathering steel develops a rust-colored patina when exposed to suitable outdoor conditions. The finish and corrosion behavior depend on the product and environment, and runoff can stain nearby concrete, stone, or other surfaces.
Edging with integrated stakes
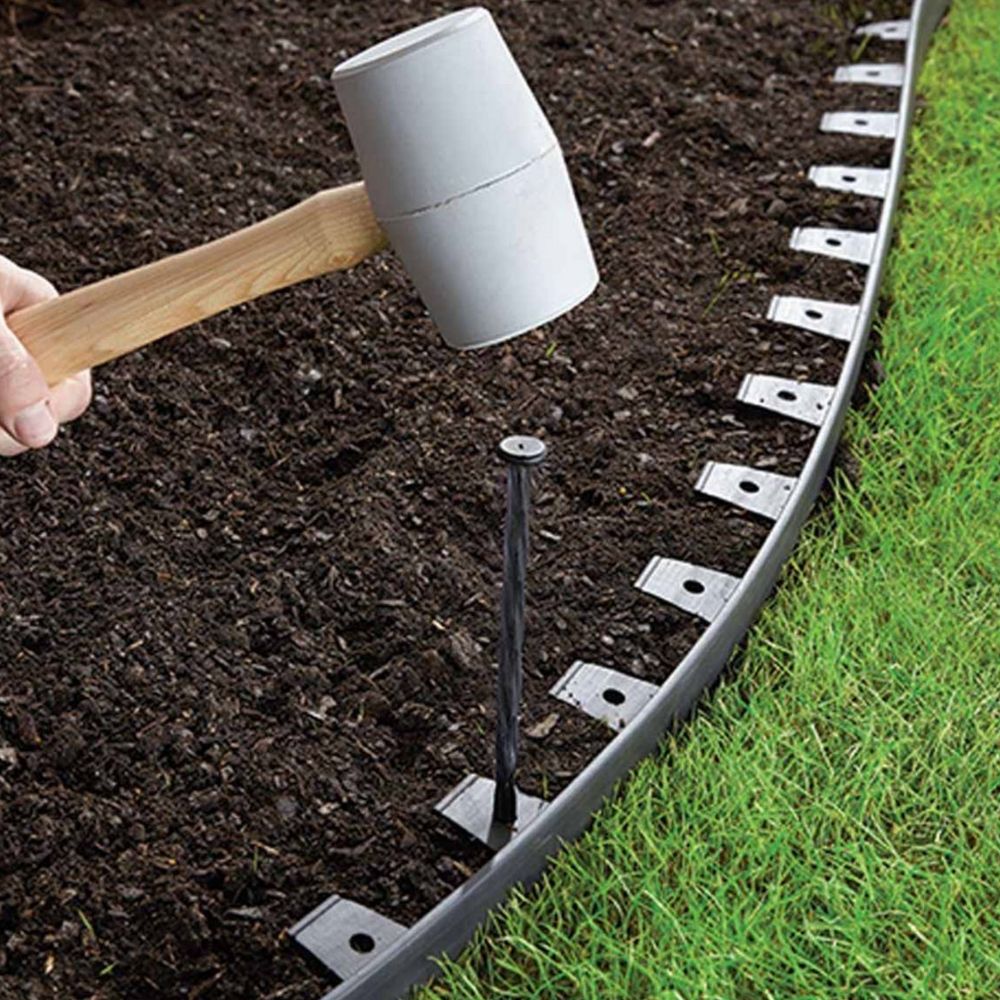
Some systems have tabs, spikes, or stake sleeves built into the edging. Others require separate stakes, clips, or fasteners, so check the complete system before installation.
Where Does Metal Landscape Edging Work Best?
Metal edging works well around flower beds, ornamental grasses, trees, shrubs, gravel paths, and lawn borders. It is also useful for creating geometric garden layouts and separating different mulch colors or decorative aggregates.
Standard decorative edging is not automatically suitable for retaining substantial amounts of soil, supporting paving, or containing vehicle loads. Use a system specifically designed for those conditions when the border must resist significant lateral pressure or traffic.
Good applications
Low garden beds, lawn boundaries, decorative gravel, mulch separation, and defined planting areas.
Applications needing additional planning
Steep slopes, raised beds, driveway edges, areas subject to mower or vehicle impacts, and locations with substantial elevation changes.
Tools and Materials Needed
Gather the edging, compatible stakes, connectors, measuring tools, digging equipment, and protective gear before starting. The exact list depends on the product. A lightweight aluminum system with integrated spikes may require fewer separate components than a thicker steel system with independent stakes and bolted joints.
Source: steelscapes.co.uk
Measuring and marking tools
Tape measure, marking paint or chalk, string line, landscape stakes, and a garden hose for laying out curves.
Digging tools
A flat-blade spade, edging shovel, hand trowel, or trenching tool appropriate for the soil and trench dimensions.
Installation tools
Rubber mallet, compatible installation block, hammer where permitted by the product instructions, and a level or straightedge.
Fastening supplies
Manufacturer-approved stakes, connectors, clips, screws, or bolts. Confirm that the fasteners are compatible with the metal and intended outdoor conditions.
Protective equipment
Cut-resistant work gloves, safety glasses, sturdy footwear, and additional protection specified for any cutting equipment.
Optional cutting equipment
A suitable metal-cutting tool and a file or deburring tool, but only if the product requires cutting and the manufacturer’s instructions permit the method.
Do You Need Sand or Landscape Fabric?
Not every metal edging installation needs a sand base. A narrow garden border in reasonably firm soil may need only a properly prepared trench. Sand can help with leveling in certain designed assemblies, but adding it automatically may create an unstable base if it is not appropriate for the soil and application.
Landscape fabric is optional and depends on the planting or gravel design. If used, it should be installed so it does not interfere with the edging’s anchoring system, drainage, or future maintenance. Fabric alone does not eliminate weeds, and soil or organic debris can still accumulate above it.
For ordinary garden borders
Prepare a clean, stable trench and follow the edging manufacturer’s guidance for the base material.
For gravel paths
Plan the edging alongside the gravel base and finished surface elevations to prevent loose aggregate from spilling over.
Step 1: Plan the Layout and Measure the Border
Start by deciding exactly where the edging will run and how high it should sit after installation. Planning the finished line first prevents unnecessary digging, poorly positioned joints, and visible height changes. Walk around the area and view the proposed border from several directions before committing to the layout.
Source: i.ytimg.com
Measure Straight Runs and Curves
For a straight border, measure the distance between the starting and ending points. For a curved border, lay a flexible garden hose along the intended path and measure its length, or use a flexible tape measure. Include returns, corners, and short connecting sections in the total.
Add a modest allowance for cuts and layout adjustments when purchasing materials. The necessary allowance depends on section lengths, corner details, and whether offcuts can be reused. Avoid assuming that every edging section can be bent or cut without affecting its connection system.
Straight lines
Use stakes and string to create a visible reference line and check that it aligns with nearby paths, fences, or planting beds.
Curves
Use a hose or flexible marking line to test the shape. Choose a product with a suitable minimum bend radius rather than forcing a rigid strip into a tight curve.
Corners
Decide whether to use manufacturer-made corner pieces, compatible connectors, or gradual bends allowed by the system.
Check Underground Utilities Before Digging
In the United States, contact 811 or use the applicable state 811 request service before digging. Follow the required notice period, wait for the relevant utility responses, and respect the markings and instructions provided. Private irrigation lines, landscape lighting wires, and other homeowner-installed services may not be included in public utility marking, so identify those separately.
If the proposed border crosses a marked utility route or the markings are unclear, stop and resolve the conflict before excavating. Never assume a shallow trench is too small to reach a buried line.
Public utility lines
Use the official 811 process and follow the local requirements for marking and safe digging.
Private landscape systems
Identify irrigation, lighting, invisible-fence wiring, and other private services before digging.
Step 2: Prepare the Ground and Dig the Trench
Prepare a narrow, consistent trench along the marked route. Its width and depth should match the edging profile, required burial depth, anchoring system, and finished surface height. There is no single trench depth that works for every metal edging product.
Remove turf, roots, stones, and loose material that could prevent the edging from sitting correctly. Keep the trench aligned with the marking line, and check the height at regular intervals. If the ground is uneven, determine whether the edging should follow the terrain or maintain a particular finished elevation.
Source: lawnedge.com.au
Set the Correct Installation Depth
The correct depth depends on the edging’s overall height and how much metal needs to remain visible. For a lawn border, the top is often set close to the surrounding soil or turf level to reduce interference with mowing. A decorative gravel border may require a different exposed height to contain the aggregate.
Do not bury weathering steel or another specialty product beyond the manufacturer’s permitted installation conditions. The buried portion experiences different moisture and soil exposure from the visible surface, which can affect corrosion and service life.
For lawn edges
Aim for a finished height that creates a clean boundary without creating a hazardous protruding strip or interfering with mowing.
For mulch and gravel beds
Leave enough exposed height to contain the material while allowing for settlement and the intended finished grade.
For uneven ground
Adjust the trench gradually rather than forcing the edging to twist or lean to match sudden changes in elevation.
What If the Soil Is Hard or Rocky?
If the soil is compacted, dry, or rocky, loosen it with a suitable hand tool and remove obstructions rather than forcing thin edging or stakes into the ground. A preformed trench can be especially helpful in dense soil.
If you encounter a large buried rock, concrete, or an unexpected obstruction, stop and assess the location. Do not continue striking the edging forcefully because the metal can buckle, the stakes can deform, or a hidden utility can be damaged.
Hard soil
Loosen the trench carefully and remove compacted clods before positioning the edging.
Rocky ground
Clear the immediate installation path and adjust the route if necessary without compromising the intended border.
Step 3: Position the Metal Landscape Edging
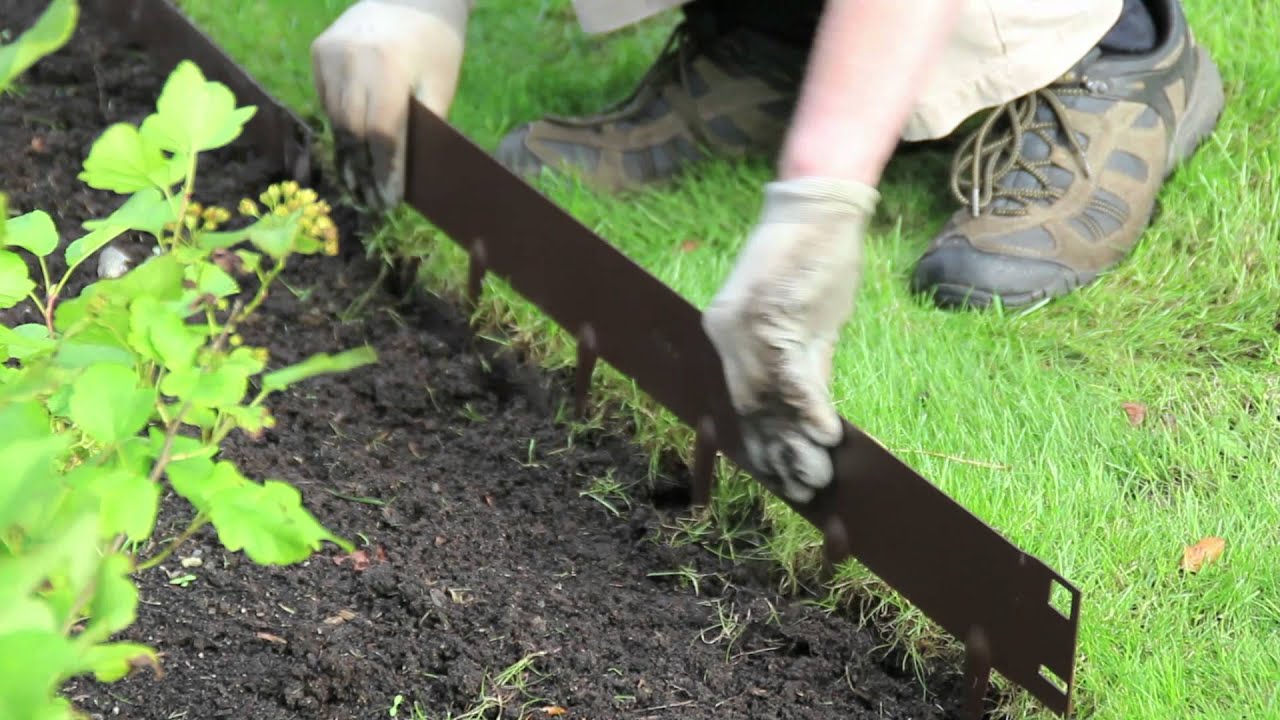
Place the edging into the prepared trench with its correct face and orientation toward the intended landscape area. Check the manufacturer’s instructions for stake sleeves, tabs, connectors, and any directional features before inserting the sections.
Begin at a convenient end or reference point and work along the marked line. Keep the top edge at the planned finished height. Use a straightedge, level where appropriate, or string line to check alignment before securing each section fully.
Source: i.pinimg.com
Install Straight Sections Without Buckling
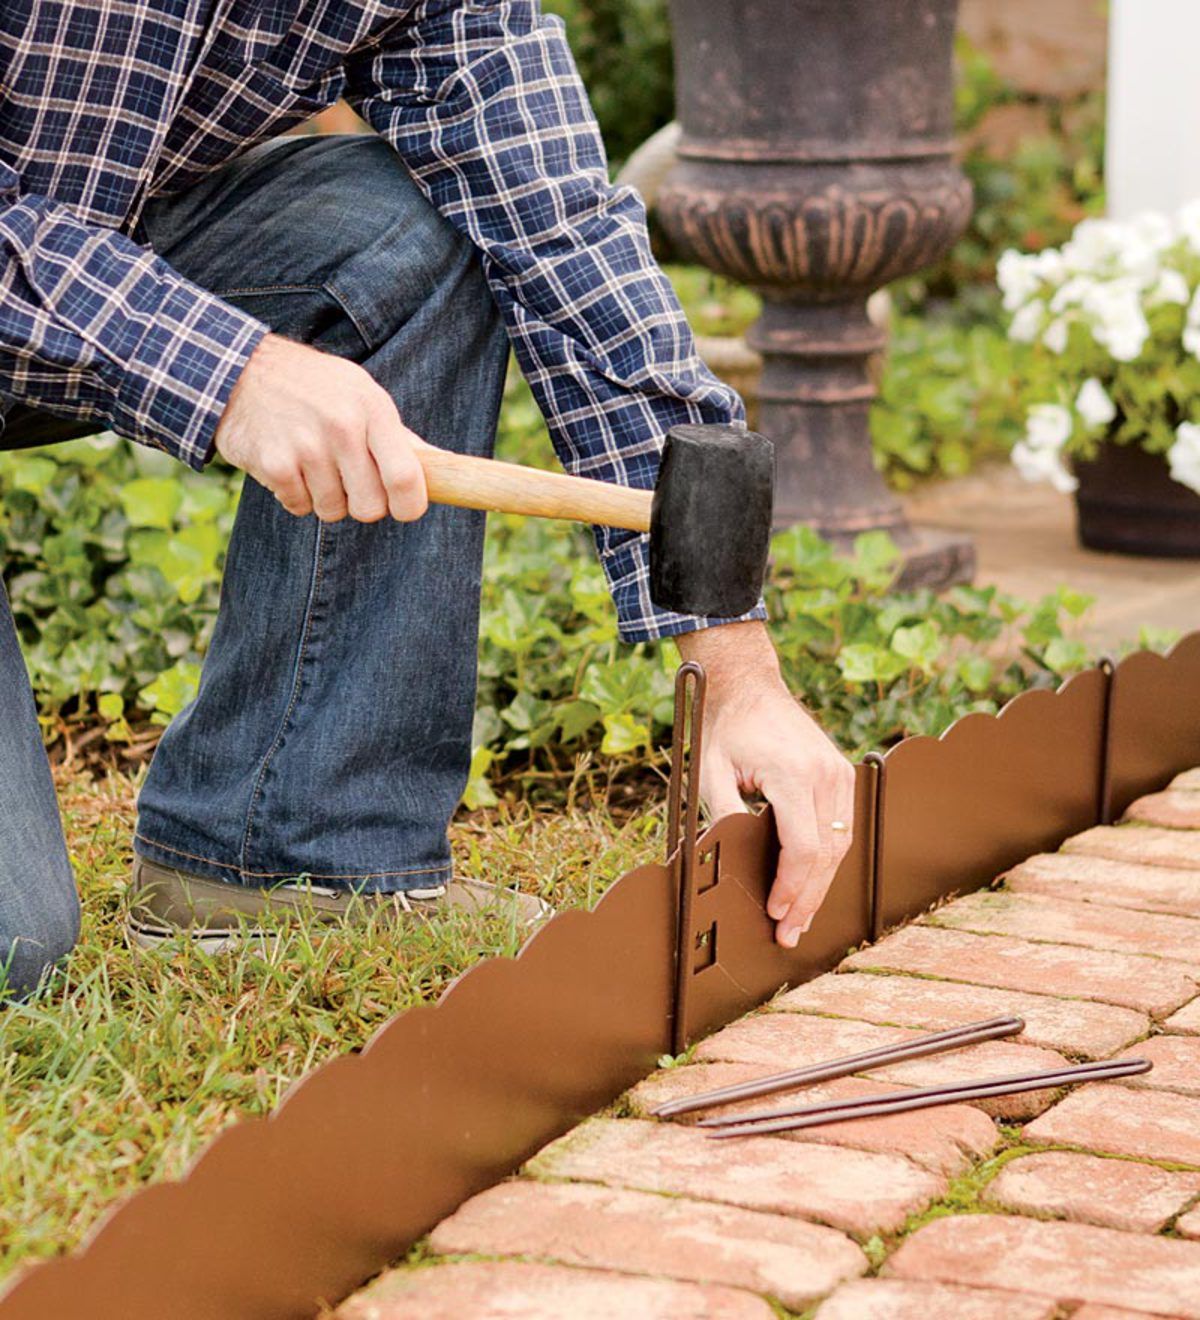
Set the first section in position and confirm that it is aligned with the layout. Where the system is designed to be driven into the soil, use the recommended installation block or striking surface to distribute force. Tap gently and evenly rather than hitting the exposed edge directly.
If the edging starts to bend, lean, or rise unevenly, stop and correct the obstruction or trench depth. Repeatedly striking a section that is not properly supported can permanently distort the metal.
Check the top edge
Maintain a consistent visible height relative to the intended finished soil, turf, mulch, or gravel level.
Protect the metal
Use a compatible block or the manufacturer’s recommended installation tool to prevent dents and deformation.
Join Adjacent Sections Securely
Connect neighboring pieces using the supplied clips, interlocking ends, sleeves, or approved fasteners. Keep the joints aligned and fully engaged according to the product instructions. Some systems require a slight overlap, while others use a dedicated connector or a specified joint gap.
Position joints so they can be secured properly and supported by stakes where required. Do not improvise with incompatible fasteners or assume that a simple overlap will provide adequate stability for every product.
Integrated connectors
Engage the connection fully and check that adjacent sections remain aligned.
Separate fasteners
Use the specified screws, bolts, or clips and tighten them as directed without stripping threads or distorting the metal.
Step 4: Secure the Edging With Stakes
Secure the edging with the stakes, tabs, or anchoring components designed for the product. Stakes help keep the metal upright, maintain its alignment, and resist movement as soil settles or landscape materials press against the border.
Stake spacing varies with the edging’s height, thickness, flexibility, soil conditions, and manufacturer’s specifications. Straight, low borders in firm soil may require less support than taller borders, curves, or areas exposed to pressure. Use the specified spacing rather than applying a universal measurement to every installation.
Source: i.ytimg.com
How to Install Edging Stakes
Place the stakes at the designated locations, including the points needed to support joints, ends, curves, and corners. Drive or fasten each stake according to the system’s instructions. Keep the edging aligned while securing the stakes so the border does not drift away from the marked line.
If a stake bends or refuses to enter the ground, stop rather than applying excessive force. Remove the obstruction or prepare the soil more carefully. Replace damaged hardware with compatible components.
At joints
Provide the support required by the connection design so neighboring sections do not separate or shift.
Along curves
Follow the manufacturer’s guidance for additional support where the edging tends to spring back or change shape.
At ends and corners
Secure exposed ends and directional changes to reduce the chance of movement or separation.
How to Avoid Damaging the Edging
Do not strike a thin metal edge directly with a heavy hammer unless the installation instructions specifically call for that method. Direct impacts can create dents, sharp deformations, or an uneven top line.
Where the edging uses separate stakes and screws, make sure the fastening system is correctly positioned before tightening. Do not use a stake arrangement intended for a different metal thickness or edging profile.
Use the correct striking method
Choose a rubber mallet or installation block when specified by the manufacturer.
Inspect each fixing
Confirm that stakes are stable, fasteners are secure, and the edging has not twisted during installation.
Step 5: Shape Curves and Corners
Shape the edging gradually to follow the intended border, using a product designed for the required radius. Flexible aluminum and certain thin steel systems can accommodate gentle curves, while thicker or more rigid sections may need purpose-made corner pieces or preformed bends.
Avoid sharply bending metal that is not designed for that treatment. Kinks can weaken the section, damage its protective coating, interfere with the connectors, and create an uneven finished line.
Source: ahlcorten.com
How to Create Smooth Curves
Lay out the curve before final installation. Apply gradual pressure over a broad area and compare the emerging shape with the marked line. Secure the edging progressively so it follows the layout without springing away from the intended curve.
If the edging resists bending or begins to crease, stop. Use a compatible flexible product or a manufacturer-approved curved component rather than forcing the material.
Broad curves
Form the curve gradually and check it from several viewing angles before securing all the stakes.
Tight curves
Use a product rated for the required radius or a compatible preformed section.
How to Finish Corners and Endpoints
Use compatible corner connectors or factory-formed corner pieces where available. For systems that permit bending, form the corner according to the manufacturer’s instructions and maintain a secure connection.
Finish exposed ends using the intended end caps, folded returns, or other approved details. Sharp, unfinished edges should not be left where people, pets, or maintenance equipment could contact them.
Clean corner transitions
Check the height and alignment on both sides of the corner and confirm that the joint is stable.
Safe endpoints
Use the manufacturer’s approved finishing components and avoid exposed sharp projections.
Step 6: Backfill the Trench and Finish the Border
Once the edging is aligned and secured, backfill the trench with suitable soil and firm it carefully on the sides. Work in manageable layers so the edging remains upright and the ground settles evenly. Avoid pushing so much soil against one side that it shifts the border.
Restore the surrounding turf, add mulch, or spread gravel to the intended finished level. Keep drainage paths open and ensure that surface water is not being redirected toward a house foundation or another area where it could cause problems.
Source: lawnedge.com.au
Set the Finished Height Correctly
For lawn installations, check that the top edge will not create an unexpected obstacle for mowing or routine foot traffic. The appropriate height depends on the edging profile and the adjacent surfaces. Do not assume every metal border should be completely hidden.
For mulch and gravel installations, account for the material depth and likely settling. If the edging is too low, material can spill across the boundary. If it is unnecessarily high, the exposed metal may become a trip or contact hazard.
Restore the lawn
Replace displaced turf or soil and check that the border meets the grass cleanly.
Finish planting beds
Add mulch or soil without covering drainage openings or exceeding the product’s recommended burial depth.
Finish gravel paths
Rake the aggregate into a consistent surface and confirm that the edging retains the intended amount of material.
Inspect the Installation Before Cleaning Up
Walk the entire border and look for leaning sections, loose joints, visible gaps, exposed sharp edges, and uneven transitions. Gently check stability without placing hands against sharp metal edges.
Correct problems before the ground becomes difficult to reopen. It is usually easier to reposition a section immediately than to repair it after soil compacts or planting materials cover the joints.
Alignment
The top edge should follow the planned line without unexpected bends, dips, or protrusions.
Stability
The sections and joints should remain in position when the surrounding soil is gently pressed into place.
Drainage
Water should continue to move along its intended route rather than pooling behind the edging.
How Much Metal Landscape Edging Do You Need?
Calculate the total length of the border before ordering edging. Measure straight runs individually, measure curves along the intended path, and include every return and corner. Divide the total by the usable length of each section, then round up to a whole number.
Usable length may be shorter than the nominal section length if connectors, overlaps, or end details consume part of each piece. Check the manufacturer’s dimensions and account for cuts and unavoidable waste.
Source: i.pinimg.com
Example Calculation for a Garden Bed
Suppose a rectangular garden bed measures 12 feet by 8 feet and requires edging around all four sides. Its perimeter is 2 times the sum of 12 feet and 8 feet, which equals 40 linear feet.
If each edging section provides 8 feet of usable length, divide 40 by 8 to get 5 sections. If the design requires extra material for cuts, overlaps, or corner details, purchase additional sections as needed. This example assumes all four sides are edged and does not account for openings or special corner hardware.
Rectangular beds
Use the perimeter formula: 2 times length plus width.
Circular beds
Use circumference: pi multiplied by the diameter, or approximately 3.14 times the diameter.
Irregular borders
Measure along the actual proposed line using a flexible tape or hose rather than estimating from the bed’s widest dimensions.
Steel vs. Aluminum Landscape Edging
Steel and aluminum can both create effective landscape borders, but they differ in weight, rigidity, corrosion behavior, and ease of shaping. The best option is the material and product that match the project’s loads, layout, exposure, and maintenance expectations.
Steel may be preferable when a rigid profile is needed, while a suitable aluminum system can be convenient for a lightweight residential border. Product thickness, alloy, finish, stake design, and installation quality matter as much as the broad material category.
Source: steelscapes.co.uk
When to Choose Steel
Consider steel when you need a firm border for long straight sections or a more substantial appearance. Galvanized steel has a zinc coating intended to protect the underlying metal, while weathering steel develops a characteristic patina under suitable conditions.
Steel is not immune to corrosion. Damaged coatings, persistent moisture, soil chemistry, and incompatible contact materials can affect performance. Select a product intended for the actual installation environment.
Potential advantages
Rigid profiles, a substantial feel, and options for straight, curved, or architectural landscape details.
Potential limitations
Weight, harder cutting and shaping for some products, and corrosion risks that depend on the finish and exposure.
When to Choose Aluminum
Consider aluminum for lightweight residential borders and layouts that require manageable sections. Certain aluminum products are easy to shape into gradual curves and can be convenient for small garden beds.
Aluminum can bend under impact, especially when the profile is thin or poorly supported. Check the intended application and the supplied anchoring method before using it beside gravel paths or other areas that exert pressure.
Potential advantages
Lower handling weight and flexibility in products designed for curved layouts.
Potential limitations
Some profiles are less resistant to deformation, and the available finishes and connection systems vary by product.
Common Metal Landscape Edging Installation Problems
Most installation problems come from inadequate ground preparation, incorrect installation depth, unsuitable stake spacing, poorly connected sections, or using a product outside its intended application. Diagnose the cause before attempting a repair.
Source: i.ytimg.com
The Edging Keeps Leaning
Leaning can result from loose soil, insufficient anchoring, uneven backfill, pressure from mulch or gravel, or a section that was forced into an unsuitable curve. Remove enough surrounding material to inspect the affected section and its stakes.
Reposition the edging, correct the trench, and install the required supports. If the border must hold back a significant amount of soil, confirm that the product is rated for that purpose before reinstalling it.
Likely cause
Unstable soil, inadequate anchoring, or lateral pressure.
Correction
Prepare a stable trench, restore the correct alignment, and use the specified anchoring system.
The Top Edge Looks Uneven
An uneven top edge usually indicates inconsistent trench depth, uneven ground, or movement during staking and backfilling. Compare the affected area with the original string line and intended finished grade.
Loosen the soil around the problem section and reset it gradually. Avoid trying to correct major height differences by repeatedly hammering the top edge.
Likely cause
Inconsistent trench preparation or an incorrect reference height.
Correction
Regrade the trench locally and reset the section using a consistent reference line.
Sections Separate at the Joints
Separated joints can indicate an incomplete connector, incompatible hardware, movement in the ground, or missing support. Check the joint and the adjacent stakes before trying to force the pieces together.
Reconnect the sections using the manufacturer’s approved method and replace damaged connectors if necessary. Add support only where the system permits it.
Likely cause
Loose or incompatible connectors, insufficient joint support, or movement.
Correction
Reconnect and secure the joint, then check the surrounding sections for the source of movement.
The Metal Buckles During Installation
Buckling can occur when the trench contains an obstruction, the metal is struck directly, the product is forced into a tight curve, or the material is too thin for the intended use. Stop installation as soon as deformation appears.
Remove the pressure and inspect the section. Replace permanently damaged material when it cannot be safely restored, and choose a suitable profile or curve component for the location.
Likely cause
Excessive impact, an obstructed trench, or an unsuitable bend radius.
Correction
Clear the obstruction, use the recommended installation technique, and replace damaged sections where needed.
Water Collects Behind the Edging
Standing water may indicate that the edging interrupts the existing drainage route, the surrounding grade directs runoff into a low spot, or the soil drains poorly. Metal edging should not be used as an accidental dam across a natural drainage path.
Assess the surface slope and the intended route of runoff before changing the installation. If water approaches the foundation, repeatedly floods the area, or affects neighboring property, consult a qualified drainage or landscaping professional.
Likely cause
Poor grading, blocked drainage, or an edging line that obstructs runoff.
Correction
Restore a suitable drainage route without directing water toward buildings or other vulnerable areas.
Safety Tips for Installing Metal Landscape Edging
Metal edging can have sharp edges and pointed stakes that cause cuts or puncture injuries. Handle the material carefully, keep the work area clear, and protect your hands and eyes throughout the installation.
Source: i.ytimg.com
Wear protective equipment
Use cut-resistant gloves, safety glasses, sturdy footwear, and any additional equipment required by the manufacturer or cutting-tool instructions.
Handle cut edges carefully
Deburr cut edges with an appropriate tool and install the recommended end caps or protective finishing components.
Use cutting tools correctly
Follow the tool manufacturer’s instructions, secure the workpiece, and keep bystanders away. Do not improvise a cutting method that is not suitable for the metal.
Check for utilities
Complete the 811 process and identify private irrigation or landscape wiring before digging.
Avoid unsuitable structural uses
Do not rely on decorative edging to retain significant soil, support heavy paving, or withstand vehicle loads unless the system is specifically designed and installed for that purpose.
Keep the site clear
Store metal sections and stakes where children and pets cannot contact the sharp ends.
When to Call a Professional
Seek qualified help if the border involves substantial soil retention, a steep slope, complex drainage, heavy paving, vehicle traffic, or difficult utility conflicts. A professional can determine whether the planned edging system is suitable for the site and whether additional design or anchoring is needed.
Professional assistance is also sensible when the product requires specialized cutting, welding, or fabrication that you cannot perform safely with the available tools.
Structural or retaining applications
Choose a system specifically designed for the load and site conditions, with professional design where warranted.
Drainage and foundation concerns
Obtain qualified advice before changing grades or redirecting water near buildings.
Metal Landscape Edging Maintenance
Inspect the edging periodically, especially after heavy rain, freeze-thaw cycles, landscaping work, or the first settling period after installation. Look for loose stakes, separated joints, leaning sections, corrosion, and areas where mulch or gravel has spilled across the border.
Correct small alignment problems before they become larger. Remove accumulated soil and organic material where needed, maintain the intended drainage route, and use only repair components and coatings compatible with the metal and its existing finish.
Source: ahlcorten.com
Prevent Corrosion and Finish Damage
Corrosion resistance depends on the metal type, coating, exposure, and surrounding conditions. Avoid damaging protective coatings during installation, and follow the manufacturer’s guidance for touch-up products or maintenance.
Weathering steel develops a changing surface patina rather than maintaining a uniform painted finish. Its runoff can stain nearby paving or stone, so consider surface protection and placement before installation. Do not apply an incompatible coating simply to change the color or appearance.
Protect coated metal
Avoid unnecessary scratches and use compatible repair products when the manufacturer recommends them.
Monitor joints and stakes
Replace damaged connectors and restore stable anchoring when sections begin to shift.
Keep drainage working
Remove material that blocks intended runoff routes and correct recurring pooling problems.
Frequently Asked Questions
Q
How deep should metal landscape edging be installed?
The correct depth depends on the edging’s overall height, anchoring design, adjacent surface, and intended use. Follow the manufacturer’s instructions rather than applying one depth to every product. The top should finish at the planned level relative to the lawn, soil, mulch, or gravel.
Q
Can you install metal landscape edging without digging a trench?
Some systems are designed to be driven directly into prepared soil using integrated spikes or a specified installation tool. Other products need a trench to establish the correct depth and alignment. Check the installation instructions and do not force a trench-free method onto a product that requires excavation.
Q
How far apart should landscape edging stakes be?
Stake spacing varies with the product’s height, thickness, flexibility, soil conditions, and expected pressure. Follow the manufacturer’s spacing requirements and pay particular attention to joints, ends, corners, and curves. Taller or more flexible edging may require more support than a low, rigid border.
Q
Can metal landscape edging be bent around curves?
Yes, if the product is designed for bending and the curve falls within its permitted radius. Form gradual curves with controlled pressure and avoid sharp bends that can create kinks or damage connectors. For tight corners or rigid edging, use compatible preformed corner pieces or another approved solution.
Q
Is steel or aluminum better for garden edging?
Neither material is best for every project. Steel can provide a rigid border, while suitable aluminum products are lightweight and often easier to handle. Compare the specific product’s thickness, finish, anchoring system, flexibility, and intended application before choosing.
Q
Do I need to call 811 before installing garden edging?
In the United States, contact 811 or use your state’s official utility-location request service before digging. Follow the local notice and marking requirements. Remember that private irrigation lines, landscape lighting, and other homeowner-installed services may require separate identification.
Q
Can metal landscape edging hold back soil on a slope?
Ordinary decorative edging should not be assumed to function as a retaining wall. Its suitability depends on the product design, height, soil pressure, slope, drainage, and anchoring. For substantial elevation changes or soil retention, use a system designed for those loads and seek qualified professional advice when needed.
Q
How do I stop metal landscape edging from leaning?
Check for loose soil, inadequate stakes, incomplete joints, uneven backfill, and pressure from mulch or gravel. Reopen the affected section, correct the trench and alignment, and secure it using the recommended anchoring system. If the edging is being used to retain more soil than it was designed for, replace it with an appropriate system.
✦ Wrapping Up
Conclusion
Installing metal landscape edging starts with an accurate layout, appropriate materials, and careful ground preparation. Once the trench is ready, position the sections at the correct finished height, connect them properly, secure the required stakes, and shape curves without forcing the metal. Backfilling carefully and checking the completed border helps prevent leaning, uneven joints, and drainage issues.
For most residential garden borders, the most reliable installation is one that follows the specific product instructions and matches the site’s soil, slope, moisture exposure, and intended use. Take time to check underground utilities, protect yourself from sharp edges, and choose a different system if the project requires substantial soil retention or structural support.
💡 Key Takeaway
Before starting, measure the border, contact 811, check your edging manufacturer’s installation instructions, and gather compatible stakes and connectors. Prepare the trench, install and align the sections, secure the joints, backfill carefully, and inspect the finished border for stability and drainage.
I enjoy sharing simple gardening ideas, lawn care tips, and honest product reviews that help make outdoor work easier. From home gardening guides to helpful tools and lawn care advice, I write easy-to-follow content to help readers create a healthier and better-looking outdoor space without wasting time or money.