As an Amazon Associate, I earn from qualifying purchases.
To make a garden border with wood, mark the edge of your garden bed, dig a shallow trench, cut suitable lumber to size, set the wood in place, secure it with stakes, and backfill the soil. Choose untreated naturally durable wood or suitable landscape lumber, and keep the finished border level and stable.
A wooden garden border can give an American backyard a clean, finished look without the cost or effort of a large landscaping project. It works around flower beds, vegetable plots, trees, and paths. Whether you have a small suburban yard in Ohio, a sunny garden in Texas, or a sloping backyard in the Pacific Northwest, the basic method is much the same. The right wood and a well-prepared base can make the job easier and help the border last longer.
The key is to treat the border as a landscape feature, not just a row of boards on the ground. Wood that sits in wet soil may decay faster, while loose stakes can let boards shift after rain or frost. A little planning before you dig helps avoid these problems. This guide explains how to choose materials, measure the layout, install the border, and care for it through changing seasons.
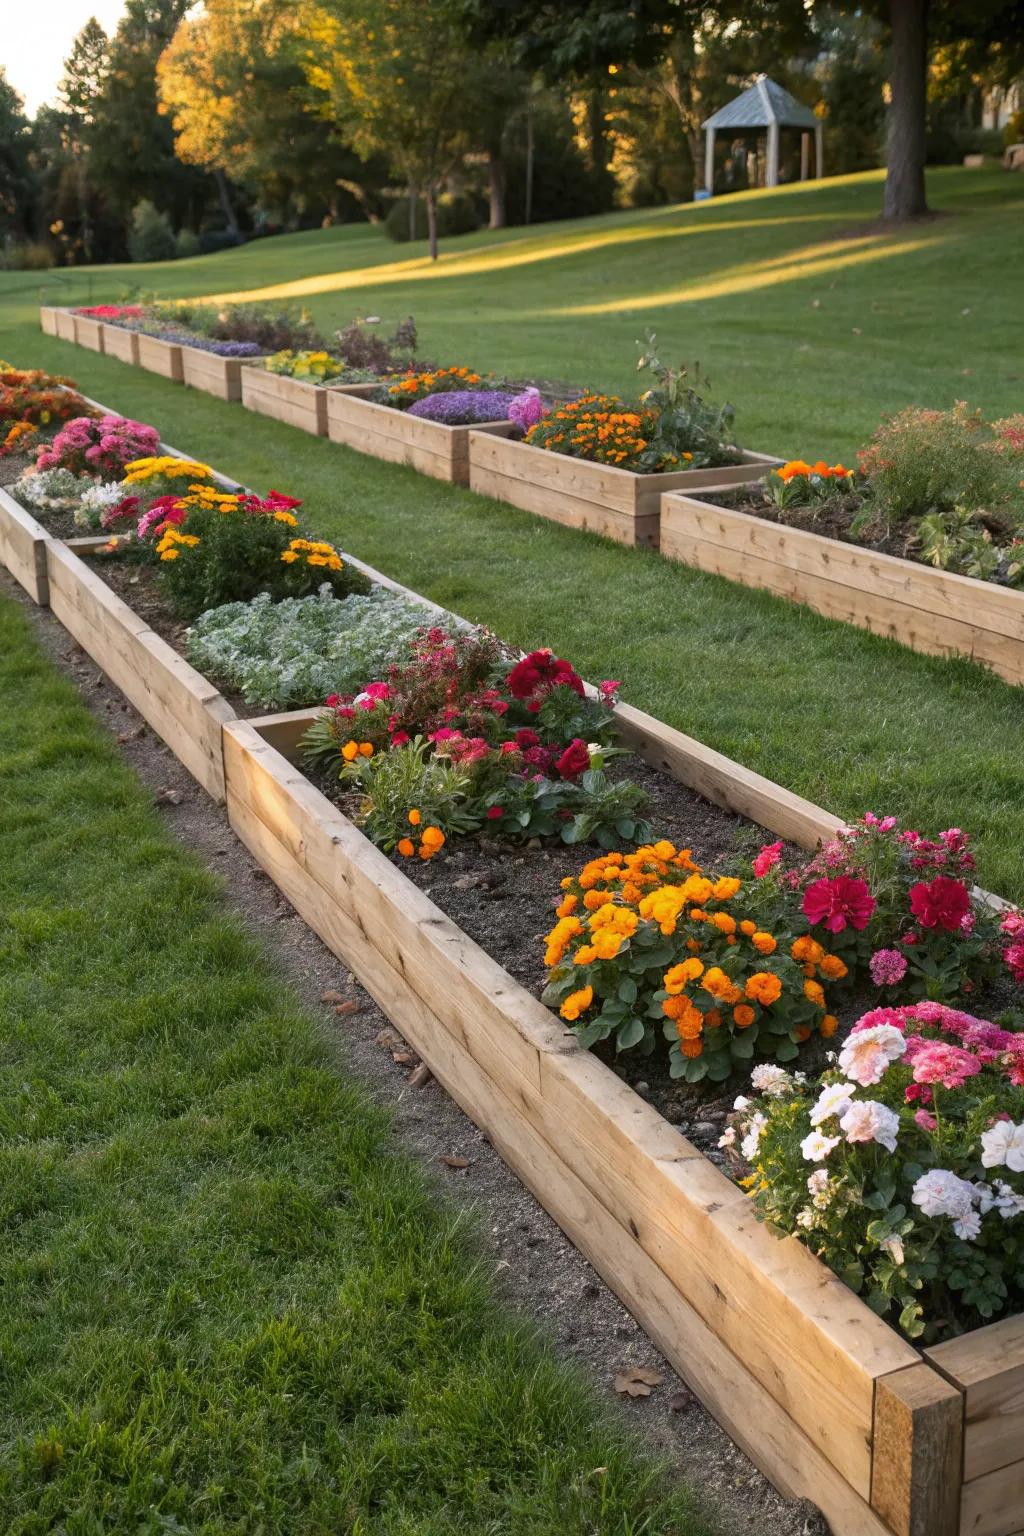
Wood is a flexible way to separate a planting bed from a lawn, path, or other part of the yard. Its natural color blends with plants, mulch, stone, and grass. It can also give a loose garden layout a clear shape without making the space feel too formal.
Unlike some rigid edging materials, wood is easy to cut with common tools. Straight boards suit simple rectangular beds, while shorter pieces can follow broad curves. Timber edging can also create a slightly raised boundary that helps keep mulch and loose soil in place, although it should not be treated as a retaining wall unless it has been designed for that purpose.
Wood does need care. Moist soil, repeated wetting, insects, and direct contact with the ground can shorten its useful life. Choosing the right material and allowing water to drain are often more valuable than adding decorative finishes.
Source: i.pinimg.com
Natural appearance
Wood pairs well with flowers, vegetables, shrubs, and informal garden designs.
Easy to customize
Boards can be cut to fit the bed and adjusted for straight edges or gentle curves.
Simple installation
Most low borders need basic measuring tools, a shovel, a saw, stakes, and suitable fasteners.
Ongoing maintenance
Wood may weather, split, shift, or decay, so inspect it regularly and replace damaged sections when needed.
Is a wooden border right for your yard?
A wooden border is a good fit when you want a warm, natural edge and can accept eventual repairs or replacement. It works especially well for low flower beds and vegetable gardens. If the site stays waterlogged, has heavy soil movement, or needs to hold back a large amount of earth, consider a different edging material or seek professional advice.
Best use
Low garden beds, lawn edges, paths, and simple landscape divisions.
Use caution
Steep slopes, areas with standing water, and locations where a border would need to resist substantial soil pressure.
Choose the Best Wood for Garden Edging
The best wood depends on your budget, local climate, soil conditions, and the look you want. Wood that naturally resists decay can work well for a low border, while properly rated treated lumber may suit other applications. No wood type lasts forever in direct soil contact, especially where drainage is poor.
For a simple border, choose straight boards without major cracks, severe warping, or loose knots that weaken the section. The board should be thick enough to stay stable once secured. Wider or taller lumber can make a more visible edge, but it may also cost more and require deeper support.
Avoid using painted, stained, or chemically treated scrap wood when you do not know its history. Old railroad ties and reclaimed industrial timbers may contain substances unsuitable for home gardens. If the border will sit beside edible plants, select materials specifically appropriate for the intended garden use.
Source: i.pinimg.com
Naturally durable wood
Cedar and redwood are common choices where available. Their resistance to decay varies by species, grade, and the part of the wood used.
Pressure-treated lumber
Modern pressure-treated products are designed for specified outdoor uses. Check the product label for ground-contact ratings and follow its instructions, especially near edible crops.
Untreated pine
Pine is often affordable and easy to cut, but untreated boards can decay sooner in damp soil.
Landscape timbers
These are made for outdoor landscape projects, but check their treatment, dimensions, and permitted use rather than assuming all products are the same.
What size lumber should you use?
For a low decorative edge, boards around 1 inch thick may be enough when supported well, while thicker boards or landscape timbers can provide a more substantial appearance. The needed size depends on the height above ground, the length of each section, the soil, and the stake spacing. Do not rely on a thin decorative board to hold back a deep bed.
A border that sits close to lawn level is often easier to mow beside than a tall raised edge. For flower beds with loose mulch, a slightly higher board may help contain the material. Keep the top low enough to remain visible and avoid creating a trip hazard across a walkway.
Low edging
Use a modest board height for clear separation between lawn and planting bed.
Raised edging
Use stronger material and more secure supports when the border needs to retain a small amount of soil.
Select safe fasteners and finishes
Use exterior-rated screws, nails, or stakes that are compatible with the selected wood and its treatment. Corrosion-resistant fasteners are useful outdoors, and the lumber label may specify suitable hardware. Do not apply a finish unless it is intended for the exposure and use in question.
Wear gloves and eye protection when cutting wood. If cutting treated lumber, follow the label and applicable safety instructions, collect the sawdust, and never burn the offcuts. Wash your hands after handling treated wood and keep debris away from children and pets.
Fasteners
Choose outdoor-rated hardware and follow the wood manufacturer’s guidance.
Wood finish
Use a suitable exterior product only when needed, following all label directions and garden-use restrictions.
Tools and Materials You Need
Gather the tools and materials before you start so you can work along the border without repeated trips to the store. The exact list depends on whether the design uses straight boards, short timber sections, or a curved arrangement. A small, level flower bed usually needs only basic hand tools.
Measure the proposed border and make a simple sketch. Mark corners, curves, joints, and any changes in height. This makes it easier to estimate the lumber, stake count, and fasteners while reducing offcuts.
Source: i.pinimg.com
Wood
Buy suitable boards or landscape timbers long enough for the planned sections.
Measuring tools
Use a tape measure, string, marking paint or garden hose, and a level.
Digging tools
A spade or trenching shovel helps remove grass and shape the base.
Cutting tools
Use a hand saw or suitable power saw for clean, square cuts.
Securing materials
Gather exterior-rated screws or nails, wooden stakes, and a drill or hammer as needed.
Safety equipment
Wear safety glasses, gloves, sturdy footwear, and hearing protection when required by the tools.
Estimate the amount of wood
Measure every straight section and add the lengths together. For a rectangular bed, add twice the length and twice the width to get the perimeter. For an irregular bed, measure each side or follow the curve with a flexible tape, string, or garden hose.
For example, a bed measuring 8 feet by 6 feet has a perimeter of 28 feet. If you use 8-foot boards, four boards provide 32 linear feet before accounting for corner cuts and waste. Check how the corners will meet before purchasing, because overlapping joints and miter cuts can change the usable length.
Allow a modest amount for cutting mistakes and damaged pieces. The amount depends on the layout, board lengths, and number of corners, so there is no single waste allowance that fits every project.
Perimeter formula
For a rectangle, perimeter equals 2 multiplied by the length plus 2 multiplied by the width.
Stake estimate
Plan a stake at each corner and near board joints, then add intermediate stakes based on board height, stiffness, and site conditions.
How to Make a Garden Border With Wood Step by Step
The most reliable approach is to lay out the border first, prepare a firm base, then install and secure each piece of wood. Work in short sections so you can check the line and height as you go. The steps below suit a simple, low garden edge rather than a retaining wall.
Source: lh5.googleusercontent.com
Step 1: Plan the shape and mark the edge
Decide where the garden bed will begin and end. Straight lines suit formal layouts and are easy to measure, while broad curves can soften a lawn edge. Lay a garden hose along the proposed curve or stretch string between stakes for a straight border.
Stand back and inspect the outline from the house, patio, or main path. Make small changes before digging. Check that the edge leaves enough room for plants to grow and for you to mow or maintain the lawn.
For straight beds
Use string and stakes to create a clear reference line.
For curved beds
Use a hose to shape smooth bends and avoid abrupt changes in direction.
Step 2: Check for underground utilities
Before driving stakes or digging, contact 811 in the United States or use the applicable state 811 service to request utility marking. Wait until the required response and marking process is complete, and follow the instructions for working near marked lines. Private lines, such as some irrigation pipes, landscape lighting wires, and homeowner-installed utilities, may not be covered by a standard public utility request.
Do not assume a shallow trench is safe simply because it is for a small garden project. If the route crosses a marked utility or you cannot identify a private line, change the layout or contact the relevant utility or a qualified professional.
Wait for markings
Follow the local 811 process and do not dig until the required clearance steps are complete.
Check private systems
Locate irrigation, lighting, drainage, and other privately installed lines separately when needed.
Step 3: Remove grass and dig a shallow trench
Use a spade to cut along the marked line and lift away the grass or weeds. Dig a trench wide enough for the board or timber to sit without being forced into place. The depth should let the wood remain stable while leaving the desired amount visible above the soil.
Remove loose roots and large stones from the base. If the soil is uneven, make small adjustments rather than trying to force a warped board to follow the trench. A shallow bed of compactable mineral material may help in some soils, but drainage and firm support matter more than adding a thick layer of gravel by default.
Keep the base firm
Remove soft organic material beneath the board so it does not settle unevenly.
Check the depth
Use the same reference point along the border to keep the top edge at a consistent height.
Step 4: Cut and dry-fit the lumber
Measure each section and mark the cut line clearly. Cut the boards on a stable work surface, using the tool according to its instructions. Dry-fit the pieces in the trench before fastening them so you can check the overall length, corner joints, and alignment.
For a square corner, the boards can meet end to side or use a suitable angled cut. A simple end-to-side joint is often easier for a beginner, provided the boards are secured well. For curves, use shorter sections where the design allows them to follow the line without leaving large gaps.
Check each cut
Make sure the ends meet as planned and that no section sticks out into a walkway.
Avoid forced bends
Do not bend rigid lumber sharply to follow a curve; use shorter pieces or choose a flexible edging design.
Step 5: Set the wood in place
Place the first board in the trench and align it with the string or marking line. Use a level to check the top edge, then adjust the base beneath the board. Continue with the next section, checking the joint and height before moving forward.
For a sloping yard, decide whether the border should follow the ground or use a stepped layout. Following a mild slope may create a smooth edge, while stepping the boards can make the top line more controlled. Avoid a layout that leaves tall, unsupported gaps beneath the wood.
Keep sections aligned
Check each board against the previous one rather than waiting until the entire border is installed.
Manage slopes
Use a stepped arrangement where needed instead of forcing a single level line across uneven ground.
Step 6: Secure the border with stakes and fasteners
Drive suitable stakes into the ground along the inside or outside of the border, according to the design. Add support at corners and joints, where movement is more likely. Attach the boards with exterior-rated fasteners that suit the lumber and the exposure.
The number and spacing of stakes depend on board height, stiffness, length, and soil conditions. Use closer support where a board tends to bow or where the soil is loose. Keep fasteners flush or properly recessed so they do not create sharp points or snag clothing.
For a very low decorative border, simple stakes may be enough. If the structure must retain a substantial depth of soil, stop and use a design intended for retaining loads rather than relying on basic garden edging.
Support the joints
Secure board ends so they cannot pull apart as the ground changes with rain or frost.
Use compatible hardware
Follow the lumber label and fastener guidance to reduce corrosion and splitting.
Step 7: Backfill and finish the edge
Once the border is secure, fill gaps beside it with the soil removed earlier. Firm the soil by hand in layers, taking care not to push the boards out of line. Keep soil and mulch below the top edge where practical so the wood remains visible and does not stay buried in damp material.
Add mulch to the bed if desired, leaving space around plant stems. Restore the lawn edge and sweep away sawdust, loose screws, and offcuts. Water the nearby soil lightly if needed to help it settle, then check the border again after the ground has settled.
Check stability
The boards should not rock when gently pressed by hand.
Clear the work area
Remove sharp offcuts, fasteners, and wood debris before children or pets use the yard.
How to Make a Wooden Border Around Curved or Uneven Beds
Curved and sloping beds need a little more planning than a straight rectangle. The goal is to make the wood follow the shape without placing stress on the joints or leaving unsupported spaces. Shorter sections often work better than long boards when the border turns.
For a broad curve, mark the line with a hose and measure the length along the curve rather than across the bed. Cut sections to suit the radius and check the gaps before fastening them. A very tight curve may call for a different edging material or a design made from small pieces.
On a slope, a stepped border can help keep each section stable. Set one board level, then place the next slightly lower or higher to match the terrain. The transition should look deliberate, and the joints should remain supported.
Source: i.pinimg.com
Use shorter sections
Short boards can follow gentle curves with less force on the joints.
Plan corners early
Dry-fit the joints before fastening so cuts and support locations are clear.
Do not use edging as a retaining wall
Where soil pressure is significant, use a properly designed retaining system.
Should the top edge be level?
A level top edge creates a formal look, but the best layout depends on the ground. On sloping terrain, a stepped design often works better than a single horizontal board line. For low edging that follows a natural curve, a smooth line along the ground may look more balanced than strict level alignment.
Formal garden
Use straight runs, square corners, and consistent top heights where the ground permits.
Informal garden
Follow broad natural curves and let the border complement the bed shape.
Common Mistakes to Avoid
Most wooden border problems begin with poor site preparation, unsuitable materials, or weak support. A board may look straight on installation day but shift after rain, freezing weather, or repeated contact with lawn equipment. A few checks during construction can prevent much of this movement.
The other common error is choosing wood based only on its initial price. A cheap untreated board may need replacement sooner in a damp location, while a durable material can cost more at the start. Compare the likely maintenance needs as well as the purchase price.
Source: cloudfrontgharpediabucket.gharpedia.com
Skipping utility checks
Digging before utility lines are marked can cause serious injury, service outages, or costly damage.
Using wet or warped boards
Severely twisted or damaged lumber is harder to align and may create gaps.
Leaving the base loose
Soft soil and buried grass can decay or settle, making the border uneven.
Using too few supports
Long boards may bow or move when the soil becomes wet or shifts.
Burying the wood too deeply
Constant soil contact and trapped moisture can speed decay, depending on the material and site.
Overlooking water flow
A border should not trap water against a house, block drainage, or redirect runoff toward neighboring property.
What if the border becomes uneven?
First, check whether the board has moved or the soil beneath it has settled. Remove a small amount of backfill and inspect the base. If the wood is still sound, reset the support and firm the soil before fastening the board again.
If the board is rotten, badly split, or no longer holds a fastener securely, replace it rather than adding more screws to damaged wood. If several sections move or the border is holding back substantial soil, reassess the design and seek suitable professional help.
Minor movement
Reset the base, realign the board, and secure the support if the wood remains sound.
Decay or structural movement
Replace damaged material and investigate drainage, soil pressure, and support spacing.
How to Maintain a Wooden Garden Border
Inspect the border at least a few times during the growing season and after severe weather. Look for loose joints, raised fasteners, splintered edges, rot, and places where water collects. Small repairs are easier before an entire board shifts or breaks.
Keep leaves, soil, and thick mulch from piling against the wood. Trim grass along the outside edge without striking the board with a mower blade or string trimmer. Where sprinklers wet the border often, adjust their direction if doing so will not harm nearby plants.
Wood naturally changes color as it weathers. A gray surface does not automatically mean the board has failed, so judge its condition by firmness, splitting, and the strength of the joints. Replace sections that are soft, unstable, or unsafe to touch.
Source: thespruce.com
Check the joints
Tighten or replace suitable fasteners when the boards remain sound and the joint can be repaired safely.
Control moisture
Improve drainage and prevent soil or mulch from trapping moisture against the wood.
Remove rotted or unstable wood instead of covering the damage with a new finish.
How long will a wooden border last?
There is no reliable single lifespan for all wooden garden borders. Durability depends on wood species, treatment, soil contact, drainage, climate, fasteners, and maintenance. A border in dry, well-drained soil may last longer than one exposed to persistent dampness or repeated flooding.
Treat lifespan estimates as site-specific rather than guarantees. Inspect the actual wood each season and plan for repair or replacement when the material becomes weak. Buying lumber rated for the intended use is a better starting point than relying on appearance alone.
Longer service
Use appropriate durable wood, provide stable support, and limit prolonged wetness.
Shorter service
Untreated wood in wet soil or areas with poor drainage may decay more quickly.
Frequently Asked Questions
Q
What is the easiest way to make a wooden garden border?
The easiest method is to use straight landscape boards for a simple bed, mark the line with string, dig a shallow trench, and secure the boards with stakes and outdoor-rated fasteners. Dry-fit the sections before fastening them. This reduces cutting errors and makes it easier to keep the border straight.
Q
Should I put gravel under a wooden garden border?
Not always. A firm, even trench base is often enough for low edging in stable soil. A thin layer of suitable compactable mineral material may help in some locations, but gravel does not automatically improve drainage and can create a loose base if it is not prepared properly. Address the site’s actual drainage problem rather than adding gravel by habit.
Q
Can I use pressure-treated wood around a vegetable garden?
Check the exact product label, treatment type, and intended use before using pressure-treated lumber near edible crops. Modern products differ from older treatments, so do not assume all treated wood is the same. If the product is not clearly suitable for your intended garden use, choose an appropriate alternative or consult the manufacturer.
Q
How deep should wooden garden edging be buried?
The depth depends on the board size, soil, support system, and amount of wood you want visible. For low decorative edging, bury enough of the board to keep it stable while leaving the desired top edge exposed. Taller borders and sloping sites may need stronger support and a different design. Avoid burying wood so deeply that the installation traps persistent moisture.
Q
How can I make a wooden garden border last longer?
Choose wood suited to outdoor ground contact, keep the base stable, use compatible exterior fasteners, and avoid standing water. Keep excess soil and mulch away from the top of the border, inspect joints regularly, and replace rotten sections promptly. Drainage and suitable material selection usually matter more than decorative finishes alone.
✦ Wrapping Up
Conclusion
A wooden garden border is a practical DIY project that can give a backyard a tidy, natural edge. The process is simple: plan the shape, measure the perimeter, choose suitable lumber, prepare the trench, set the boards, secure the joints, and backfill carefully. Each step helps the finished border look neat and stay in place.
The best result comes from matching the wood to the site. Consider soil moisture, local weather, nearby plants, and the amount of soil the border needs to contain. Check utility locations before digging, use the right safety gear, and do not treat decorative edging as a substitute for a retaining wall.
💡 Key Takeaway
Start by sketching your garden bed and measuring its perimeter. Use those measurements to choose suitable lumber and estimate the number of boards and stakes you need before you begin.
I enjoy sharing simple gardening ideas, lawn care tips, and honest product reviews that help make outdoor work easier. From home gardening guides to helpful tools and lawn care advice, I write easy-to-follow content to help readers create a healthier and better-looking outdoor space without wasting time or money.



:max_bytes(150000):strip_icc()/easily-install-a-landscape-timber-edging-2132416_Hero01-aa038b0b265a40ac9e4886137593263b.jpg "How to Make a Garden Border With Wood | 5 Steps Guide (2026)")
