As an Amazon Associate, I earn from qualifying purchases.
To make leaf mold compost, collect fallen leaves, shred them if possible, pile them in a wire bin or breathable bags, moisten them, and let fungi break them down for about 6 to 24 months. Keep the leaves damp, not soaked, and use the finished material to improve garden soil and retain moisture.
Across the United States, autumn brings a familiar garden chore: piles of fallen leaves on lawns, driveways, and garden beds. Instead of sending every bag to the curb, you can turn many of those leaves into a useful soil amendment. This method works in small suburban yards, large backyards, and community gardens, even if you have no traditional compost bin.
Leaf mold forms when fungi and other organisms slowly break down fallen leaves. The result is a dark, soft material that resembles the layer of decaying leaves on a forest floor. Unlike standard compost, which often combines leaves with food scraps and green plant waste, leaf mold can be made almost entirely from leaves.
The main benefit is better soil structure and water retention, not a large dose of plant food. Leaf mold can help sandy soil hold moisture and help dense soil develop a more open structure. It is also a low-effort way to recycle yard waste into something useful for flower beds, vegetable gardens, trees, and shrubs.
You do not need special chemicals, costly equipment, or frequent turning. A suitable pile, enough moisture, and patience are the main requirements. The process is slow, but a well-managed pile can reward you with a useful supply of leaf mold for seasons to come.
Leaf mold is decomposed leaf matter made through a slow, fungus-led process. It is often called leaf mold compost in home gardening, although it differs from conventional compost. The material can be coarse and leafy at first, then become darker, softer, and more crumbly as decomposition continues.
The fungi that break down leaves can work without the hot, actively managed conditions used in many traditional compost piles. This makes leaf mold a practical choice for gardeners who want to recycle leaves without mixing in kitchen waste or turning a pile every week.
The finished material acts much like a natural sponge in the soil. It helps hold water, supports soil organisms, and can improve the spaces between soil particles. These benefits can make watering more effective and help roots grow in better soil conditions.
Leaf mold is not a strong fertilizer. Leaves contain nutrients, but the finished product usually provides less immediately available plant food than a well-made, nutrient-rich compost. For a vegetable garden or another bed with high nutrient needs, use leaf mold alongside an appropriate source of plant nutrients when needed.
Source: i.pinimg.com
Better moisture retention
Leaf mold helps soil hold water for longer, which can be useful in sandy beds, raised beds, and gardens that dry out quickly.
Improved soil texture
Adding organic matter can help loosen dense soil and improve the structure of lighter soils over time.
Less yard waste
Leaves that would otherwise be bagged for disposal become a useful garden resource.
Low maintenance
A leaf mold pile needs moisture checks and occasional attention, but it generally does not require frequent turning or a carefully balanced mix of greens and browns.
Leaf Mold Versus Traditional Compost
The main difference is the material used and the goal. Leaf mold is made mainly from leaves and is especially useful for improving soil structure and water retention. Traditional compost often combines dry leaves with nitrogen-rich materials such as vegetable scraps and grass clippings to create a broader soil amendment.
A traditional compost pile may break down faster when its ingredients, moisture, air supply, and temperature are managed well. Leaf mold is usually slower and simpler. Choose leaf mold when you have many leaves and want a low-maintenance soil conditioner; choose a balanced composting method when you also need to process food scraps or produce a more nutrient-rich amendment.
Choose leaf mold
Best for soil conditioning, mulching, and making use of a large seasonal supply of leaves.
Choose traditional compost
Best when you want to process mixed organic waste and return a wider range of nutrients to garden soil.
What You Need to Make Leaf Mold
You can start with fallen leaves and a place to store them. Most home gardeners do not need to buy a special composting system. A simple pile in a quiet corner can work well if it stays moist and does not block paths, drains, or shared spaces.
Choose a location that is easy to reach with a hose or watering can. Partial shade can help the leaves stay moist, although a pile in another suitable spot can also work. Make sure excess water can drain away rather than leaving the leaves submerged in a low area.
A pile around 3 feet high and 3 feet wide is a useful starting point for a modest backyard supply. A larger enclosure can hold more leaves, but do not pack the material so tightly that air and water cannot move through it. If space is limited, breathable bags or a compact wire enclosure can be practical alternatives.
Source: i.ytimg.com
Fallen leaves
Collect leaves from trees and shrubs in your yard or another place where you have permission to gather them. Use clean leaves that have not been contaminated by oil, chemical spills, or other pollutants.
A storage area
Use a leaf pile, a wire enclosure, a wooden frame with gaps, or breathable bags with drainage and ventilation.
A way to shred leaves
A lawn mower with a suitable collection system or a leaf shredder can cut leaves into smaller pieces. This step is helpful but not essential.
Water
Use a hose or watering can to moisten dry leaves and restore moisture during dry weather.
Garden gloves
Wear gloves when handling leaf piles, especially if the leaves contain sticks, debris, or unknown plant material.
Which Leaves Work Best?
Most fallen leaves will eventually break down, but some decompose faster than others. Soft leaves from trees such as maple often break down relatively quickly when shredded and kept moist. Oak leaves can also make useful leaf mold, although intact leaves may take longer to soften and decompose.
Thick or waxy leaves may need more time or extra shredding. A mix of leaf types can be useful because it creates a varied pile rather than a dense mat of one leaf type. Avoid leaves from plants known to be diseased, and do not use material contaminated with herbicides or other chemicals unless you have reliable information that it is suitable for garden use.
Soft leaves
Maple and similar leaves are generally easy to shred and can break down relatively quickly.
Tough leaves
Oak and other thick leaves may need extra time, moisture, and smaller pieces.
Questionable leaves
Leave out diseased foliage and material that may contain harmful chemical residues.
How to Make Leaf Mold Compost Step by Step
The basic method is simple: collect leaves, reduce their size if possible, place them in a suitable enclosure, add water, and let nature do the work. You do not need to add kitchen scraps, manure, or commercial fertilizer to make leaf mold. The most useful tasks are maintaining moisture and making sure the pile is not waterlogged.
Source: gardenary-data.s3.amazonaws.com
Step 1: Collect Clean Fallen Leaves
Gather leaves after they have fallen, often during autumn in much of the United States. If your area has a mild winter or evergreen trees, you can collect suitable leaves at other times as well. Choose leaves from your own property or locations where collection is allowed.
Check the pile for trash, plastic, stones, and large sticks. Avoid leaves gathered from roadsides or areas that may have been exposed to oil, heavy chemical use, or contaminated runoff. If you are unsure about the source, use a cleaner supply instead.
Keep useful leaves
Collect clean fallen leaves and remove large branches or unwanted debris.
Leave some habitat
Where practical, keep some fallen leaves in garden beds or natural areas to provide shelter for overwintering wildlife.
Step 2: Shred the Leaves
Shredding is one of the easiest ways to speed up leaf mold production. Smaller pieces expose more surface area to fungi and other decomposers. They also pack more evenly and are less likely to form thick, airless mats.
A lawn mower can work well on dry leaves when used according to its instructions and only in a suitable area. Check the pile for animals before mowing, and keep children and pets away from operating equipment. If you do not have a mower or shredder, whole leaves are still suitable; expect a longer wait.
Shredded leaves
Use these when you want faster decomposition and easier handling.
Whole leaves
Use these when equipment is unavailable, but check the pile for compacted layers and allow more time.
Step 3: Build the Pile or Fill the Bags
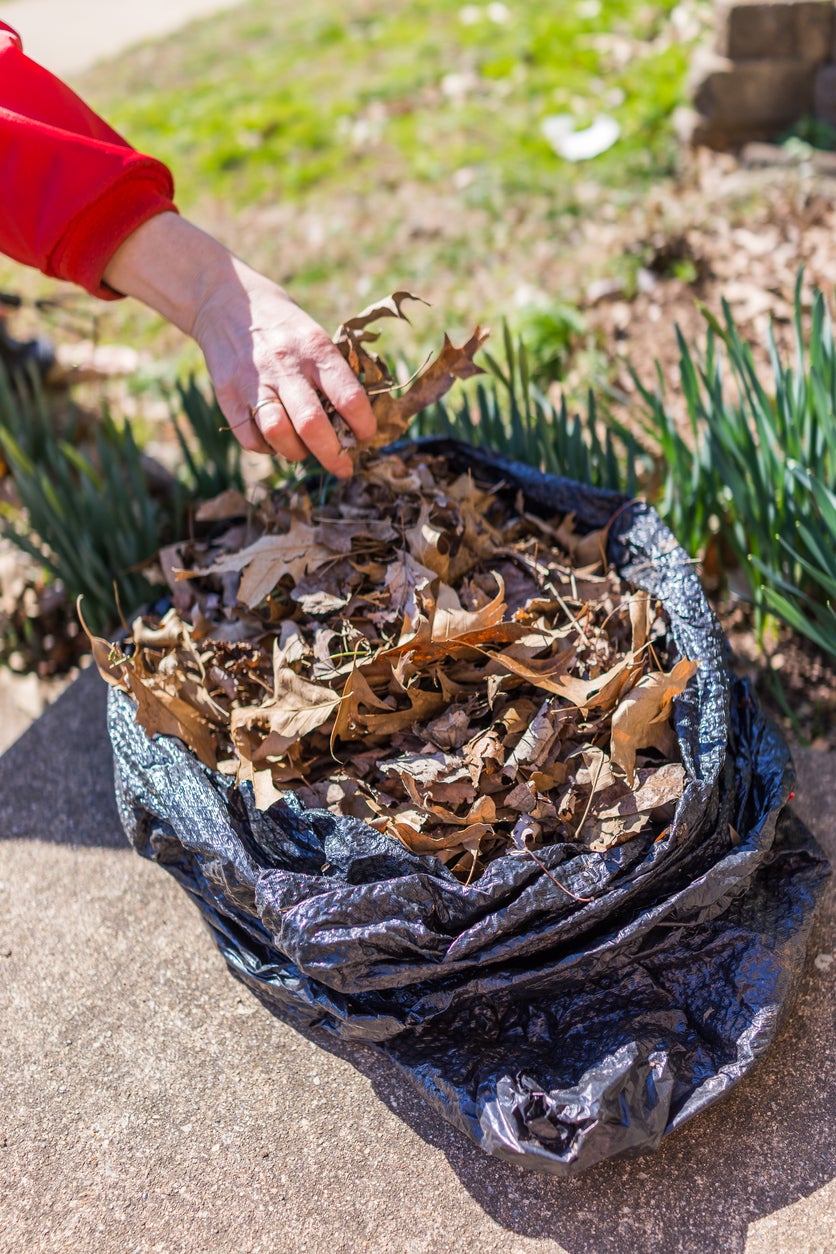
Place the leaves in a wire enclosure, a breathable garden bag, or a dedicated pile. A wire enclosure is useful because it keeps leaves in one place while allowing air to move through the material. If you use bags, choose breathable bags or make sure the container has adequate ventilation and drainage.
Add leaves in loose layers. Press them down gently if needed to make room, but do not compress them into a hard mass. A pile that is too loose may dry out quickly, while one that is packed too tightly may hold too much water and break down unevenly.
For a small yard
Use a breathable bag or a compact wire enclosure that fits the available space.
For a large yard
Build a wider pile or use a larger enclosure to handle the fall leaf supply.
Step 4: Moisten the Leaves
Water the pile until the leaves feel damp throughout. A useful guide is the feel of a wrung-out sponge: moist but not dripping. Dry leaves break down slowly because fungi need moisture to grow and spread through the material.
Apply water in stages instead of flooding the pile all at once. Dry leaves can shed water at first, so allow time for it to soak in. If the leaves are already wet from rain, check them before adding more water.
If the leaves are dry
Add water in light passes, checking the middle of the pile as you go.
If the leaves are soaked
Improve drainage and loosen compacted material. Wait for excess water to drain before adding more.
Step 5: Maintain Moisture and Wait
Once the pile is built, leave it to decompose. Check it every few weeks during dry weather and after heavy rain. Add water when the leaves begin to dry, and loosen a dense or matted pile if water cannot drain through it.
Unlike a hot compost pile, a leaf mold pile does not need frequent turning. You can leave it largely undisturbed, though gently mixing the material once in a while may help if some areas stay dry and others remain wet. The process depends on local weather, the type of leaves, and how small the pieces are.
Label the pile with its starting date if you plan to make several batches. This simple habit helps you track progress and avoid using fresh material before it has broken down enough for your intended purpose.
Check moisture
Keep the pile damp rather than dry or saturated.
Check drainage
Make sure rainwater can escape and the leaves are not sitting in standing water.
Be patient
Allow enough time for the leaves to soften, darken, and develop an earthy smell.
How Long Does Leaf Mold Take to Make?
Leaf mold commonly takes about 6 to 24 months to reach a useful stage, although some piles need longer. Shredded leaves kept evenly moist may break down much faster than whole leaves left in a dry or cold location. There is no single finish date that works for every climate or leaf type.
In many parts of the United States, autumn is a convenient time to start because leaves are plentiful. In colder regions, decomposition may slow during winter and resume as temperatures rise. In warmer regions, fungi may remain active for more of the year, but a pile that dries out still needs water.
Use the texture and smell of the material to judge its readiness rather than relying only on the calendar. Some leaf fragments may remain even in useful leaf mold. The right level of decomposition depends on whether you want a coarse mulch, a soil amendment, or a finer ingredient for a growing mix.
Source: gardenbetty.com
Around 6 to 12 months
Shredded leaves under favorable moisture and temperature conditions may be partly decomposed or ready for some coarse uses.
Around 12 to 24 months
Many piles become darker, softer, and more suitable for mixing into garden soil during this period.
Longer than 24 months
Whole, thick, dry, or cold-stored leaves may need more time to become fine and crumbly.
How to Tell When Leaf Mold Is Ready
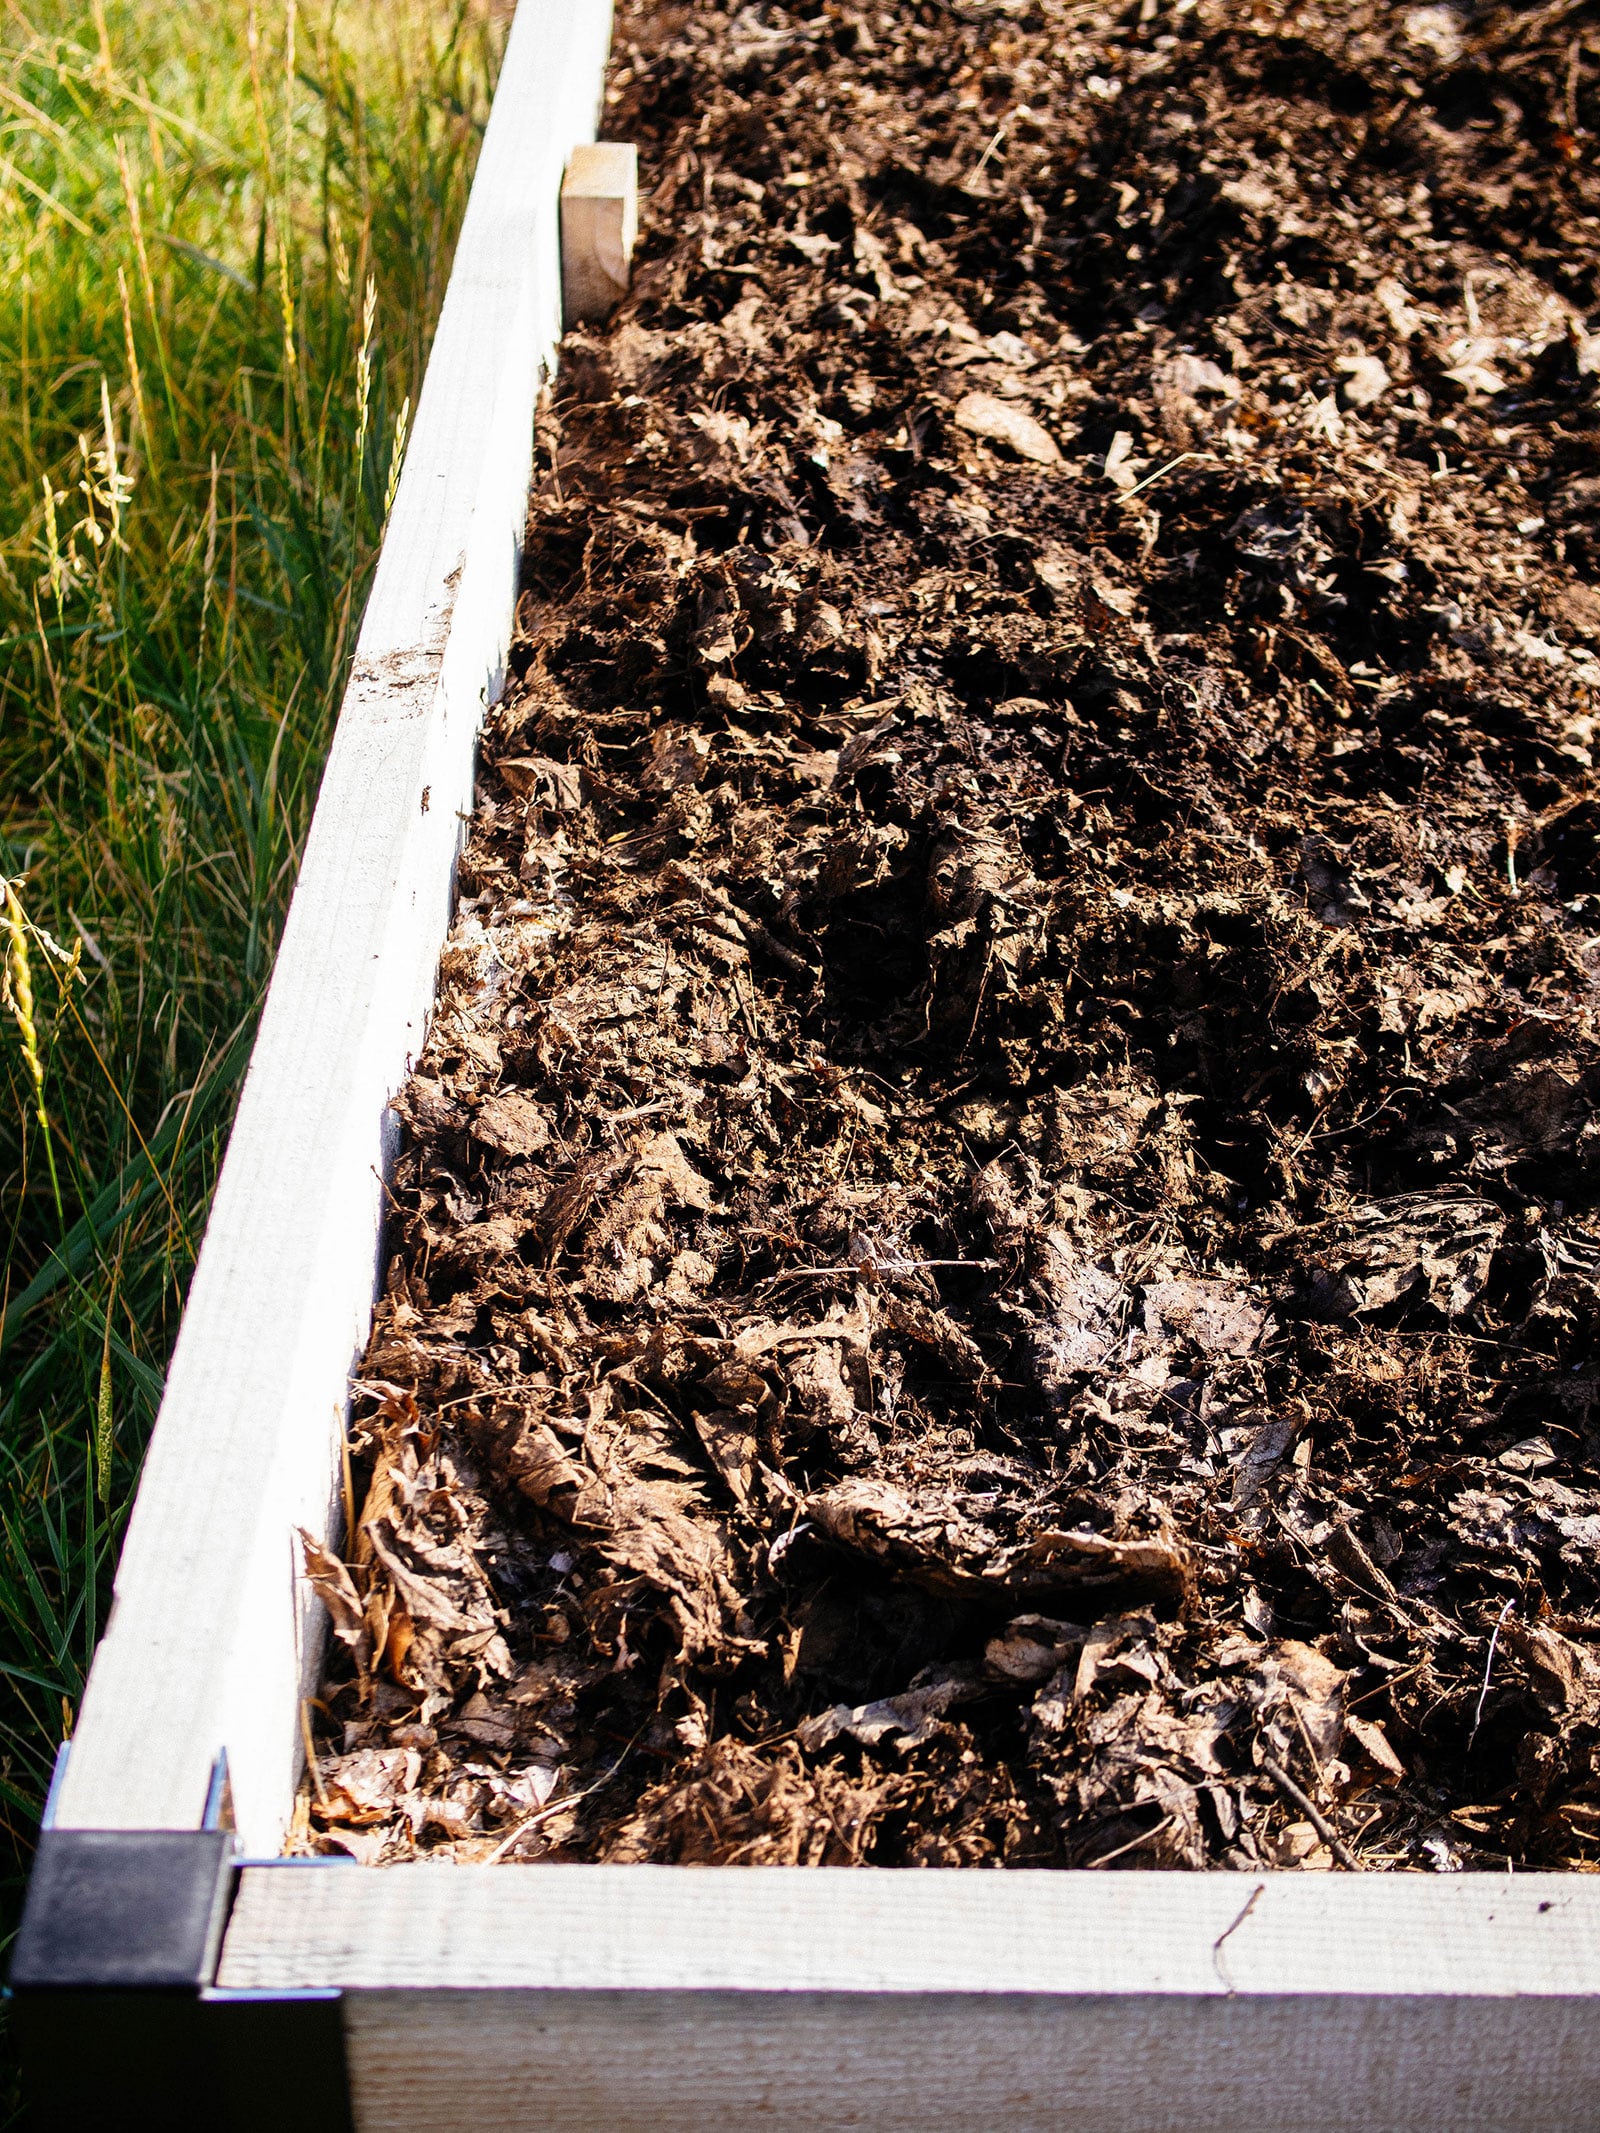
Finished leaf mold is usually dark brown to nearly black, soft, and crumbly. It has a pleasant earthy smell rather than a sour, rotten, or chemical odor. You may still recognize a few leaf pieces, especially if the material was not shredded.
For use as a surface mulch, partly decomposed leaves can be useful as long as they are not forming a thick, slippery mat. For incorporation into garden soil, wait until the material is more broken down. If you want a fine growing medium, screen the material and allow large fragments to decompose longer.
Good signs
Dark color, a crumbly texture, a mild earthy smell, and few recognizable fresh leaves.
Signs it needs more time
Many crisp leaves, dry and stiff layers, or a strong sour smell that may signal excess moisture and poor airflow.
How to Use Leaf Mold in Your Garden
Use finished leaf mold to improve soil, cover the soil surface, or add organic matter around established plants. Match the texture of the material to the job. Coarser leaf mold works well as mulch, while finer material is easier to blend into the upper layer of garden soil.
For an ordinary garden bed, spread a layer about 1 to 2 inches deep over the surface and work it gently into the top few inches where appropriate. Avoid damaging established roots. You can also leave it on the surface so rain, soil organisms, and natural movement gradually carry some of the organic matter downward.
For mulch, spread leaf mold over exposed soil around shrubs, perennials, and other suitable plants. Keep it a little away from stems and trunks rather than piling it against the bark. This helps maintain a clear space around the plant base and reduces the risk of prolonged moisture against the stem.
Leaf mold can also be mixed into a homemade growing medium, but it should be fully decomposed, clean, and well screened for uses that require a fine texture. It is not automatically sterile and should not be treated as a complete substitute for a tested seed-starting or potting mix. Plants grown in containers may still need a suitable source of nutrients.
Source: gardeningchores.com
Vegetable beds
Mix a modest amount of mature leaf mold into the soil to improve structure and moisture retention. Add nutrients based on plant needs and soil test results.
Flower beds
Use leaf mold as a surface mulch or a soil amendment before planting, taking care around shallow roots.
Trees and shrubs
Spread a layer over the root zone without piling it against trunks or woody stems.
Sandy soil
Blend mature leaf mold into the soil to help it retain more water and organic matter.
Dense clay soil
Use leaf mold as part of a broader soil improvement plan. Organic matter can improve structure, but avoid working wet clay because it can compact and smear.
Container mixes
Use only well-decomposed, screened material in a balanced mix that still provides adequate drainage, air space, and plant nutrients.
Can Leaf Mold Replace Fertilizer?
No. Leaf mold is mainly a soil conditioner, not a complete fertilizer. It can improve the conditions in which roots grow, but it may not provide enough readily available nitrogen, phosphorus, potassium, or other nutrients for demanding plants.
If vegetables or flowers grow poorly, do not assume that adding more leaf mold will solve the problem. Check watering, light, pests, and soil fertility. A soil test can help show whether the soil needs a nutrient amendment or a pH adjustment.
Use leaf mold for soil structure
It helps improve texture, moisture retention, and the organic matter content of soil.
Use nutrients when needed
Select fertilizer or nutrient-rich compost based on crop needs and reliable soil test guidance.
Common Leaf Mold Problems and How to Fix Them
Most leaf mold problems come from poor moisture control, compacted leaves, unsuitable material, or impatience. You can often correct them without starting over. Check the condition of the pile before adding anything, because more water or extra ingredients may make the problem worse.
A healthy pile should feel damp, allow some airflow, and develop a mild earthy smell as it breaks down. It does not need to heat up like a traditional hot compost pile. A cool pile is normal for this method and is not, by itself, a sign that decomposition has stopped.
Source: puregreeny.com
The leaves stay dry and crisp
Cause: Too little moisture, exposure to dry wind, or water running off the surface. Fix: Add water gradually, mix dry and damp areas if needed, and use a more sheltered spot.
The pile smells sour or rotten
Cause: Excess water and poor airflow. Fix: Improve drainage, loosen matted leaves, and let the pile return to a damp rather than soaked state.
The leaves barely break down
Cause: Large intact leaves, cold weather, or a pile that dries out. Fix: Shred the leaves if practical, check moisture, and allow more time.
The pile attracts pests
Cause: Food scraps, animal waste, or other materials that attract animals. Fix: Keep the leaf mold pile limited to leaves, secure the enclosure if necessary, and remove unsuitable material.
The leaves form a solid mat
Cause: Whole leaves packed too tightly or waterlogged layers. Fix: Loosen the pile, break apart the mat, and improve drainage and airflow.
Weeds grow through the pile
Cause: Weed seeds in the material or seeds arriving from nearby plants. Fix: Remove unwanted plants before they set seed, and avoid using contaminated leaves or debris.
Safety Tips for Collecting and Handling Leaves
Use leaves from a known, reasonably clean source. Avoid material contaminated by oil, chemical spills, or unknown pesticide residues. If leaves came from plants treated with herbicides, check the product label and reliable local guidance before using them in a garden where sensitive plants will grow.
Do not assume a cool leaf mold pile will destroy weed seeds, plant pathogens, or every unwanted chemical. Leaf mold develops slowly and does not reliably reach the high temperatures associated with managed hot composting. Keep diseased plant material out unless you have specific guidance confirming that your process can handle it.
Wear gloves when collecting leaves and use appropriate eye and respiratory protection if dust or mold spores are a concern. Avoid stirring up dry, moldy material in enclosed areas. People who have severe mold allergies or breathing problems should avoid direct exposure and ask someone else to handle dusty piles when necessary.
Before mowing or shredding a leaf pile, check it for wildlife and remove sticks or other objects that could become projectiles. Follow the equipment manufacturer’s safety instructions, keep bystanders away, and never put hands near moving blades.
Avoid contaminated leaves
Choose material from a source you trust and leave out leaves exposed to hazardous substances.
Do not rely on leaf mold for sanitation
Use only suitable plant material and do not assume slow decomposition eliminates pathogens or persistent herbicides.
Protect yourself when handling dusty leaves
Wear suitable protection and avoid breathing dust or mold spores, especially in poorly ventilated spaces.
Frequently Asked Questions
Q
Can I make leaf mold compost in a plastic bag?
Yes, if the bag allows enough airflow and excess water can drain. A breathable garden bag is often easier to manage than a sealed plastic bag. If you use an ordinary plastic bag, do not seal it airtight; provide suitable ventilation and drainage, and check moisture regularly.
Fill the bag with leaves, add water until they are evenly damp, and store it in a place where it will not become waterlogged or dry out completely. Keep the bag secure and check it from time to time for unpleasant odors or compacted layers.
Q
Do I need to add soil, manure, or food scraps?
No. Leaf mold can be made from fallen leaves alone. The fungi and other organisms that break down the leaves are already present in the environment, so adding soil or a special starter is usually unnecessary.
Manure and food scraps are more typical of other composting methods. Adding them changes the process and may attract animals. If your goal is leaf mold, keep the pile simple and focus on leaf size, moisture, drainage, and time.
Q
Should I turn my leaf mold pile?
Frequent turning is not required. Leaf mold is a slow process, so you can usually leave the pile undisturbed while checking moisture and drainage.
If the leaves become tightly matted, smell sour, or remain wet in the center, gently loosen them to improve airflow. Turning the pile from time to time is an option, but it is not essential for most backyard leaf mold systems.
Q
Can I use leaf mold before it is fully decomposed?
Partly decomposed leaves can be used as a surface mulch when they are clean and do not form a dense mat. Coarse material can protect exposed soil while it continues to break down.
For mixing into garden soil or using in a fine growing medium, wait until the material is darker, softer, and more crumbly. Unfinished leaves can continue decomposing after application, so avoid treating them as a complete fertilizer or a finished potting mix.
Q
Is leaf mold suitable for vegetable gardens?
Yes. Mature leaf mold can improve soil structure and moisture retention in vegetable beds. It is useful where soil dries quickly or needs more organic matter.
However, leaf mold alone may not meet the nutrient needs of heavy-feeding crops. Use clean, mature material, avoid diseased foliage, and base any added fertilizer or nutrient-rich compost on the needs of your crops and soil.
Q
What is the fastest way to make leaf mold?
Shred the leaves, keep them consistently moist, and store them in a well-drained enclosure. Smaller pieces offer more surface area for decomposition and tend to break down faster than whole leaves.
Even with these steps, leaf mold takes time. If you need a finished soil amendment quickly, a properly managed traditional compost pile may be more suitable, provided you can balance its ingredients and maintain moisture and airflow.
✦ Wrapping Up
Conclusion
Making leaf mold compost is a simple way to turn fallen leaves into a useful resource for your garden. Collect clean leaves, shred them when possible, place them in a breathable pile or container, and keep them damp while they slowly break down. With little equipment and modest care, you can make a soil conditioner that helps improve soil structure and retain moisture.
The key is to match your expectations to the process. Leaf mold is not a quick fertilizer, and whole leaves may take a year or longer to become soft and crumbly. Keep an eye on moisture, allow excess water to drain, and give the pile enough time to mature before using it for soil mixing or a fine growing medium.
For many American home gardeners, autumn is the easiest time to begin because fallen leaves are plentiful. A small batch started this season can become a useful mulch or soil amendment for future planting seasons. If your garden also needs extra nutrients, pair leaf mold with suitable compost or fertilizer rather than expecting the leaves to do every job.
💡 Key Takeaway
Start with one pile of clean fallen leaves this season. Shred them if possible, moisten them until damp, store them in a breathable enclosure, and check them every few weeks. When the material becomes dark, crumbly, and earthy-smelling, use it to improve your garden soil or as a surface mulch.
I enjoy sharing simple gardening ideas, lawn care tips, and honest product reviews that help make outdoor work easier. From home gardening guides to helpful tools and lawn care advice, I write easy-to-follow content to help readers create a healthier and better-looking outdoor space without wasting time or money.