As an Amazon Associate, I earn from qualifying purchases.
The best landscaping ideas around a shed combine easy-care plants, a clear walking path, a neat border, and good drainage. Choose features that suit your yard, local climate, shed size, and storage needs.
A backyard shed can hold garden tools, lawn equipment, bikes, or seasonal supplies. Yet a plain shed can look out of place beside a lawn, patio, or vegetable garden. In American backyards, a few smart landscape choices can help the shed blend into its setting without taking up much room or adding hours of yard work.
Start with the ground around the shed, not the flowers. Water should drain away from the building, doors should open freely, and paths should stay safe after rain. Once these needs are met, add plants, mulch, gravel, stepping stones, or a small seating area to suit your space.
Your local growing conditions matter, too. A shed in humid Florida may need plants that handle heat and heavy rain, while a yard in Colorado may call for drought-tolerant choices. Northern yards face cold winters, and shaded spaces beneath trees may need plants that thrive with less sun. Use local planting guidance to match each choice to your region.
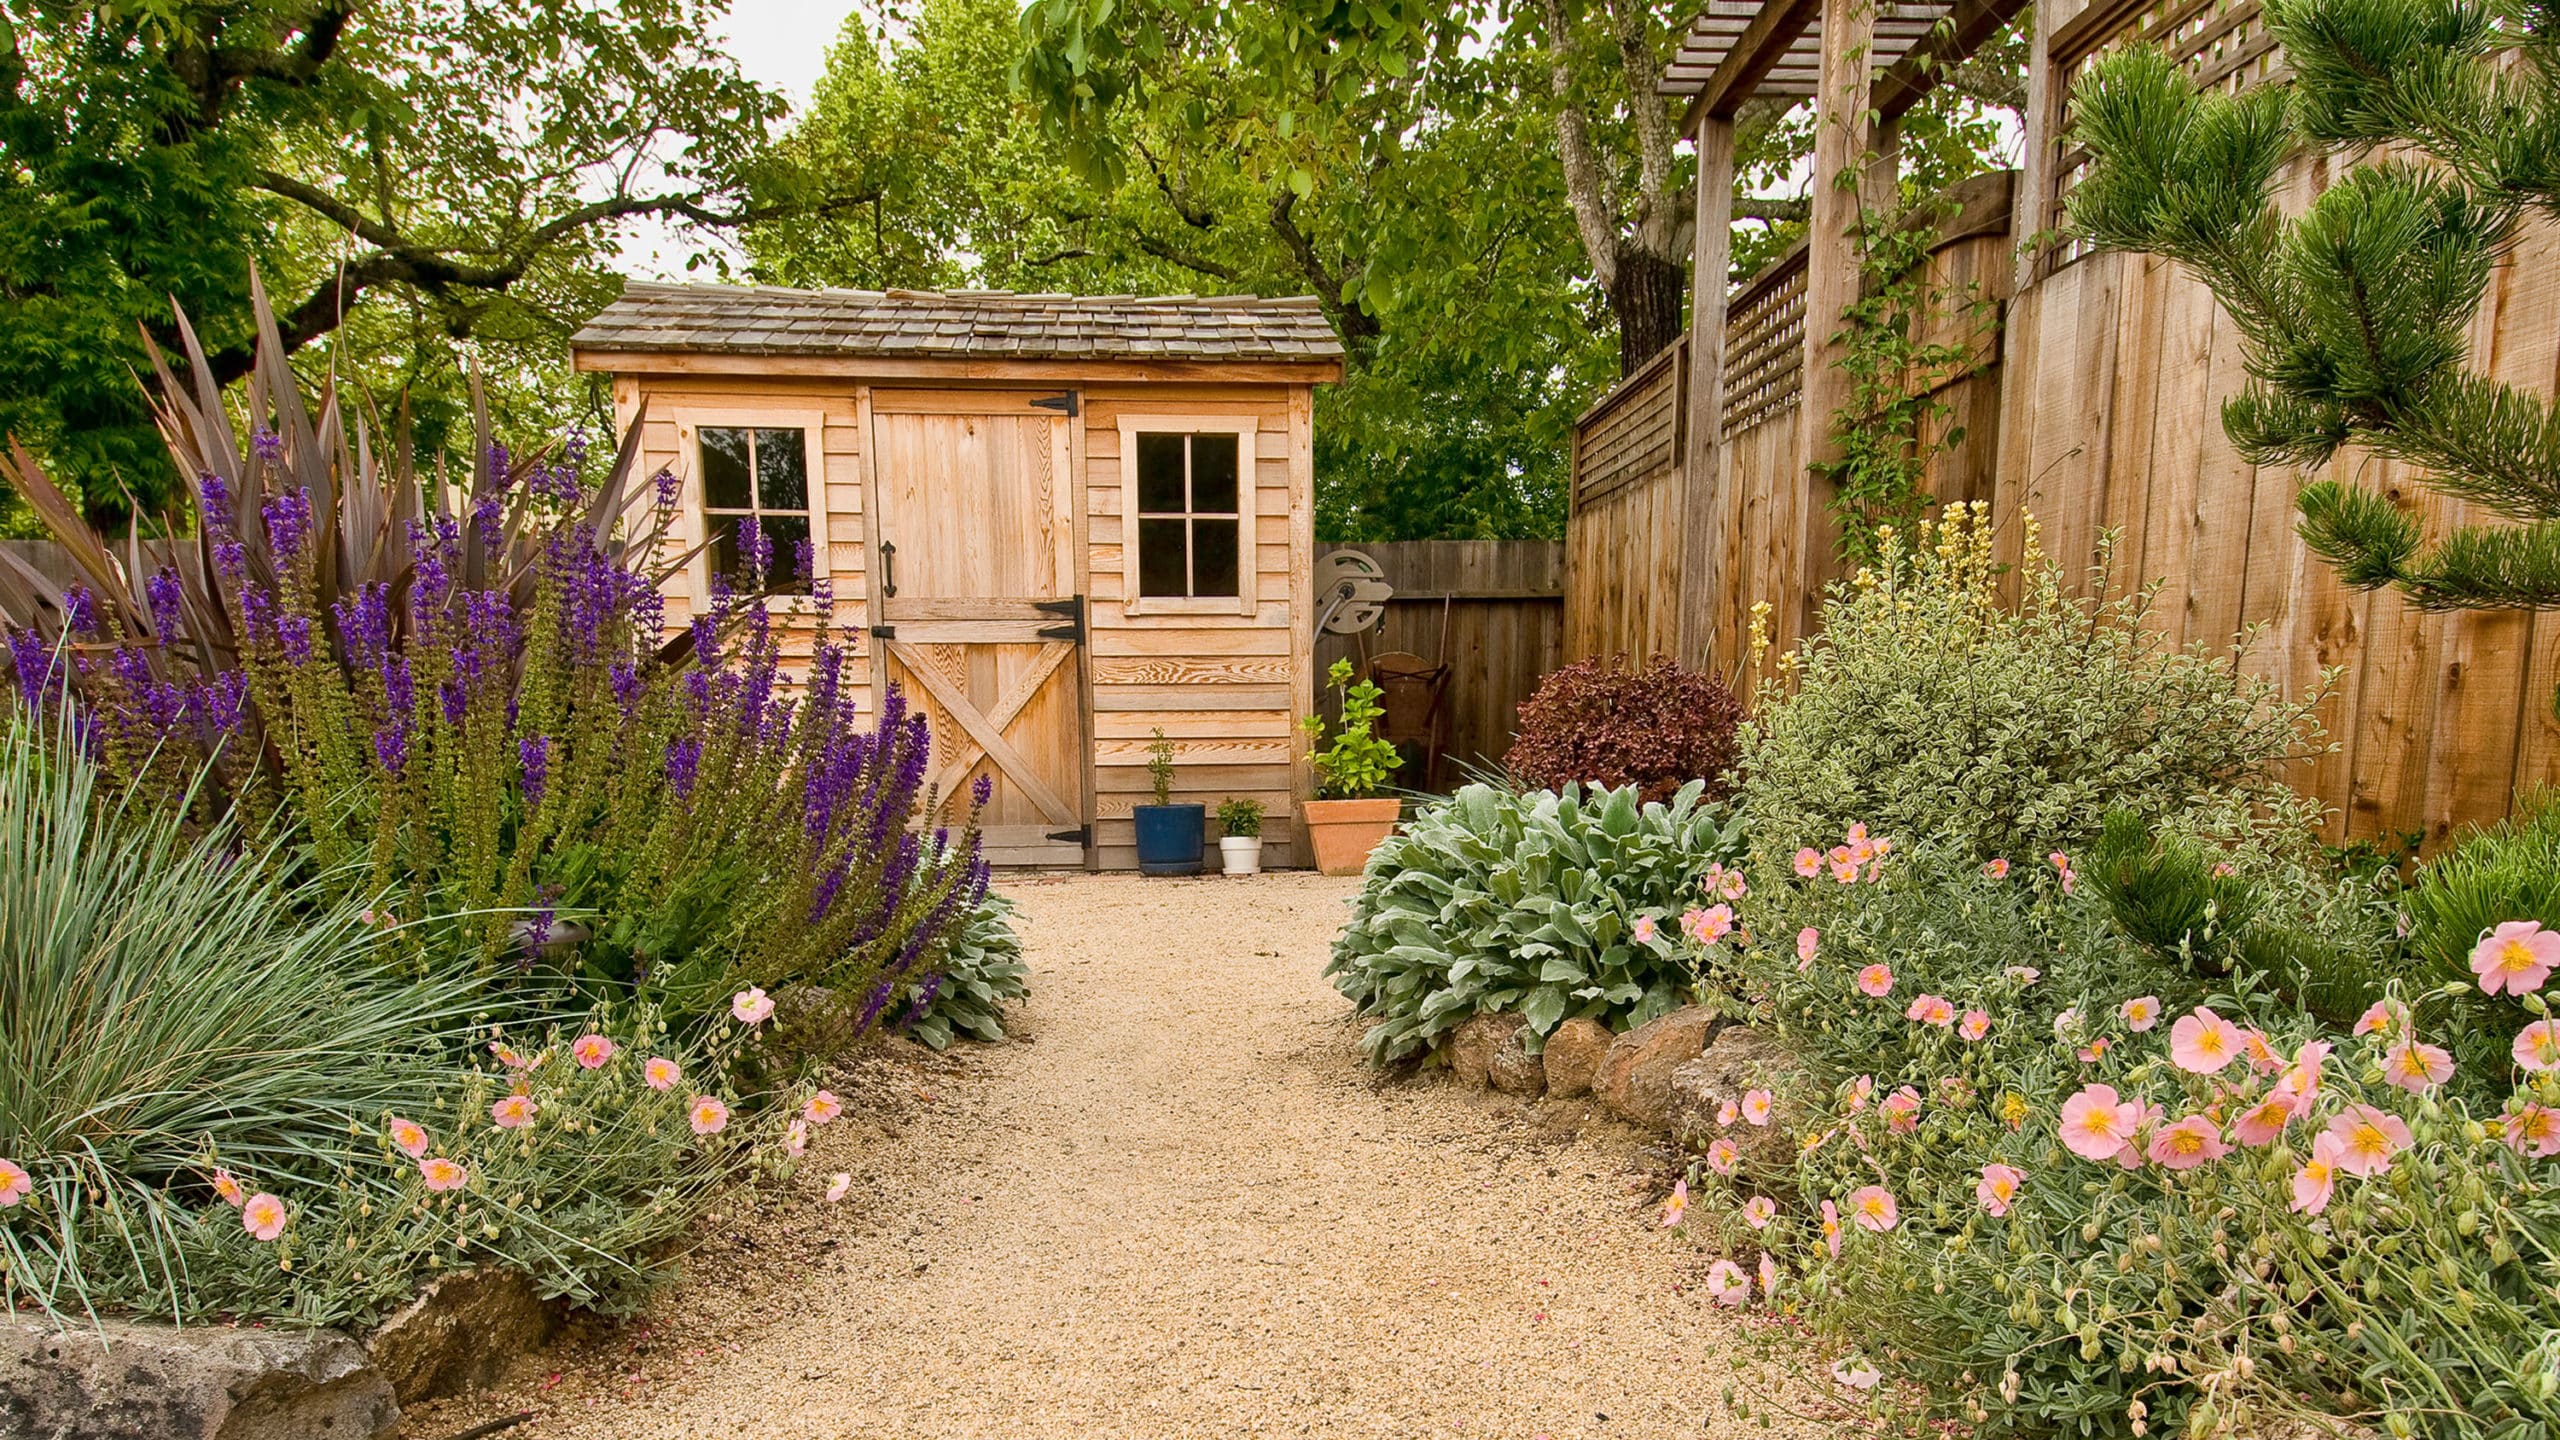
A curved flower bed can soften the straight walls and sharp corners of a garden shed. Instead of planting a narrow strip along every wall, shape a broad curve along the front or one visible side. This creates a natural link between the shed, lawn, and nearby garden beds.
Mark the outline with a garden hose before digging. View the shape from the house and the main yard path, then adjust the curve until it looks balanced. A broad, gentle curve often looks more natural than several small bends packed into a tight space.
Choose plants that fit the bed’s sun exposure and mature size. A sunny shed might suit coneflowers, black-eyed Susans, or compact ornamental grasses in suitable regions. A shaded shed may work better with ferns, coral bells, or other shade-tolerant plants suited to the local climate.
Source: garden.eco
Use a simple plant pattern
Place taller plants toward the back or corners, medium plants through the middle, and low plants near the lawn edge. Keep the shed door and windows clear.
Repeat a few plant types
Repeating two or three compatible species can make a small bed feel calm and planned. Too many unrelated plants can create a crowded look.
Finish with mulch
Apply a suitable layer of organic mulch to help limit weeds and reduce moisture loss. Keep mulch away from wood siding and do not pile it against the shed.
How Wide Should the Flower Bed Be?
Set the bed width according to the plants you want to grow and the room available for access. A narrow bed may suit small perennials, while a deeper bed gives shrubs and layered plantings more room. Check mature plant widths before buying so branches do not crowd the wall or block the entrance.
Small shed
Use one curved bed near the front rather than planting around all four sides.
Large shed
Use wider beds at the corners and a lower planting strip near frequently used doors.
2. Add a Gravel Border for a Clean, Practical Finish
A gravel border gives the shed a tidy edge and can reduce mud near frequently used doors. It works especially well beside tool sheds, lawn equipment storage, and small garden workshops. Gravel also creates a clear visual break between the building and nearby lawn or planting beds.
Before adding gravel, check how water moves across the site. A gravel strip is not a fix for poor drainage by itself. If the ground slopes toward the shed or water collects beside the wall, correct the grading or seek suitable drainage advice before installing the border.
Remove weeds and loose organic matter from the planned area. Prepare a stable base and consider a suitable permeable landscape fabric if it fits the site and intended use. Use gravel that is comfortable to walk on, and keep loose stones away from door tracks, mower paths, and areas where they could be kicked onto a lawn.
Source: artofit.org
Choose a useful stone size
Small decorative gravel can look neat but may shift underfoot. Larger stones may be harder to walk on, so choose a size that suits the traffic and the people using the shed.
Define the edge
Metal, stone, or durable plastic edging can help separate gravel from grass and keep the border in place.
Plan for upkeep
Expect to remove windblown leaves and occasional weeds. Gravel near trees may need more frequent cleaning.
Gravel or Mulch: Which Works Better?
Gravel suits a clean, durable-looking border and does not need regular replacement due to decay. Organic mulch is often better inside planted beds because it can add organic matter as it breaks down. Neither material should be piled against siding, and both need to be installed with drainage and building access in mind.
Choose gravel
Use it for a defined walking edge, a simple utility area, or a decorative strip where loose stones will not create a hazard.
Choose organic mulch
Use it around compatible plants where you want to help conserve soil moisture and limit weeds.
3. Build a Simple Path to the Shed
A clear path makes a shed easier to reach and helps keep mud out of the house. It also gives the yard a sense of direction by linking the shed to a patio, gate, driveway, or vegetable garden. Choose a path that fits how you use the building rather than adding a decorative walkway that is hard to maintain.
For light foot traffic, stepping stones set into gravel or turf may be enough. A compacted gravel path can suit a casual backyard, while pavers create a firmer, more finished surface. If you move a loaded wheelbarrow, mower, or heavy equipment to the shed, choose a wider and more stable route.
Prepare the base properly so the path does not sink or shift. Keep the finished surface from directing water toward the shed, and avoid abrupt changes in height that could cause trips. In areas with freezing winters, local soil conditions and frost movement may affect how well certain path materials stay level.
Source: storage.googleapis.com
Use stepping stones for a small budget
Set stones at a comfortable stride and stabilize them so they do not rock underfoot. Add gravel or ground cover between them if the site allows.
Use pavers for frequent access
A properly prepared paver path offers a more even walking surface and can suit a shed used every day.
Use compacted gravel for utility access
A well-prepared gravel route can work for wheelbarrows and garden carts, provided the stone and base suit the expected load.
Make the Path Feel Connected to the Yard
Repeat a material or color already used in the yard. For example, a path can echo the stone around a patio or use edging that matches a nearby raised bed. This small design choice helps the shed feel like part of the landscape rather than an isolated storage box.
For a cottage garden
Use irregular stepping stones and soft planting along the outer edge.
For a modern yard
Choose clean paver lines, restrained colors, and a simple gravel border.
4. Choose Native Plants for Easier Care
Plants native to your region can be a useful choice for landscaping around a shed because they are adapted to local growing conditions. Once established in a suitable spot, many native plants need less extra watering than plants poorly matched to the climate. Their value still depends on the species, soil, rainfall, and amount of sunlight.
Start by noting whether each side of the shed receives full sun, partial shade, or deep shade. Roof overhangs can leave some areas unusually dry, while downspouts may create wet spots. Match plants to those conditions instead of assuming the entire bed has the same moisture level.
Check mature height and width before planting. Large shrubs can block windows, trap leaves against siding, or make repairs difficult. Compact native perennials, small grasses, and low-growing ground covers often offer a practical way to soften the shed without hiding it.
Source: peltonstreeservices.com
For sunny areas
Depending on your region, consider native coneflowers, black-eyed Susans, little bluestem, or other locally appropriate sun-loving plants.
For shady areas
Look for suitable native ferns, woodland sedges, or shade-tolerant wildflowers that match your soil moisture.
For dry sites
Choose locally adapted drought-tolerant plants after establishment conditions are understood, and water new plants as needed.
For wet sites
Select species that tolerate the actual moisture level, but fix harmful standing water around the shed rather than relying on plants to solve a drainage problem.
How to Find Plants That Suit Your State
Use your state extension service or a regional native plant society to check species, planting times, and mature sizes. The same plant may thrive in one part of a state and struggle in another because of differences in heat, elevation, rainfall, and soil. Local advice is more useful than a national plant list when you need a dependable match.
Check the plant’s mature size
Leave enough room for growth and access to the shed wall.
Check water needs
Group plants with similar watering needs to make routine care easier.
5. Add Low-Growing Plants Along the Shed Walls
Low-growing plants can soften a shed’s base without making the building hard to inspect or maintain. Compact perennials, small ornamental grasses, and suitable ground covers work well when their mature size fits the available space. Leave room to reach siding, doors, vents, and any utility connections.
Avoid planting large shrubs directly against the wall. Dense growth can limit airflow, hide damage, trap leaves, and make painting or repairs harder. Plants that spread aggressively may also creep beneath a shed or across a nearby path.
Think about maintenance before you choose a plant. A fast-growing ground cover may fill space quickly, but it could need frequent trimming. A slower-growing plant may take longer to establish yet require less work once it settles in.
Source: freshpatio.com
Use compact perennials
Select plants that stay within the bed and suit the local light and moisture conditions.
Use ornamental grasses with care
Choose a clump-forming type with a mature size that will not block access or brush against the shed.
Avoid climbing plants on vulnerable walls
Climbers can hold moisture or damage finishes, depending on the plant and wall material. Use a separate, properly placed support if a climbing plant is appropriate.
Should You Plant Right Against the Shed?
A narrow planting gap is not always enough for safe access or healthy airflow. The best spacing depends on the shed’s construction, local climate, plant size, and maintenance needs. Follow the shed manufacturer’s instructions where available, and keep soil and mulch from contacting vulnerable wood or covering vents.
Keep the base visible
A clear inspection area makes it easier to spot rot, pests, water damage, and shifting materials.
Leave service access
Keep doors, vents, exterior fixtures, and utility points open and reachable.
6. Use Decorative Planters for Flexible Color
Planters offer an easy way to add color around a shed without digging a permanent flower bed. They work well beside the entrance, near a window, or at the end of a path. You can also move them when you need to paint the shed or store large tools nearby.
Choose pots with drainage holes and use a suitable potting mix. Containers without drainage can hold excess water and harm roots. Place each planter on a stable surface, and keep it out of the door’s swing path and away from vents or narrow access areas.
For a simple design, use two matching pots near the door or group containers of different heights in one corner. Keep the color scheme close to the shed trim, patio, or nearby flowers so the display feels connected to the rest of the yard.
Source: materialsix.com
For summer color
Use annual flowers that suit your local heat and sun exposure, and plan for regular watering during hot spells.
For a useful herb display
Grow herbs such as thyme, parsley, or chives where light conditions fit their needs and the location is convenient for harvesting.
For a low-water display
Select plants suited to containers and your climate, and use pots large enough to avoid excessive drying between waterings.
How to Keep Container Plants Healthy
Container soil can dry out faster than garden soil, especially in summer heat and wind. Check moisture regularly instead of watering on a fixed schedule alone. Move pots if roof runoff, reflected heat, or deep shade creates poor growing conditions.
Group by water needs
Place plants with similar moisture needs together so one pot does not stay wet while another dries out.
Check weight and stability
Use stable pots and avoid placing heavy containers where they may tip onto a walkway.
7. Make a Small Seating Spot Beside the Shed
A shed can serve as more than a storage building if the yard has room for a small seating area. A simple bench beside a flower bed creates a quiet place to rest after gardening. This works best when the shed sits in a pleasant part of the yard and the seating does not interfere with doors or equipment access.
Use a level, stable base for the bench. Pavers, a compacted gravel pad, or an existing patio can provide a firm surface when installed correctly. Keep the area clear of downspouts, muddy spots, and places where roof runoff falls.
Make the seating area feel intentional with one or two supporting features. A container of flowers, a small side table, or a low border may be enough. Avoid crowding the area with outdoor furniture that makes the shed harder to reach.
Source: storage.googleapis.com
For a small yard
Choose a narrow bench against a suitable open side, with enough space to walk past it safely.
For a larger yard
Create a small gravel or paver nook with a bench and a planted border.
For a garden workspace
Use a simple seat near the entrance so you can pause, sort seed packets, or rest between tasks without blocking storage access.
Keep Comfort and Safety in Mind
Place the bench where it will not obstruct a route used to carry tools or move a mower. If the shed stores fuel, pesticides, or other hazardous materials, do not turn the immediate storage area into a gathering spot. Keep chemicals secured according to their labels and away from children and pets.
Choose shade thoughtfully
A nearby tree or shade-tolerant planting can improve comfort, but do not plant a large tree where roots or falling branches could threaten the shed.
Leave room to work
Keep enough open space to move tools and perform routine building maintenance.
8. Add a Rustic Garden Border With Wood or Stone
A simple border can make the space around a shed look finished without requiring many plants. Natural stone suits cottage gardens and informal yards, while clean timber edging can complement a wooden shed. Choose a material that fits the building, nearby paths, and the amount of maintenance you want to do.
Stone edging can last a long time when it rests on a suitable base, but uneven stones can become trip hazards. Wood edging is easy to cut and install, yet it may decay over time when exposed to soil moisture. Use materials intended for the location and avoid treatments that are not suitable for contact with garden soil.
Keep the border low enough to avoid blocking access or holding water against the shed. If the yard slopes, do not treat a decorative edge as a retaining wall unless it has been designed for that purpose. Significant slopes or signs of soil movement may require professional assessment.
Source: farmfoodfamily.com
Natural stone edging
Use it to frame a curved flower bed, define a gravel strip, or match existing hardscape features.
Timber edging
Use suitable outdoor-rated material to form a simple, low border around a planting bed.
Recycled brick edging
Reuse sound bricks to create a traditional border, provided they can be set firmly and do not obstruct the path.
Which Border Material Is Best for a Low-Maintenance Yard?
Stone is often a useful option when long service life and a natural look matter more than ease of cutting or moving. Timber may be easier to install with basic tools but can need repair or replacement. The right choice depends on local weather, soil contact, appearance, and how firmly the edging can be installed.
Choose stone for lasting definition
Prepare a stable base and avoid loose stones where people walk.
Choose timber for a simple DIY border
Use appropriate outdoor materials and inspect them for decay as part of regular yard care.
9. Use Climbing Plants on a Separate Trellis
A trellis can add height and flowers beside a shed without covering the building itself. It suits a cottage-style yard or a garden where vertical space is limited. Place the trellis far enough from the wall to allow airflow, access, and maintenance.
Choose a climber suited to your climate and the amount of sun the site receives. Some vines grow quickly and become difficult to control, while others need more time to fill a trellis. Check whether a species is invasive or restricted in your area before planting it.
Secure the trellis to a suitable support rather than relying on loose stakes in a windy location. Keep it stable and leave space for pruning. Do not allow vines to cover shed vents, gutters, windows, or electrical fixtures.
For seasonal flowers
Choose a locally suitable flowering vine with a manageable mature size and a clear pruning plan.
For a vegetable garden
A trellis for compatible climbing vegetables may help connect the shed to nearby growing beds, provided sun and space are adequate.
For a narrow yard
A vertical trellis can create visual interest without using the full ground area needed by spreading shrubs.
Why a Separate Trellis Is Better Than Covering the Wall
A separate support lets you prune or remove plants without working directly against the shed siding. It also helps prevent stems from hiding damage or blocking ventilation. Keep the structure secure and make sure the mature vine will not overwhelm it.
Allow for mature growth
Check the vine’s height, spread, and pruning needs before choosing its position.
Keep the wall accessible
Leave a clear route for painting, repairs, and inspection.
10. Improve Drainage Before Adding Plants
Good drainage is the most important part of landscaping around a shed. Water that collects beside the base can damage some building materials, soften the soil, create muddy paths, and harm plant roots. Fix these problems before adding decorative stone or new beds.
Watch the area during rain if it is safe to do so. Look for puddles, soil washing away, water flowing toward the shed, or downspouts that empty beside the wall. Also check whether compacted soil or a nearby paved surface sends runoff into the same spot.
Correcting drainage may involve redirecting a downspout to a suitable discharge area, adjusting the ground where permitted, or creating a properly designed drainage feature. Do not send runoff onto a neighbor‘s property, across a public walkway, or toward a foundation where it could cause harm. For persistent flooding, steep slopes, or complex drainage concerns, consult a qualified local professional.
Keep water moving away
Maintain ground grading that directs surface water away from the shed without creating erosion or drainage problems elsewhere.
Check roof runoff
Use suitable gutters and downspouts where needed, and discharge water at a safe location.
Avoid covering a drainage problem
A layer of gravel or fresh mulch can hide standing water temporarily but will not correct the underlying cause.
How to Tell Whether Your Shed Area Needs Drainage Work
Repeated puddles, washed-out soil, a persistently muddy path, or dampness near the base are signs that water movement needs attention. The cause may be roof runoff, poor grading, compacted soil, or a naturally wet site. Identify the cause before deciding whether a shallow planting bed, gravel strip, or drainage system is appropriate.
If water pools after rain
Track where it comes from and where it can safely drain before changing the ground.
If soil keeps washing away
Review the slope and runoff route. A properly planned erosion-control method may be needed.
If the shed base looks damaged
Pause landscaping work and assess the building condition before covering the area.
11. Design a Low-Maintenance Shed Landscape
A low-maintenance design uses fewer plant types, clear edges, and materials that suit the site. It does not mean that every part of the yard should be covered in stone or artificial turf. Instead, reduce tasks that cause the most work, such as frequent trimming, constant watering, and repeated weed removal.
Group plants according to their light and water needs. Use mulch where plants grow, keep the lawn edge simple, and avoid shrubs that quickly outgrow the space. A small number of well-placed plants can look more attractive and be easier to manage than a crowded collection.
Think about the work you already do in the yard. If you mow every week, leave a clear mowing edge around the bed. If you grow vegetables, place the shed path where it does not cut through the main growing area. The best layout should make routine tasks easier, not add more obstacles.
Limit the plant palette
Repeat a few reliable species that suit the site’s conditions and mature size.
Use practical edging
Choose a stable border that separates lawn, mulch, gravel, and planting areas.
Choose plants for your region
Locally adapted plants can reduce extra care when the species and site conditions are a good match.
Plan for access
Leave room for mowing, carrying tools, opening doors, and reaching the shed walls.
A Simple Weekend Plan for a Neat Shed Area
You do not need to complete every feature at once. Start by clearing debris, checking the ground after rain, and marking the walking route. Once the base and drainage are in good shape, install the path or border and add a small group of suitable plants.
First task
Remove weeds and debris, inspect the shed base, and identify any drainage problems.
Second task
Mark the bed and path, check door clearance, and measure the areas before buying materials.
Third task
Install the stable path or edging and prepare the soil for the chosen plants.
Final task
Plant, water as needed, apply suitable mulch, and check that the area remains easy to access.
12. Choose the Right Design for Your Shed and Budget
The right shed landscape depends on available space, the building’s purpose, the climate, and the amount you want to spend. A compact storage shed may need only a clear path and a small bed. A larger garden workshop may benefit from a firm access route, wider working space, and planting that softens its visible sides.
Before buying materials, measure the area and make a rough sketch. Include the shed footprint, doors, roof runoff, existing trees, utility lines, and nearby paths. Estimate how much gravel, mulch, edging, or paving you need, then add a reasonable allowance for waste and uneven ground.
Use the table below to compare common approaches. The cost descriptions are relative planning guides, not current quotes; local material prices, delivery charges, site preparation, and labor can change the final amount.
Keep the first project small
A finished path and one tidy bed can improve the space without requiring a complete yard redesign.
Reuse sound materials
Existing pavers, suitable stones, or healthy plants may reduce waste and help the shed match the rest of the yard.
Buy for the finished layout
Measure first and avoid buying plants or bulk materials before checking the available space and drainage.
Compare Common Shed Landscaping Options
Use this comparison to narrow your choices before making a sketch. Each option has a different balance of cost, upkeep, and usefulness, so the most suitable design is the one that fits the way you use the shed.
Gravel border
Relative cost: low to moderate. Upkeep: occasional weed and leaf removal. Best for a neat edge and light foot traffic.
Curved flower bed
Relative cost: low to moderate. Upkeep: seasonal pruning, watering during establishment, and occasional replanting. Best for softening the shed’s appearance.
Paver walkway
Relative cost: moderate to high. Upkeep: occasional cleaning and joint repair. Best for frequent access on a firm surface.
Decorative planters
Relative cost: low to moderate. Upkeep: regular moisture checks and seasonal plant care. Best for renters or small yards that need flexible color.
Native planting bed
Relative cost: low to moderate. Upkeep: varies with species and establishment needs. Best for a regionally appropriate design with potentially lower long-term watering.
13. Common Shed Landscaping Mistakes to Avoid
The most common mistake is choosing the look before checking how the site works. A beautiful bed can become a problem if it traps water, blocks a door, or hides damage. Plan for drainage, access, and mature plant size before adding decorative details.
Another mistake is planting too close to the building. Small nursery plants can grow much wider than expected, and their branches may eventually press against siding or block vents. Read plant labels and allow room for the full mature plant rather than the size it has on planting day.
Avoid adding too many different materials in a small area. Several stone colors, edging styles, plant shapes, and path patterns can make the space feel busy. Repeat a few colors and textures to create a clear design.
Ignoring drainage
Correct the source of standing water before covering the soil with mulch or stone.
Blocking the entrance
Check how the door opens and leave enough room to carry bulky tools or move equipment.
Choosing plants by appearance alone
Check mature size, sun needs, water needs, and local suitability before planting.
Using unstable paths or edging
Prepare a suitable base and fix loose stones or uneven pavers that could cause trips.
Forgetting building maintenance
Keep siding, vents, gutters, and the shed base accessible for cleaning and inspection.
Planting trees too close
Consider mature canopy size, roots, shade, falling branches, and the shed’s foundation or support system before planting a tree.
Check for Underground Utilities Before Digging
Before digging for edging, shrubs, posts, or drainage, contact 811 in the United States or use the applicable state service to learn how to request utility marking. The exact process and timing vary by state. Public utility marking may not identify every privately owned line, so check the status of private irrigation, lighting, or other buried services as well.
Before digging
Request utility marking within the required local time frame and wait until the relevant markings are complete.
Near electrical equipment
Do not dig or install features that interfere with wiring, outlets, or access to electrical equipment.
Frequently Asked Questions
Q
What should I put around the base of a garden shed?
A well-drained gravel strip, a properly placed planting bed, or a simple path can work around a garden shed. Choose the option based on water movement, building materials, and how often you need to reach the wall. Keep soil and mulch away from vulnerable siding, preserve airflow, and follow the shed manufacturer’s clearance guidance.
Q
How do I make a shed look attractive in my backyard?
Start with a neat path, a defined border, and a small group of plants that suit the site. Repeat colors or materials used elsewhere in the yard so the shed feels connected to the landscape. Keep the entrance clear and avoid hiding the building behind large shrubs.
Q
What are the best low-maintenance plants around a shed?
The best plants are those that match your local climate, soil, sunlight, and available moisture. Native perennials, compact ornamental grasses, and suitable ground covers can work well when their mature sizes fit the space. Check with a local extension service or native plant group for species suited to your area.
Q
Should I use gravel or mulch around my shed?
Gravel is useful for a defined border or light-use walking area, while organic mulch often suits planted beds. Gravel can shift or collect debris, and mulch breaks down and needs occasional replacement. Neither material corrects poor drainage on its own, and both should be kept away from vulnerable siding.
Q
How much space should I leave between plants and a shed?
There is no single spacing distance that works for every shed and plant. Base the gap on mature plant width, airflow, siding material, door clearance, and the room needed for repairs. Follow manufacturer instructions where available and leave a clear route to inspect the shed’s base and walls.
Q
How can I landscape around a shed on a small budget?
Start by clearing the area, improving drainage if needed, and creating one simple path. Use a small curved bed, a few suitable plants, and materials already available in your yard when they are safe and appropriate for the job. Complete the essential work first, then add planters or decorative edging later.
Q
Can I plant flowers directly beside a wooden shed?
You can plant flowers near a wooden shed if you leave enough space for airflow, inspection, and maintenance. Choose compact plants that will not press against the siding, and keep soil and mulch from contacting vulnerable wood. Avoid letting dense growth hide damp areas or signs of decay.
Q
How do I stop water from collecting around my shed?
First, identify whether the water comes from roof runoff, nearby paving, poor grading, or naturally wet soil. Keep surface water moving toward a suitable discharge area without directing it onto neighboring property or toward another building. If water continues to collect or the ground is unstable, seek advice from a qualified local drainage professional.
✦ Wrapping Up
Conclusion
The best landscaping ideas around a shed make the space look neat while keeping the building useful and easy to maintain. A curved flower bed, gravel border, stepping-stone path, native plants, or a few decorative planters can each improve the yard without requiring a major redesign. The right combination depends on your available space, local climate, and the way you use the shed.
Start with drainage and access, then choose one or two features that fit your budget. Check plant sizes, keep the shed base visible, and use materials that suit the ground and expected foot traffic. A simple, well-planned layout will usually serve you better than a crowded design that needs constant care.
💡 Key Takeaway
This weekend, inspect the ground around your shed after rain, measure the entrance and walking route, and sketch one path with one planting bed. Fix drainage concerns first, then choose a few locally suitable plants and a simple border to finish the space.
I enjoy sharing simple gardening ideas, lawn care tips, and honest product reviews that help make outdoor work easier. From home gardening guides to helpful tools and lawn care advice, I write easy-to-follow content to help readers create a healthier and better-looking outdoor space without wasting time or money.