As an Amazon Associate, I earn from qualifying purchases.
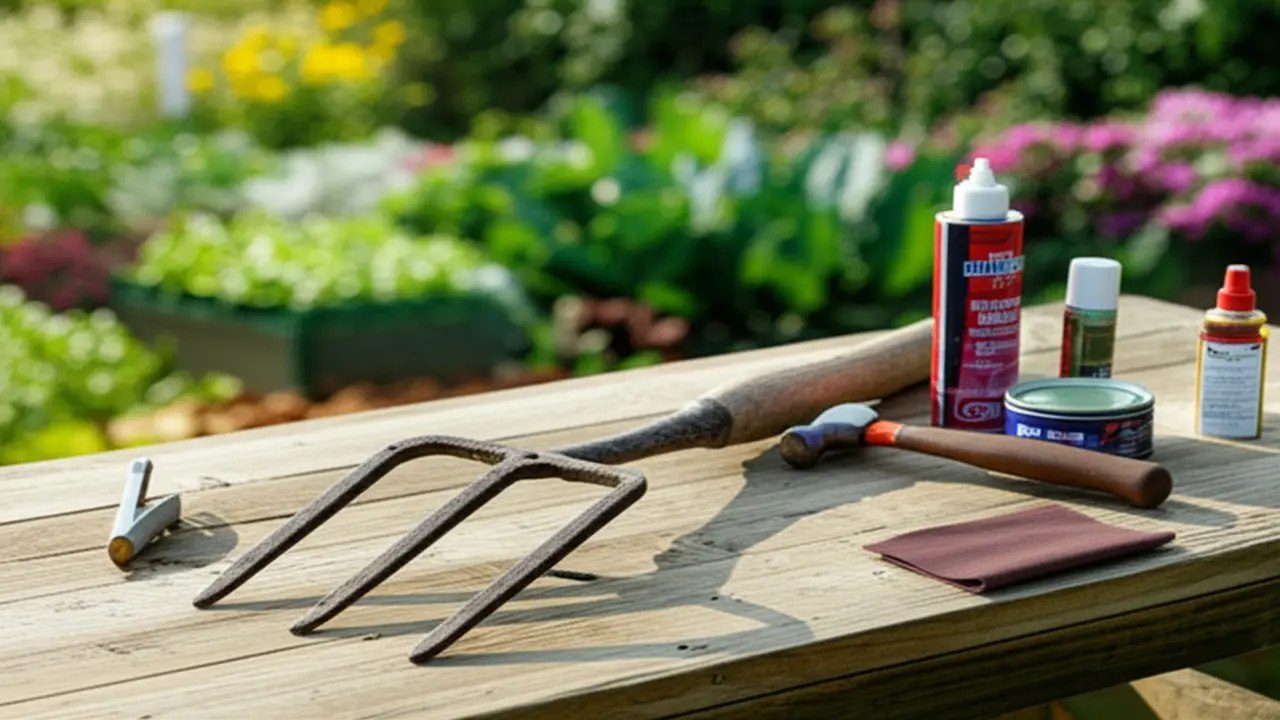
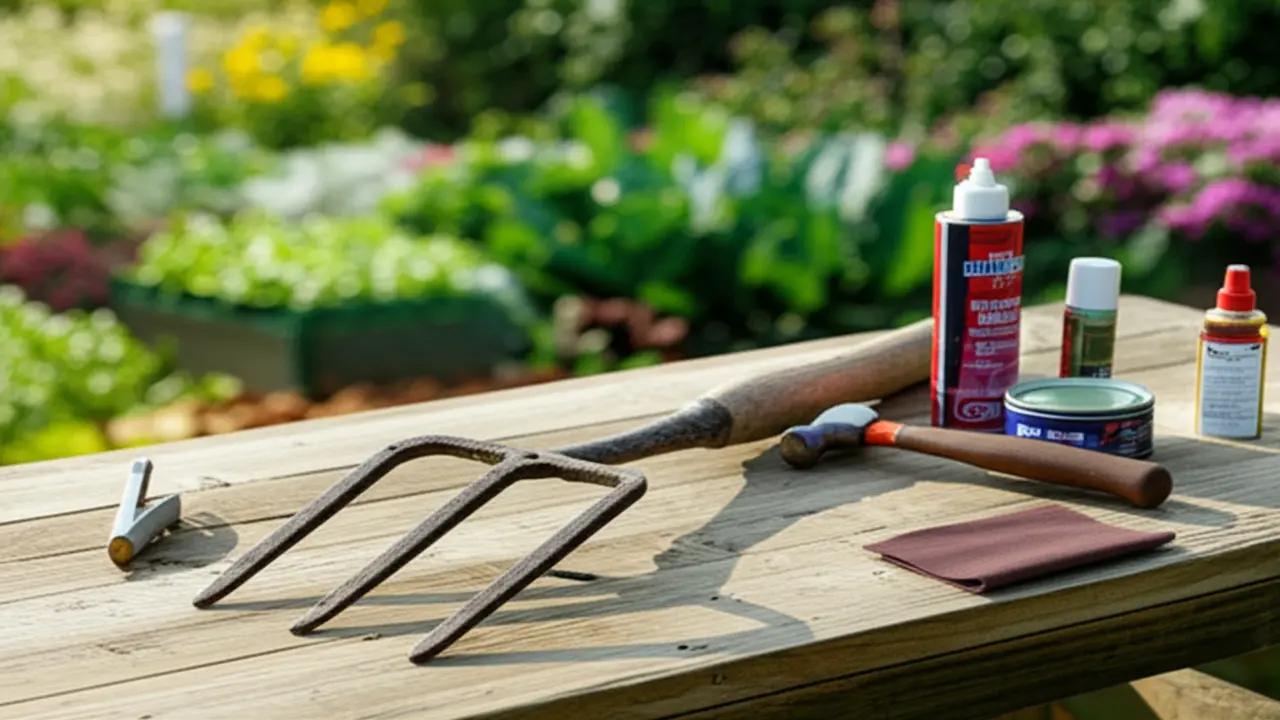
You can repair a garden fork handle by tightening its existing fitting, replacing a worn wooden wedge, or installing a new handle if the old one is cracked or broken. The right method depends on how the handle attaches to the metal fork head.
A garden fork is a useful tool for many jobs around an American yard. It helps loosen compacted soil, turn compost, lift potatoes, and move mulch. A loose or broken handle can make these jobs harder and may cause an injury if the metal head comes free during use.
The good news is that many garden fork handle problems do not require replacing the whole tool. A loose wooden handle may need a new wedge or fastener, while a cracked handle often needs a full replacement. Before starting, check how the handle joins the metal head and look for damage around the socket, rivets, and wood.
This guide explains how to inspect, repair, and replace a garden fork handle. It also covers the tools you need, common fitting problems, and ways to keep the repaired fork in good shape. The goal is a firm, safe fit that can handle normal digging work without movement.
Garden fork handles face repeated pressure during digging. Each time you push the tines into the ground, lift soil, or turn compost, force travels through the handle and into the metal head. Over time, this pressure can loosen the fitting or damage the wood.
Moisture also plays a part. Wooden handles absorb water and lose moisture as the weather changes. This can make the wood swell or shrink, which may loosen a wedge or create movement inside the metal socket.
Poor storage can speed up wear. A fork left outside in rain or placed on damp soil may develop rot, rust, or cracks. Heavy use on hard or rocky ground can also place more stress on the handle than normal garden work.
Source: gardenitemreviews.com
Loose handle
The wooden shaft moves inside the metal socket or the grip shifts when you push the fork into the soil.
Cracked wood
Small splits may appear near the top grip, along the shaft, or close to the metal head.
Broken handle
The shaft has snapped or lost a large piece of wood, making normal use unsafe.
Damaged fastener
A screw, bolt, rivet, or wedge has become loose, worn, or damaged.
Corroded fitting
Rust around the socket or retaining parts may weaken the connection between the handle and fork head.
How to Tell Whether the Handle Needs Repair or Replacement
Start with a visual check. Look for long cracks, soft wood, missing pieces, and signs of rot. Pay close attention to the area where the handle enters the metal head because this part takes much of the digging force.
Next, hold the fork head firmly and gently move the handle from side to side. If the handle shifts inside the fitting, the connection needs attention. Do not test it by pushing hard against the ground because a loose head could come free.
A handle with a few shallow surface marks may still be usable after sanding. However, a deep crack, broken shaft, or soft area near the socket calls for replacement rather than a surface repair.
Repair may work
The wood is sound, the metal head is intact, and the problem comes from a loose wedge or fastener.
Replace the handle
The wood is split through, badly cracked, rotten, or broken near the metal head.
Replace the fork
The metal head, socket, or tines have serious structural damage that cannot be safely corrected.
Tools and Materials Needed to Repair a Garden Fork Handle
Gather the right tools before taking the fork apart. The exact items depend on whether your fork has a wooden wedge, a riveted socket, or a screw-on handle. Having the correct tools makes the work easier and reduces the chance of damaging the metal head.
For most wooden handle repairs, you need a stable workbench, a clamp, and basic hand tools. A replacement handle should match the original fitting. Do not assume that every garden fork uses the same handle shape or attachment method.
Wear safety glasses when drilling, cutting, grinding, or driving out metal fasteners. Work gloves can help when handling rough wood, but keep your hands away from moving drill bits and cutting tools.
Source: www.youtube.com > Tightwad Workshop
Basic hand tools
A hammer, wooden mallet, screwdriver, pliers, punch, and adjustable wrench can help with common repairs.
Woodworking tools
A wood rasp, file, hand saw, and sandpaper help shape and smooth a replacement wooden handle.
Power tools
A drill and suitable bits may be needed to remove old wood or make a new retaining hole.
Replacement parts
You may need a matching wooden handle, hardwood wedge, screw, bolt, or rivet.
Safety equipment
Use safety glasses, suitable work gloves, and sturdy footwear. Secure the fork head before drilling or striking it.
Choosing the Right Replacement Handle
The replacement handle must match the fork’s fitting. Check its length, diameter, shape, and attachment style before buying one. Some garden forks use a long wooden shaft with a D-shaped grip, while others have a straight handle.
Hardwood handles are common on traditional garden tools. Ash and hickory are examples of woods used for tool handles because of their useful strength and flexibility. However, the correct shape and sound construction matter more than choosing a wood name alone.
If possible, take the old handle or the fork head to a hardware store or garden tool supplier. This makes it easier to compare the fitting and avoid buying a handle that is too large, too small, or shaped for a different tool.
Length
Choose a handle that gives you a comfortable working position and matches the fork’s original design.
Diameter
The lower end must fit the socket or tang without excessive gaps.
Wood condition
Choose straight-grained wood without deep cracks, loose knots, or signs of rot.
Grip style
Check whether your fork needs a D-grip, T-grip, or straight handle.
How to Repair a Loose Garden Fork Handle
A loose handle may be repairable without replacing the whole shaft. First, find out why it moves. The problem may be a loose wedge, a worn fastener, or a gap caused by changes in the wood.
A small amount of movement does not always mean the handle is beyond repair. However, adding more pressure or using the fork while it is loose can make the damage worse. Fix the connection before returning the tool to the garden.
Source: www.youtube.com > aaanton11
Step 1: Clean the fitting
Remove soil, rust flakes, and loose debris from the area around the metal socket. Use a wire brush where needed.
Step 2: Check the fastener
Look for a screw, bolt, rivet, or wedge. Identify the part that holds the handle in place.
Step 3: Tighten the connection
Tighten a suitable screw or bolt if the original design allows it. Replace worn or damaged fasteners with matching parts.
Step 4: Check the fit
Hold the metal head and gently move the handle. It should remain firmly seated without twisting or shifting.
How to Replace a Loose Wooden Wedge
Some wooden garden fork handles are held in place by a wedge. The wedge spreads the end of the wood inside the fitting and helps keep the metal head secure. If the wedge has moved or worn down, the handle may begin to wobble.
If the existing wedge is damaged, remove it carefully using a suitable punch or small hand tool. Avoid striking the fork tines or bending the metal socket. Clean the slot and check that the handle itself has no serious cracks.
Fit a correctly sized hardwood wedge into the existing slot. Tap it into place with a wooden mallet until the handle is secure. Do not keep striking once the wedge is firmly seated, as excessive force can split the wood.
Trim any excess wedge material if needed, then check the connection. The handle should sit firmly in the head without visible gaps or movement.
Use the right wedge
Choose a suitable hardwood wedge that matches the slot and fitting.
Avoid overdriving
Too much force can split the handle or damage the fitting.
Inspect the wood
Do not install a new wedge in wood that is badly cracked or rotten.
What If the Handle Is Loose Because the Wood Has Shrunk?
Wood can change size as moisture levels change. A handle that once fitted tightly may become loose after spending time in a hot, dry shed or garage.
Check the fitting before trying to tighten it. If the design uses a replaceable wedge, a suitable new wedge may restore the connection. If the wood has become too small or damaged, replacing the handle is the better option.
Avoid wrapping the socket with tape or packing it with random pieces of wood. These materials may shift under digging pressure and create an unsafe connection.
Best option
Repair the original wedge or replace the handle if the wood no longer fits securely.
Avoid
Do not depend on glue, tape, or loose packing as the main support for a working fork handle.
How to Replace a Broken Garden Fork Handle
A broken handle usually needs full replacement. A fork handle carries force during digging and lifting, so a simple patch cannot reliably restore the strength of wood that has split through.
The replacement process depends on the fork’s construction. A socket fitting, a tanged fitting, and a bolted fitting do not all use the same method. Identify the design before removing the old handle.
Source: farmcitystate.com
Step 1: Secure the fork head
Place the metal head in a sturdy bench vise or another suitable holding fixture. Protect the metal from damage and make sure it cannot move.
Step 2: Remove the old fastener
Take out the screw, bolt, rivet, or wedge that holds the handle in place. A rivet may require its head to be carefully ground or filed off before it can be punched out.
Step 3: Remove the broken wood
Pull out the old handle if possible. If wood remains inside a socket, drill several suitable holes into the wooden core and carefully remove the remaining pieces with a punch.
Step 4: Clean the fitting
Remove loose wood, rust, and dirt. Check the metal head and socket for cracks, distortion, or severe corrosion.
Step 5: Prepare the new handle
Compare the replacement handle with the old one. Check its length, shape, diameter, and fitting position.
Step 6: Fit the new handle
Shape the lower end with a rasp or file when necessary. Remove small amounts of wood and check the fit often.
Step 7: Secure the handle
Install the correct wedge, rivet, screw, or bolt for the fork’s original design.
Step 8: Inspect the finished repair
Check the alignment, fastening, and grip. Do not use the fork until the connection is firm and secure.
Replacing a Handle in a Socket-Type Garden Fork
A socket-type fork has a metal sleeve that holds the lower end of the handle. The handle may be secured by a rivet, screw, or another retaining part. Remove that part before trying to pull out the old shaft.
Once the old handle is out, clean the inside of the socket. Check for damage and compare the replacement handle with the opening. The new handle should fit snugly without requiring excessive force.
If the handle is too large, use a rasp or file to remove a little wood at a time. Keep checking the fit so you do not make the shaft too thin. If it is too loose, select a correctly sized replacement rather than trying to fill a large gap with random material.
Seat the new handle fully in its intended position. Follow the original fitting method and install a suitable retaining screw, bolt, or rivet. A drilled hole should line up with the original fastening position where the design requires it.
Important fitting check
The handle should sit squarely in the socket and should not rock from side to side.
Fastener check
Use a suitable replacement fastener of the correct size and type.
Replacing a Tanged Garden Fork Handle
A tanged fork has a narrow metal extension that enters the wooden handle. The tang may be secured with a rivet or similar fastener. This design needs accurate alignment because the metal extension must sit correctly inside the new wood.
Remove the retaining fastener and carefully pull the old handle away from the tang. Measure the distance between the end of the tang and its fastening hole. These measurements help position the new handle correctly.
Prepare the replacement handle for the tang. Check that the opening is suitable and that the metal part enters to the correct depth. Mark the fastener position and drill the required hole carefully.
Fit the handle, align the fork head, and install a suitable replacement rivet or fastener. If the tang or its fastening area is bent or damaged, have the tool assessed before attempting to use it.
Measure first
Record the original fitting depth and retaining-hole position before removing the old handle.
Keep alignment correct
The fork head should sit straight in relation to the handle.
Do not force the tang
A poor fit can split the wood or damage the metal extension.
Replacing a Handle Held by Screws or Bolts
Some garden forks use screws or bolts to hold the handle in place. This type can be easier to service because the fastener can often be removed without cutting or grinding metal.
Use the correct screwdriver or wrench to remove the fastener. Check the hole and the surrounding wood for damage. If the hole is badly enlarged or the wood has split, replacing the handle is safer than simply fitting a larger screw.
Install a matching handle and align its original fastening point. Reuse a sound fastener or install a suitable replacement. Tighten it firmly without stripping the threads or crushing the wood.
Keep the original hardware
Save usable screws, bolts, and washers if they are in good condition and suitable for reuse.
Check the threads
Replace damaged fasteners rather than forcing them into place.
How to Fit a New Wooden Handle Correctly
A good fit is more important than how quickly you finish the repair. The replacement handle must sit firmly in the metal fitting and stay aligned during digging. A handle that is forced into place or held by an oversized wedge may fail later.
Start by comparing the replacement handle with the old one. Mark the fitting depth and any fastening positions. If the replacement needs shaping, work slowly and test it often.
For a traditional wedge-secured fitting, the end of the handle may have a slot for a hardwood wedge. Follow the design of the tool and the replacement handle rather than cutting a slot where one is not required.
Source: farmcitystate.com
Shape gradually
Use a rasp or file to remove small amounts of wood until the handle fits correctly.
Check the depth
Make sure the handle reaches the correct seating position inside the socket or around the tang.
Keep the head straight
Align the handle with the fork head before installing the fastener.
Secure the fitting
Use the original attachment method and suitable replacement parts.
Why You Should Avoid an Oversized Handle
A handle that is too large may seem easy to secure with extra hammering. However, forcing it into a narrow socket can split the wood or place too much stress on the metal fitting.
A handle that is too small can also cause problems. It may wobble, move during digging, or place extra pressure on the retaining fastener.
The best fit is snug and even. If the replacement handle cannot be shaped to fit without becoming weak, choose another handle that matches the fork.
Too large
Remove a small amount of wood with a rasp and test the fit again.
Too small
Choose a correctly sized handle instead of relying on loose packing.
Should You Use Glue or Epoxy?
Wood glue and epoxy are not automatic solutions for a loose garden fork handle. The correct attachment method should provide the main mechanical support. Glue may not solve movement caused by a damaged socket, broken tang, or badly fitted shaft.
Some repair designs may allow an adhesive as an additional material, but it should only be used when the tool manufacturer or a suitable repair method supports it. Do not use adhesive as a substitute for a required rivet, bolt, or wedge.
If the handle remains loose after proper fitting, stop and inspect the connection. A different replacement handle or professional repair may be needed.
Do
Follow the manufacturer’s instructions for the specific fork and handle.
Do not
Depend on a layer of glue to hold a badly fitted handle in place.
How to Repair Minor Surface Damage on a Wooden Handle
Not every damaged handle needs replacement. Shallow scratches, rough patches, and small surface splinters may be fixed with careful sanding if the wood underneath remains sound.
Start by cleaning the handle and allowing it to dry. Sand rough areas with suitable sandpaper, following the grain of the wood. Use light pressure and avoid removing more material than needed.
After sanding, wipe away the dust and inspect the handle again. If you find a deep split or soft, rotten wood, stop the surface repair and replace the handle.
Source: YouTube > iCultivate
Step 1: Clean the handle
Remove dirt and moisture so you can see the condition of the wood.
Step 2: Sand rough areas
Use suitable sandpaper to remove splinters and rough edges.
Step 3: Remove dust
Wipe the handle with a clean cloth before applying a finish.
Step 4: Apply a suitable wood treatment
Use a compatible wood-care oil according to its label, then allow the handle to dry fully.
How to Protect the Handle After Sanding
A suitable wood treatment can help reduce moisture-related wear. Boiled linseed oil is one traditional option for wooden garden tool handles. Apply it according to the product instructions and wipe away excess oil.
Allow the finish to dry fully before using the fork. Oil-soaked rags can heat up and ignite as they dry, so handle and dispose of them according to the product label. Do not leave oily cloths crumpled in a pile.
Avoid thick coatings that make the grip slippery. The finished handle should feel smooth but still provide a firm grip when your hands are dry or damp.
Use a suitable finish
Choose a wood treatment intended for tool handles or exterior wooden items.
Follow drying instructions
Do not return the fork to service while the finish remains wet or tacky.
Keep the grip comfortable
Avoid a glossy or slippery finish on the areas you hold.
Common Garden Fork Handle Repair Problems and Solutions
A repair does not always go as planned. A replacement handle may refuse to fit, a fastener may not line up, or the fork head may remain loose after assembly. These problems often point to a mismatch between the replacement part and the original fitting.
Do not try to solve every problem with extra force. More hammering, larger screws, or thick layers of adhesive can create new damage. Stop and find the cause before continuing.
Source: www.youtube.com > The No-Nonsense Vegetable Growing System
The new handle will not enter the socket
Check the dimensions and remove small amounts of wood with a rasp. Make sure the replacement handle is designed for that fitting.
The handle moves after fitting
Check the seating depth, wedge, and retaining fastener. Replace an incorrectly sized or damaged handle.
The retaining hole does not line up
Check the handle position and fitting type. Do not force a fastener through an incorrect hole.
The wood splits during installation
Stop immediately. Remove the damaged handle and check whether the wood was too large, dry, or poorly aligned.
The metal socket is cracked
Do not continue the repair as a normal handle replacement. A damaged socket can no longer provide a reliable connection.
What to Do If the Handle Keeps Coming Loose
A handle that repeatedly becomes loose may have a deeper problem than a worn wedge. The socket could be stretched, the wood could be too small, or the retaining hole could be damaged.
Remove the handle and inspect both parts. Look for a distorted metal opening, damaged threads, a split shaft, or signs that the handle does not reach its proper seating depth.
If the metal fitting is still sound, a correctly matched replacement handle may solve the problem. If the socket or tang is damaged, replacing the entire fork may be the safer and more practical choice.
Inspect the socket
Look for cracks, spreading, or deformation.
Check the shaft
Look for crushed wood, splits, and an incorrect fit.
Review the fastener
Check for worn threads, loose rivets, or a damaged wedge slot.
Safety Checks Before Using Your Repaired Garden Fork
A repaired garden fork should pass a careful inspection before it returns to work. The metal head must remain firmly attached to the handle, and the shaft should have no cracks or loose sections.
Begin with a visual inspection. Check the entire handle, the fitting, and the tines. Make sure no fastener is sticking out in a way that could catch your hand.
Next, hold the fork securely and gently test the connection. Do not put your full weight on the tool or use it as a lever to see whether the repair holds. If anything moves, stop and correct the problem.
Source: www.youtube.com > OCuana Designs
Check the handle
Make sure the wood is sound, smooth, and free from deep cracks or splinters.
Check the metal head
Look for cracks, loose tines, damaged sockets, and serious corrosion.
Check the fasteners
Make sure screws, bolts, rivets, and wedges are properly seated.
Check the alignment
The handle should sit straight and feel comfortable to hold.
Test carefully
Start with gentle pressure in loose soil. Stop if you notice movement or unusual sounds.
When Should You Replace the Whole Garden Fork?
Sometimes a new handle will not make an old fork safe. If the metal head is cracked, the socket is badly damaged, or several tines are loose, the tool may need replacement.
A severely rusted head also deserves careful inspection. Surface rust can often be cleaned, but deep corrosion that reduces the strength of the metal is a different problem.
If the repair requires welding, major metal reshaping, or a custom fitting, ask a qualified tool repair professional to assess it. The cost and effort may be greater than buying a sound replacement fork.
Replace the tool
When the head has serious structural cracks or the socket cannot hold a handle securely.
Seek professional help
When the metal fitting needs specialist repair or the correct handle cannot be identified.
Keep the tool
When the metal head is sound and the problem is limited to a replaceable handle or fastener.
How to Keep a Garden Fork Handle in Good Condition
Regular care can help a repaired handle last longer. Clean the fork after each use and remove soil from the metal head and handle. Dirt that stays trapped around the fitting can hold moisture and make it harder to spot early damage.
Store the fork in a dry shed or garage when possible. Hanging it on a wall rack keeps the handle away from damp floors and reduces the chance of someone stepping on the tines.
Check the handle from time to time, especially after heavy digging. Early signs of movement or surface damage are easier to deal with than a handle that breaks during use.
Source: YouTube > khthhonl
Clean after use
Remove mud and plant debris from the fork head and wipe the handle clean.
Dry before storage
Allow the tool to dry before placing it in a shed or garage.
Store under cover
Protect wooden handles from long periods of rain, direct sun, and damp conditions.
Inspect the fitting
Look for movement, loose wedges, and damaged fasteners.
Maintain the wood
Sand minor splinters and apply a suitable wood treatment when needed.
Avoid Using a Garden Fork as a Crowbar
A garden fork is made for loosening and lifting soil, not for levering heavy stones or breaking hard concrete. Using it as a crowbar can bend the tines and place too much force on the handle connection.
If you meet a large stone or a very hard root, stop and use a tool designed for that task. This simple habit can help protect both the handle and the metal head.
Also avoid using the fork to lift loads beyond its intended purpose. Even a well-fitted wooden handle can break when exposed to excessive force.
Use the right tool
Choose a digging bar or another suitable tool for heavy levering tasks.
Avoid excessive force
Do not jump on the fork or use your full body weight to force it into hard ground.
Inspect after heavy work
Check the handle and fitting after working in rocky or compacted soil.
Repair or Replace: Which Option Makes More Sense?
The best choice depends on the condition of the handle and the metal head. A loose fastener is usually a smaller repair than a broken shaft, while a damaged metal socket may make the whole tool unsuitable for further use.
The table below compares common problems and the most sensible next step. It is a practical decision guide rather than a fixed rule for every garden fork.
Small surface splinters
Sand the affected area if the wood underneath is still sound.
Loose wedge
Remove and replace the wedge if the handle and fitting remain in good condition.
Broken wooden shaft
Install a compatible replacement handle.
Damaged metal head
Seek a qualified repair assessment or replace the fork.
Quick Repair Decision Table
Use this comparison to decide what to do before buying parts or starting work.
Loose screw or bolt
Recommended action: inspect and tighten or replace the fastener if the wood and threads are sound.
Worn wooden wedge
Recommended action: fit a suitable replacement wedge if the handle is not cracked.
Shallow scratches
Recommended action: clean and sand the handle.
Deep wood split
Recommended action: replace the handle.
Broken rivet
Recommended action: remove the old fastener and install a suitable replacement using the correct method.
Cracked socket
Recommended action: stop using the fork and seek professional assessment or replace the tool.
Research Notes and Useful Next Questions
The main repair methods in this guide are based on documented tool-rehandling instructions, agricultural hand-tool training material, and garden tool maintenance guidance. These sources describe different fitting designs, so one repair method should not be treated as suitable for every fork.
The most useful distinction is between socket fittings, tanged fittings, and handles secured with wedges or removable fasteners. Identifying the fitting before removing the old shaft helps prevent damage and avoids buying the wrong replacement.
A useful additional point is knowing when not to repair. A new handle cannot restore a cracked metal head or a badly damaged socket. This distinction helps readers avoid spending time on a repair that cannot make the tool safe.
Question: Can a broken handle be patched?
Reader stage: Repair decision. Basis: Inferred next need. Coverage in reviewed guidance: Limited. Reader benefit: Explains why a full replacement is generally the safer choice for a broken working shaft. Priority: High.
Question: How do I identify the correct handle fitting?
Reader stage: Before buying parts. Basis: Inferred next need. Coverage in reviewed guidance: Answered in general, but often lacks a clear fitting comparison. Reader benefit: Reduces incorrect purchases. Priority: High.
Question: What if the metal socket is damaged?
Reader stage: Troubleshooting. Basis: Inferred next need. Coverage in reviewed guidance: Shallow. Reader benefit: Helps prevent an unsafe handle installation. Priority: High.
Question: How should I care for the replacement handle?
Reader stage: After repair. Basis: Inferred next need. Coverage in reviewed guidance: Answered in general. Reader benefit: Helps reduce moisture-related damage. Priority: Medium.
Frequently Asked Questions
Q
Can I repair a broken garden fork handle without replacing it?
It depends on the damage. Minor surface scratches and small splinters may be repaired with sanding, but a handle that has snapped or split deeply should be replaced.
A patch made with tape, glue, or a metal sleeve may not provide the strength needed for digging. A correctly fitted replacement handle is usually the safer choice.
Q
How do I fix a loose wooden garden fork handle?
First, inspect the fitting and find out whether the handle uses a wedge, screw, bolt, or rivet. Tighten or replace the correct retaining part if the wood and metal fitting are still sound.
If the wood has shrunk or become badly worn, a suitable replacement handle may be necessary. Do not use the fork until the handle stays firmly in place.
Q
What type of wood is best for a garden fork handle?
Ash and hickory are examples of hardwoods used for tool handles. Both can provide useful strength and flexibility when properly selected and made.
The most important factors are sound wood, suitable grain, correct dimensions, and a fitting that matches your fork. A poorly fitted hardwood handle is not a safe replacement.
Q
Can I use super glue to fix a garden fork handle?
Super glue should not be used as the main way to secure a loose or broken garden fork handle. It cannot replace the mechanical support provided by a proper wedge, rivet, screw, or bolt.
Follow the tool manufacturer’s repair instructions. If the fitting cannot hold the handle securely, replace the damaged part or have the tool assessed.
Q
How do I remove a broken handle from a garden fork?
Secure the metal head in a suitable vise and remove the retaining fastener. If wood remains inside a socket, drill several holes into the wooden core and carefully remove the pieces with a punch.
Use eye protection and keep the fork stable while working. If the fitting is difficult to remove or requires specialist metalwork, ask a qualified repair professional for help.
Q
How tight should a new garden fork handle be?
The handle should fit snugly and sit in the correct position without rocking or twisting. It should not require excessive force to install.
Once the correct wedge or fastener is fitted, the connection should remain firm during a gentle inspection. If the handle still moves, do not use the fork.
Q
Can I use a shovel handle on a garden fork?
Only if the replacement handle matches the fork’s fitting, dimensions, length, and grip design. Shovel and fork handles can look similar but may have different shapes or attachment points.
Compare the old handle and the metal head before buying. A handle that does not match should not be forced into the fitting.
Q
How often should I oil a wooden garden fork handle?
There is no single schedule for every handle. Check the wood regularly and apply a suitable treatment when it becomes dry or rough, following the product instructions.
Clean and dry the handle before treatment. Wipe away excess oil and allow it to dry fully before using the fork.
✦ Wrapping Up
Conclusion
Repairing a garden fork handle is often possible with a few basic tools and the correct replacement parts. A loose wedge or fastener may need only a small repair, while a cracked or broken wooden shaft usually needs a new handle.
The most important step is identifying the fitting before taking the fork apart. Socket fittings, tanged fittings, and bolted designs need different repair methods. A properly matched handle should fit snugly, remain aligned, and stay firmly attached to the metal head.
After the repair, inspect the entire fork before returning it to your garden. Keep the handle clean and dry, store the tool under cover, and check the fitting from time to time. These simple habits can help your garden fork remain useful for many seasons.
💡 Key Takeaway
Start by cleaning your garden fork and checking the handle, socket, tines, and fasteners. If the wood is sound, repair the loose fitting with the correct wedge or fastener. If the handle is cracked or broken, measure the original fitting and install a matching replacement. Never use the fork until the handle is secure and the metal head is free from structural damage.
I enjoy sharing simple gardening ideas, lawn care tips, and honest product reviews that help make outdoor work easier. From home gardening guides to helpful tools and lawn care advice, I write easy-to-follow content to help readers create a healthier and better-looking outdoor space without wasting time or money.