As an Amazon Associate, I earn from qualifying purchases.
To build a raised garden bed with wood, choose a sunny, level spot, cut four boards to size, join them with outdoor-rated screws, set the frame in place, and fill it with suitable garden soil. For a simple first bed, a frame about 4 feet wide, 8 feet long, and 12 inches deep is a practical starting point.
Across the United States, a wooden raised garden bed can turn a small backyard, side yard, or patch of compacted lawn into a useful place to grow fresh food. It works well for home gardeners who want to grow tomatoes, peppers, lettuce, herbs, or other crops without digging a full garden into the ground. The basic design is simple, and most of the work involves careful measuring, cutting, and fastening.
The best results start before the first board is cut. Choose lumber that is suitable for a food garden, make sure the site drains well, and plan a width that lets you reach the center without stepping on the soil. These choices help the frame last longer and make planting, weeding, and watering easier.
This guide explains how to build a sturdy wooden garden bed with common tools and straightforward steps. It also covers lumber choices, soil volume, drainage, common construction mistakes, and ways to adapt the design for different American climates and yard sizes.
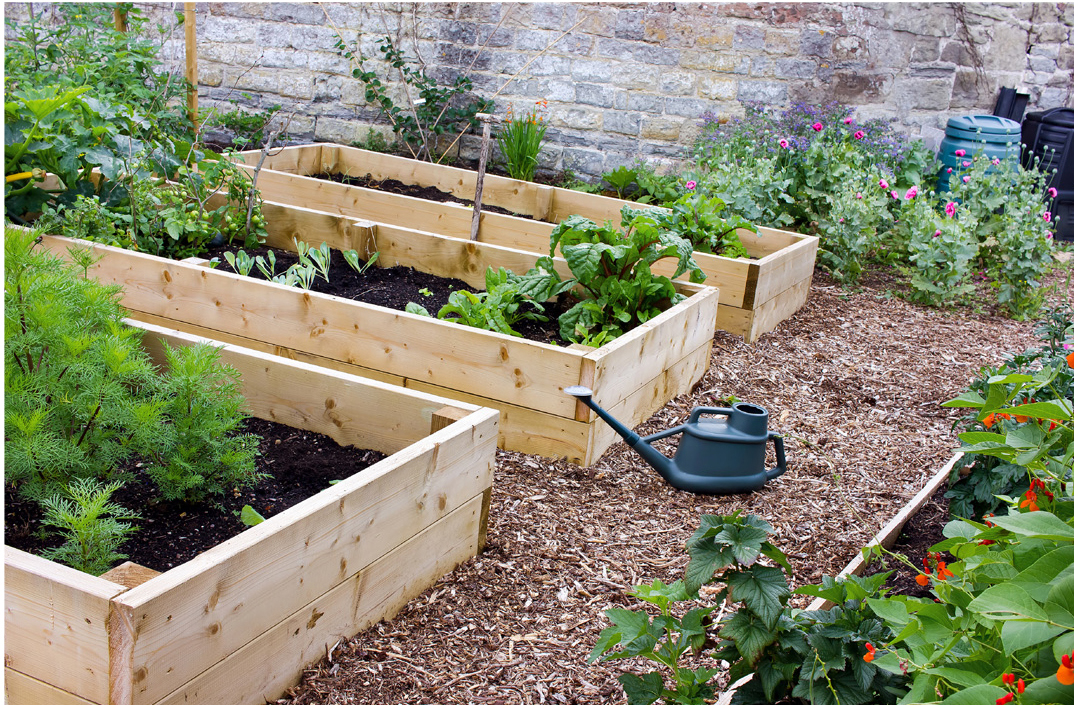
A wooden raised bed holds growing soil above the surrounding ground. Its sides create a clear planting area and can make garden care easier in yards with compacted soil, poor drainage, or limited space. The frame also gives you a defined place to add compost and other suitable soil amendments.
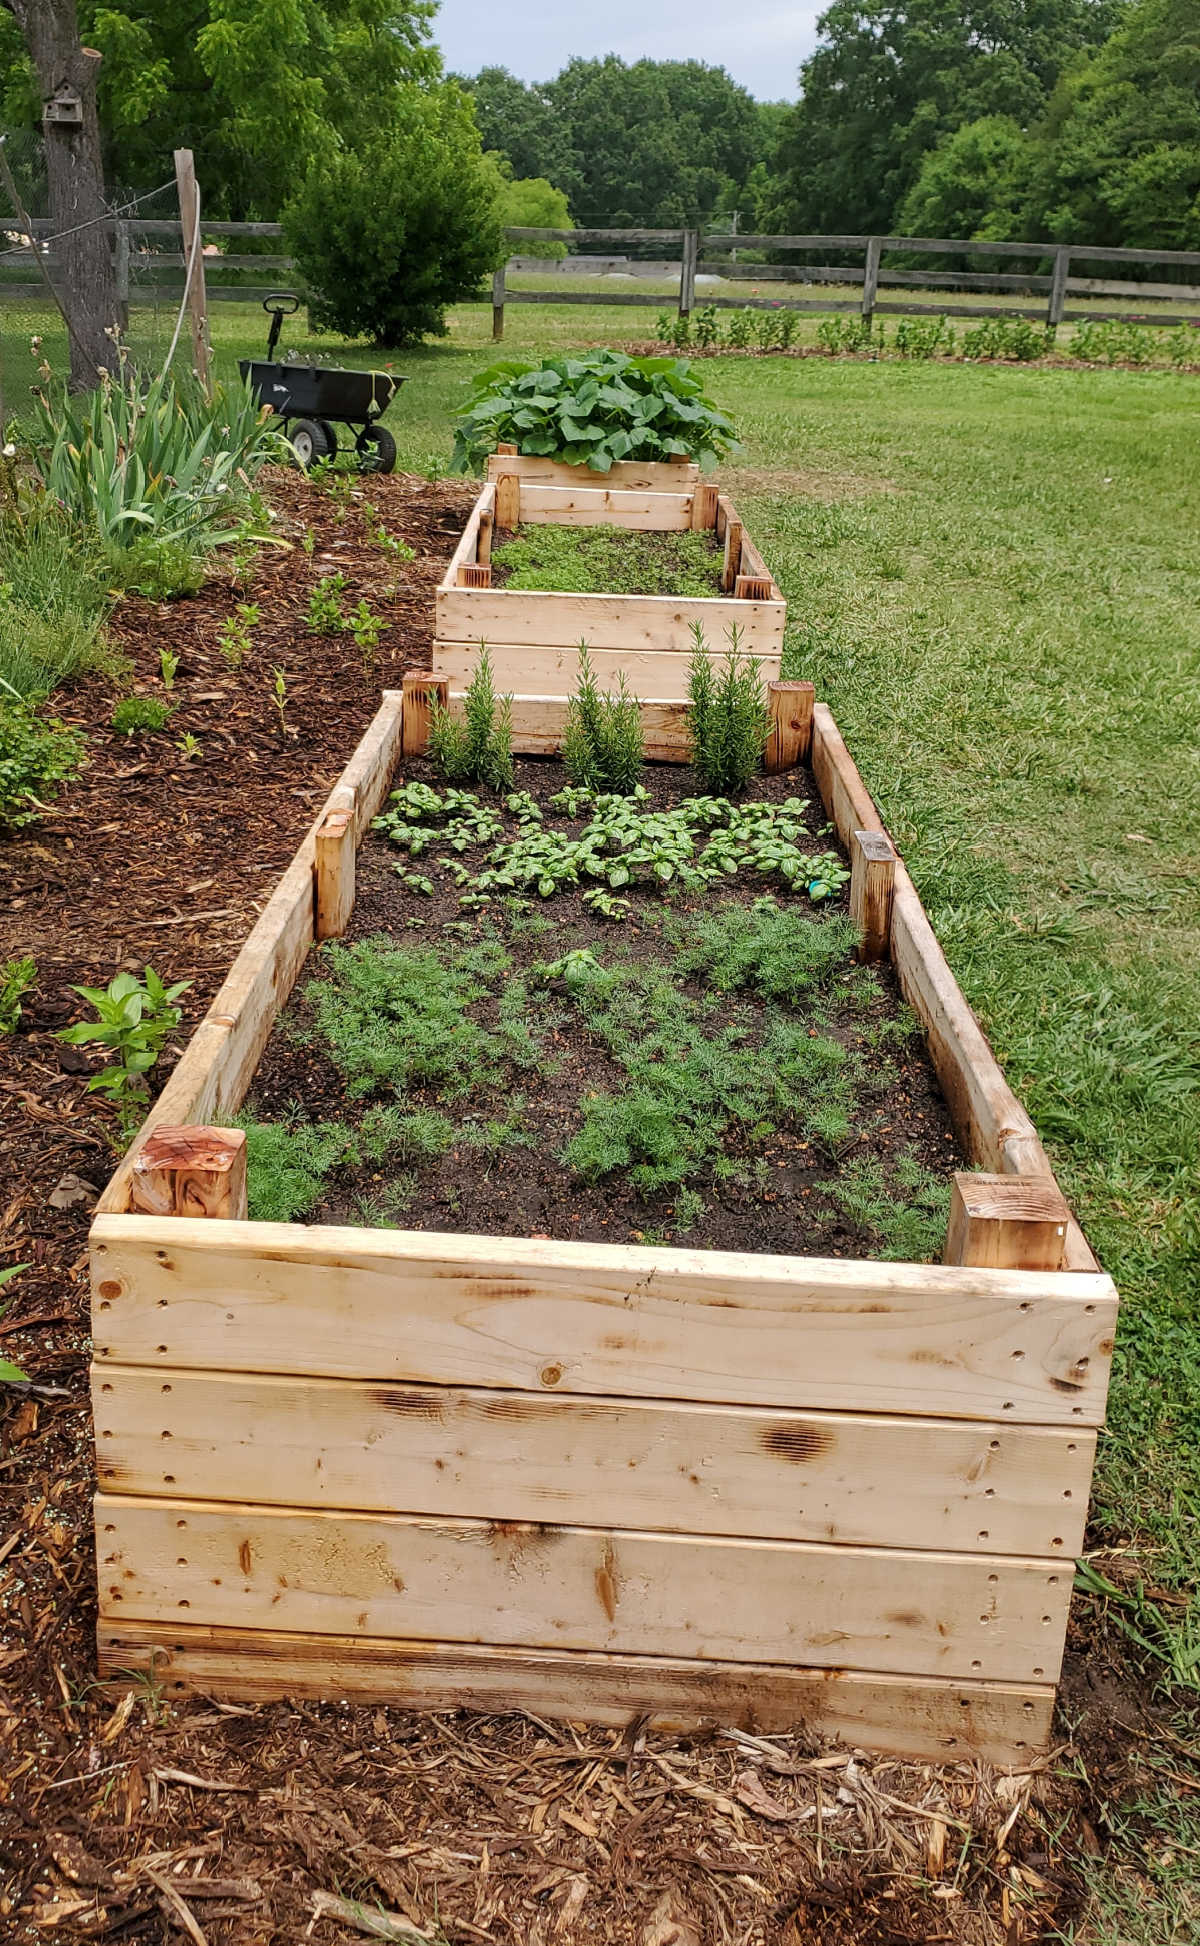
Wood is popular because it is easy to cut, widely available, and simple to repair. You can build a basic rectangle with four boards, or add corner posts, braces, or extra courses of lumber for a taller design. The right choice depends on your budget, soil conditions, mobility needs, and the crops you want to grow.
A raised bed does not automatically need special soil or a complex foundation. Most ground-level beds can sit directly on suitable soil after you remove grass and level the site. A bed placed on concrete, a deck, or another hard surface needs a different plan for drainage, weight, and soil depth.
Source: infoupdate.org
Better access
A defined planting area can be easier to reach and maintain than a large in-ground garden. Taller beds may reduce bending, but they require more lumber and soil.
Clear growing space
The frame helps separate garden soil from surrounding paths and lawn. It also makes it easier to organize crops and keep foot traffic away from roots.
Flexible design
You can adjust the bed length, width, and height to fit your yard, available lumber, and planting goals.
Choose a Ground-Level or Elevated Bed
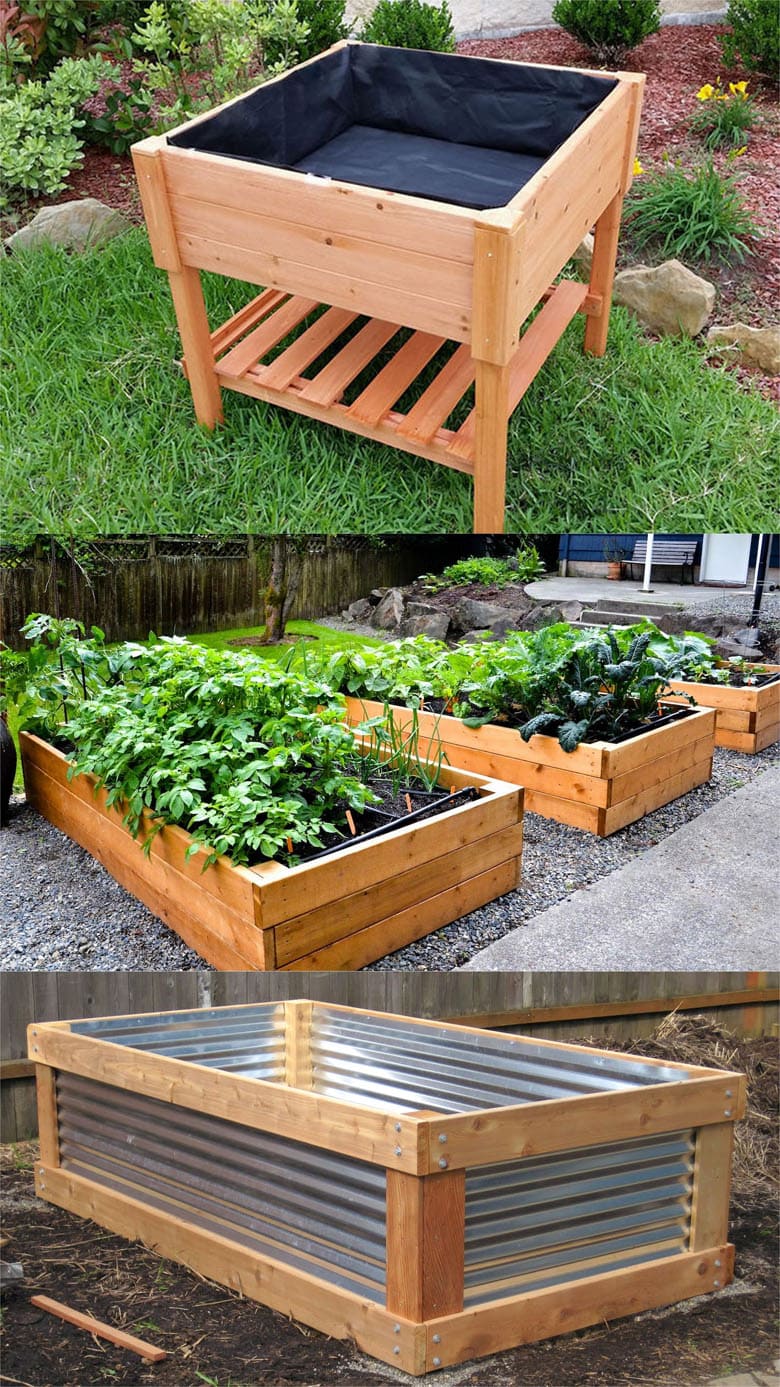
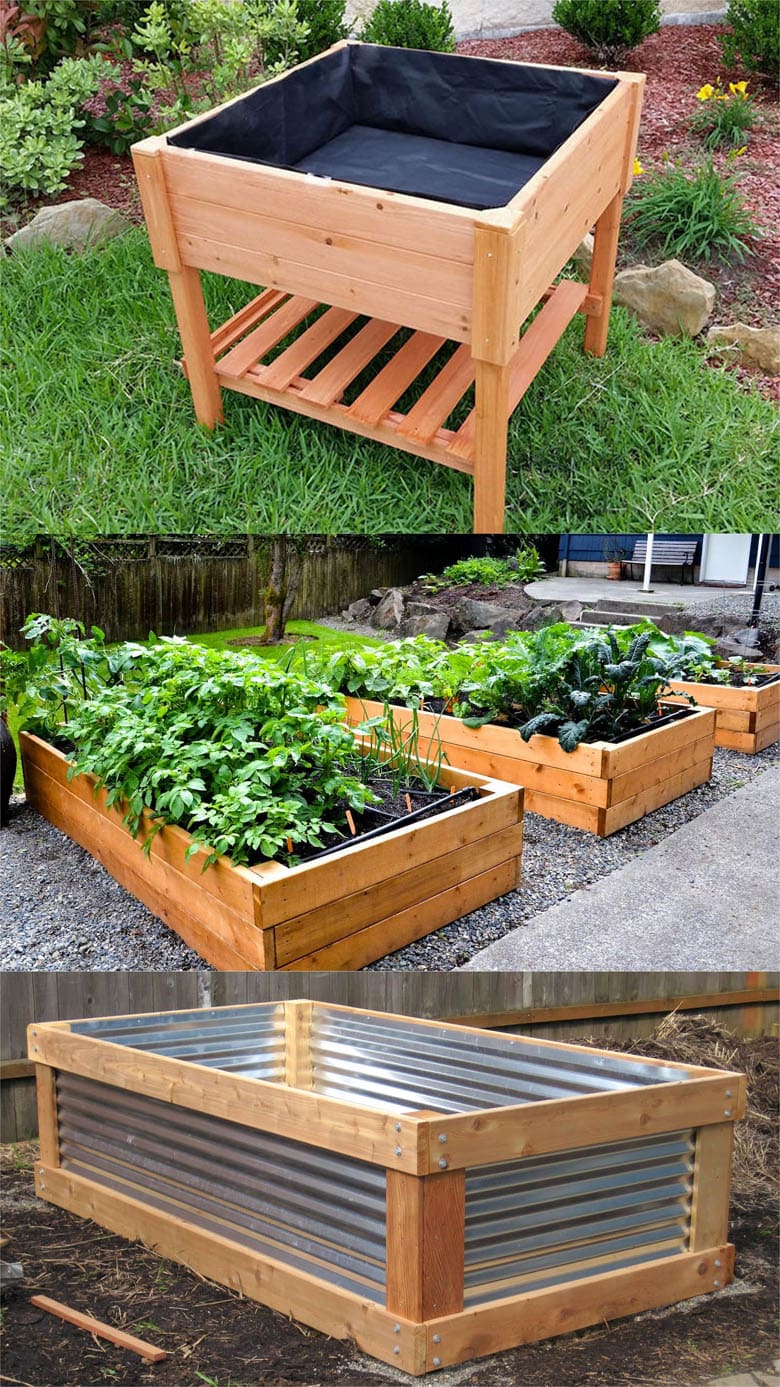
A ground-level raised bed is usually the simplest option for a backyard vegetable garden. It uses less lumber, holds more soil in contact with the ground, and does not need legs. An elevated planter stands above the ground on a support structure and may suit a patio or a gardener who needs a higher working surface.
Do not treat an elevated planter like a basic box. Wet soil is heavy, so the legs, joints, and base must support the full load. For decks, balconies, and porches, confirm that the surface can safely carry the weight before building or filling the planter.
Best simple design
A ground-level rectangle is a practical first project for most backyard growers.
Best for easier reach
A taller bed can reduce bending, but it needs a sound support structure and more soil.
Plan the Size, Location, and Layout
Choose the garden location before buying lumber. Most fruiting vegetables, including tomatoes, peppers, and cucumbers, need plenty of direct sunlight, often around six to eight hours per day. Leafy crops can tolerate less sun, but their growth and yield still depend on the variety and local conditions.
Look for a spot with access to a hose or watering can and enough room to walk around the bed. Avoid places where roof runoff regularly floods the soil, where tree roots are dense, or where water remains pooled after rain. If you are gardening in a hot, dry region, access to water and some protection from harsh afternoon heat may matter more than in a cooler climate.
For many home gardens, a bed 4 feet wide is easy to reach from both sides. A length of 6 or 8 feet provides plenty of planting room without making the frame too cumbersome to move during construction. If you can reach the bed from only one side, make it narrower so you do not need to step into the soil.
A depth of 6 to 12 inches can work for many shallow-rooted crops when the bed sits over usable ground soil. A 12-inch depth gives roots more loose growing mix, while deeper-rooted crops may benefit from greater soil depth. If the bed sits on concrete, account for the full root zone rather than relying on soil beneath the frame.
Source: storage.googleapis.com
Suggested starter size
Plan a rectangular bed 4 feet wide, 8 feet long, and 12 inches high. This is a convenient example, not a required size for every garden.
Sunlight
Track the site’s sun during the day and match the location to the crops you intend to grow.
Access
Leave enough space for paths, watering, harvesting, and moving a wheelbarrow or garden cart.
Drainage
Choose ground that does not stay saturated. Correct major drainage problems before placing the frame.
Check the Ground Before You Build
Remove grass, weeds, rocks, and other debris from the footprint. If the site has turf, cut it away or smother it with an appropriate organic barrier before adding the growing mix. Remove persistent weeds and invasive roots rather than burying them and hoping they will disappear.
Use a level to check the ground in both directions. Small differences can often be corrected by removing soil from high spots and firming low spots. A reasonably level base helps the boards meet cleanly and prevents the completed frame from twisting.
Test the site
After rain or watering, check whether water drains away or collects in the proposed bed area.
Check soil history
If the yard may contain lead, industrial waste, or other contaminants, test the soil through a suitable laboratory before growing food directly in it.
Choose Safe, Durable Wood
The lumber you choose affects the cost, lifespan, and suitability of the garden bed. For a food garden, naturally durable, untreated wood is a straightforward choice when it fits your budget. Cedar, redwood, and certain other durable species can resist decay better than untreated, non-durable wood, although performance varies with species, grade, moisture, soil contact, and local weather.
Pine and other common softwoods may cost less, but untreated boards can decay sooner when they remain in contact with wet soil. That does not make them unusable for every project; it means you should expect a potentially shorter service life. Thick boards and good site drainage can help, but they cannot prevent decay indefinitely.
Pressure-treated lumber can last longer in outdoor conditions, but treatment chemistry matters. Modern products may use preservatives that differ from older formulations. Read the label and follow the manufacturer’s directions for the intended use, and do not assume that every treated board is suitable for every food-garden application.
Avoid salvaged wood with an unknown treatment history, painted boards with flaking coatings, railroad ties, and wood that may have been treated with creosote or other unsuitable chemicals. Reclaimed pallets can also have unknown uses or contamination. If you cannot identify the wood or its treatment, choose known, untreated lumber instead.
Source: exofdjhjw.blob.core.windows.net
Cedar
Often chosen for its natural resistance to decay and its suitability for simple outdoor frames. Price and lifespan vary by species and grade.
Redwood
Can offer good natural durability, but availability and cost differ across the United States.
Untreated pine
Often affordable and easy to cut. It may need replacement sooner when exposed to constant soil moisture.
Pressure-treated lumber
Check the exact treatment, product label, and intended-use guidance before using it around a food garden.
How Thick Should the Boards Be?
For a basic ground-level bed, nominal 2-by-6 or 2-by-8 lumber can work when the sides are low and the frame is properly joined. Nominal board sizes are larger before milling than the finished dimensions you receive, so measure the actual stock if precise height matters.
Nominal 2-by-6 boards are typically about 1.5 inches thick and 5.5 inches wide. Nominal 2-by-8 boards are typically about 1.5 inches thick and 7.25 inches wide. Two courses of 2-by-6 boards therefore create sides about 11 inches high, while two courses of 2-by-8 boards create sides about 14.5 inches high.
Taller sides hold more soil and place greater pressure on the frame. If you build a deep bed, use suitable corner posts and intermediate braces as needed. The longer the sides and the greater the soil depth, the more important it becomes to resist bowing.
For a low bed
One course of sturdy boards can define the planting area when the ground beneath supplies adequate root depth.
For a deeper bed
Stack two or more courses and add structural support based on the dimensions, lumber, and soil load.
Gather the Materials and Tools
A simple rectangular raised bed needs only a few materials. For the example below, the plan uses an 8-foot-long by 4-foot-wide frame with two courses of nominal 2-by-6 boards. The finished sides will be about 11 inches high, assuming the usual finished board width.
Use exterior-rated screws that are long enough to join the boards securely without splitting the lumber. Ordinary interior drywall screws are not intended for outdoor structural joints and may corrode or break under conditions for which they were not designed. If the frame will remain in damp soil, choose fasteners compatible with the wood and its treatment.
A saw is useful for cutting boards to length, but you can also ask a lumber supplier to make straight cuts if that service is available. Check every cut before assembly, because small errors can leave gaps or cause the frame to sit out of square.
Source: gardenlikes.blogspot.com
Lumber
Four 8-foot boards and four 4-foot boards for two courses, assuming the short boards fit between the long boards. Add corner posts or braces if needed for the design.
Fasteners
Exterior-rated wood screws suited to the lumber, plus any compatible brackets or corner hardware required by the design.
Measuring tools
Tape measure, pencil, carpenter’s square, and level.
Cutting and drilling tools
Circular saw or hand saw, drill-driver, suitable bits, and clamps if available.
Safety gear
Safety glasses, hearing protection when needed, work gloves for handling rough lumber, and a dust mask appropriate for the task.
Growing materials
Suitable garden soil or raised-bed mix, finished compost, and mulch if appropriate for the crops.
A Simple Cut List for an 8-by-4-Foot Bed
For a frame with the long boards running along the outside and the short boards fitted between them, cut four boards to 8 feet and four boards to 45 inches. The short pieces fit between two long boards that are each about 1.5 inches thick, giving an overall outside width of 48 inches.
This layout creates a nominal 8-foot by 4-foot outside footprint. The exact inside dimensions will be smaller, so use the actual measurements when calculating soil volume. If you use a different joinery method, such as corner posts with boards attached to the outside, adjust the cut list to match that design.
For greater accuracy, lay the first course out on a flat surface before cutting all pieces. Confirm the overall dimensions and corner fit, then use the first matching board as a reference for the remaining cuts.
Four long boards
Use four boards at 8 feet each, with two boards per course.
Four short boards
Use four pieces cut to 45 inches for the between-the-ends layout described above.
Optional support posts
Add suitable corner posts or intermediate braces where the design, height, or soil load calls for more support.
How to Build a Raised Garden Bed With Wood
Build the frame on a flat surface before moving it to the garden site. This makes it easier to align the corners, drive the screws, and check the dimensions. If the completed frame is too heavy to move safely, assemble it in place instead.
Source: gardengatemagazine.com
Step 1: Measure and Mark the Boards
Measure each board carefully and mark the cut line with a pencil and square. For the example bed, the long boards remain 8 feet long, while the short boards are cut to 45 inches when they fit between the long sides. Confirm the layout with the actual board thickness before cutting.
Support the lumber on a stable surface and keep the offcut free to fall away from the blade. Follow the saw manufacturer’s instructions, keep hands clear of the cutting path, and never cut a board while holding it against your leg or balancing it on an unstable support.
Check each measurement
Measure twice and compare matching pieces before cutting. Matching lengths help the frame sit square.
Step 2: Assemble the First Rectangle
Lay two long boards parallel to each other, then fit one short board between their ends at each side. Align the corners so the board edges meet evenly. A square can help confirm that the corners are close to 90 degrees.
Drill pilot holes near the ends when appropriate for the wood and screw size. Pilot holes help reduce splitting, especially near board ends. Drive exterior-rated screws through the long boards into the ends of the short boards, using enough fasteners to hold each joint securely without overdriving them.
Measure both diagonals of the rectangle. If the two diagonal measurements match, the frame is square. If they differ, gently shift the corners until the measurements are equal before tightening the joints fully.
Keep corners aligned
Use a square and clamps if available so the boards do not move while you drive the screws.
Avoid split ends
Keep screws away from the very edge and use suitable pilot holes when needed.
Step 3: Add the Second Course
Place the second set of boards directly on top of the first course. Keep the outer faces aligned and stagger the joints where your design allows. Staggering can help distribute the joints rather than placing every seam directly above another.
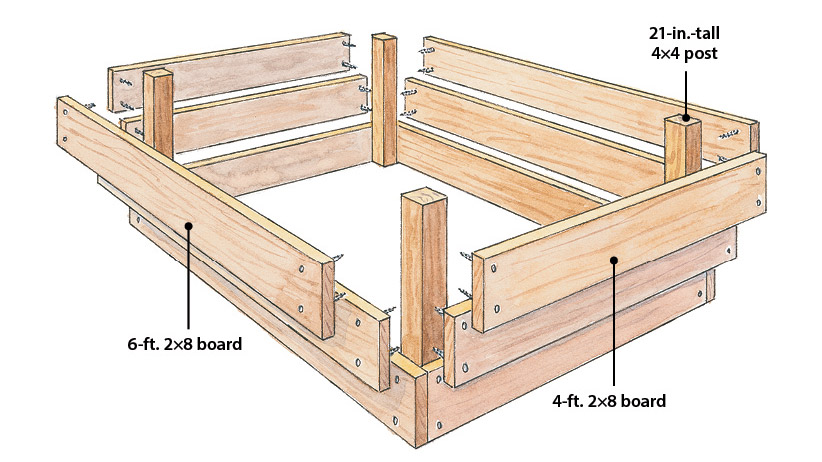
Fasten the second course to the first with suitable exterior-rated screws. If you use corner posts, attach the boards according to the planned joint design and make sure the posts are secure. Do not assume that stacking boards alone will prevent a long side from bowing as wet soil presses outward.
For an 8-foot-long bed with deeper sides, consider adding intermediate braces or posts along the long walls. The right support depends on the wood thickness, wall height, joint design, and expected soil load.
Align the courses
Keep the walls straight and the top edges even to make the bed easier to fill and maintain.
Add support where needed
Use suitable braces for long or tall walls instead of relying on extra screws alone.
Step 4: Set the Frame in Place
Move the frame to the prepared site and place it on the leveled ground. Check the top edges from side to side and end to end. If one corner sits high, adjust the ground beneath it rather than forcing the frame into a twist.
A ground-level bed generally does not need a solid floor. Leaving the bottom open lets roots grow into suitable native soil and allows excess water to drain. If burrowing pests are a problem, you may add a suitable metal mesh beneath the frame, provided it will not interfere with drainage or root growth.
Do not seal the bottom with plastic. A waterproof layer can trap water and reduce the movement of air and moisture through the bed. If you use a lining on the inside walls, choose a material suitable for the intended use and leave the base open unless the planter design specifically requires a drained floor.
Check the level
Correct uneven ground before filling so the frame does not lean or twist.
Keep drainage open
Let water move through the soil and into the ground when the site and underlying soil permit it.
Step 5: Prepare the Bottom and Soil
Remove weeds and loosen the native soil within the frame if it is compacted and safe to cultivate. Breaking up the top layer can help water and roots move between the raised mix and the ground below. Avoid deep digging around buried utilities or tree roots.
If you are placing the bed over lawn, remove persistent grass and weeds or use a suitable smothering method before adding soil. A layer of plain, uncoated cardboard may help suppress some turf when laid over the ground, but it is not a substitute for removing aggressive perennial weeds. Keep any barrier thin enough that water can pass through it.
Fill the bed with a suitable growing mix. A blend of screened topsoil and mature compost can work for many ground-level vegetable beds, while bagged raised-bed mixes offer another option. Avoid filling the entire bed with pure compost, fresh manure, or a dense material that may hold too much water or settle unevenly.
Use mature compost
Well-finished compost can add organic matter and nutrients, but it should be part of a balanced growing mix rather than the whole bed.
Match the soil to the crop
Vegetables need a mix that holds moisture while draining excess water. Container mixes and native soil blends behave differently, so choose based on the bed’s location and depth.
Step 6: Water, Settle, and Plant
Water the filled bed slowly to moisten the growing mix. The surface may settle after the first watering, especially if the soil contains loose organic matter. Add more mix if the level drops, but leave enough space below the rim to make watering and mulching easy.
Before planting, check the soil moisture a few inches below the surface. It should be moist but not waterlogged. If water pools for a long time, investigate the soil texture, site drainage, and any barrier beneath the bed before planting.
Plant according to the spacing and depth listed for each crop. Tall crops may need stakes or cages, and climbing plants may benefit from a trellis secured so it cannot pull the bed walls out of alignment. Apply mulch when appropriate to help reduce moisture loss and limit weeds.
Water evenly
Apply water slowly enough that it soaks in instead of running over the surface or spilling out the sides.
Check the planting plan
Use the mature size and spacing of each crop to avoid crowding the bed.
Calculate How Much Soil You Need
Calculate soil volume before ordering bulk material or buying bags. The basic formula is length multiplied by width multiplied by depth, with all measurements expressed in the same unit. For a rectangular bed, convert the result from cubic inches to cubic feet by dividing by 1,728, or use feet for all three measurements from the start.
An 8-foot by 4-foot bed filled to a depth of 1 foot has a nominal volume of 32 cubic feet. That is the volume for the outside dimensions; the actual inside space will be smaller because the boards take up room. If you are buying bagged mix, check the package volume and plan for a little extra to allow for settling.
Source: fity.club
Example Soil Volume Table
The table below shows approximate volumes for common bed sizes. These are geometric estimates based on the stated inside dimensions, not a guarantee of the exact amount to purchase. Soil compaction, settling, and the space occupied by boards affect the final amount.
4 by 4 feet at 6 inches deep
About 8 cubic feet of growing mix.
4 by 8 feet at 6 inches deep
About 16 cubic feet of growing mix.
4 by 8 feet at 12 inches deep
About 32 cubic feet of growing mix.
4 by 8 feet at 18 inches deep
About 48 cubic feet of growing mix.
How Many Bags Should You Buy?
Divide the required cubic feet by the volume printed on each bag. For example, if your bed needs about 32 cubic feet and each bag contains 2 cubic feet, the calculation is 32 divided by 2, or 16 bags. This is a hypothetical calculation based on the stated bag size and full bed volume.
If the bed has an irregular shape or different depths, calculate each section separately and add the results. For bulk deliveries, ask the supplier how its material is sold and whether the quoted volume refers to loose or compacted material.
Use inside dimensions
Measure the usable space between the inner walls for a more accurate estimate.
Plan for settling
Buy a modest amount beyond the estimate when practical, but avoid filling the bed with excess material that does not suit the crops.
Choose a Suitable Soil Mix for Vegetables
A wooden frame does not make poor soil good by itself. The growing mix needs enough air space for roots, enough water retention to avoid constant drying, and nutrients that match the crops. A blend of screened topsoil and finished compost is a practical starting point for many ground-level beds, though the right ratio depends on the quality of the materials and the local climate.
A soil test can help identify pH and nutrient issues, particularly if you plan to use native soil or add fertilizer. Follow the laboratory’s recommendations for the crops you grow rather than adding lime or fertilizer by habit. Too much fertilizer can harm plants and contribute to nutrient runoff.
In hot and dry areas, a mix that holds useful moisture may reduce how often you need to water. In wet areas, good drainage becomes especially important. No single soil recipe is best for every state, crop, and season, so watch how the mix behaves after watering and adjust based on what you observe.
Source: fity.club
Topsoil
Provides mineral soil and helps anchor plants. Choose a clean source with a texture suitable for growing vegetables.
Finished compost
Adds organic matter and can supply nutrients. Use mature material with a fresh, earthy smell rather than hot, unfinished compost.
Aeration
The mix should not form a dense, waterlogged mass. If drainage is poor, assess the whole blend and site rather than automatically adding a thick layer of gravel.
Soil testing
A laboratory test can guide pH and nutrient changes when the starting soil or compost quality is uncertain.
Should You Put Gravel in the Bottom?
For an ordinary raised bed placed on the ground, a gravel layer is generally unnecessary. Water moves according to the properties of the soil layers and the available drainage path, and gravel at the bottom does not fix a poorly drained site. It also takes up space that could otherwise hold growing mix.
Instead, prepare a suitable base, use a well-structured growing mix, and keep the bottom open. If the ground stays saturated, address the underlying drainage issue or choose another location before filling the bed.
Ground-level bed
Use open soil contact and a suitable mix unless a specific site condition calls for a different design.
Planter on a hard surface
Provide a properly designed drainage outlet and protect the surface from water damage.
Common Mistakes and How to Fix Them
Most problems with a homemade raised bed come from poor site preparation, weak joints, unsuitable lumber, or the wrong growing mix. A quick inspection before planting can prevent many of these issues. Check the frame after filling because wet soil places more pressure on the walls than an empty frame does.
Source: Homedit
The frame is not square
Measure both diagonals before tightening the joints. Adjust the corners until the diagonal measurements match.
The long walls bow outward
Check for loose fasteners and insufficient support. Add appropriate posts or braces and correct the wall before the movement becomes severe.
Water pools in the bed
Check the site, soil texture, and any liner. Remove barriers that trap water when appropriate and improve the drainage design before adding more soil.
The soil sinks after watering
Allow the mix to settle, then top it up with suitable growing material. Avoid filling the bed entirely with fresh organic matter that will break down quickly.
Plants grow poorly
Check sunlight, soil moisture, planting depth, spacing, pests, and nutrient conditions before adding fertilizer. A soil test may help identify a pH or nutrient problem.
The boards decay early
Check for persistent moisture, wood quality, and soil contact. Replace failed boards with suitable lumber and improve drainage where possible.
What If the Ground Is Uneven?
Small slopes can often be handled by removing soil from the high side and building a level base. Do not force a rectangular frame flat against uneven ground, because the boards may twist and the joints may loosen. Check the finished frame with a level before adding soil.
On a steep slope, a raised bed may need a stepped layout or a separately designed retaining structure. A simple garden box is not a substitute for an engineered retaining wall when the project must hold back a substantial amount of earth. Seek qualified help if the slope is unstable or the design could affect a structure or neighboring property.
Minor slope
Prepare a stable, level base and keep the frame supported along its full perimeter.
Major slope
Assess erosion, runoff, and soil pressure before building. Use a design suitable for the site.
What If You Have Poor Native Soil?
A raised bed can provide a separate growing medium, but it cannot guarantee protection from every soil contaminant. If the native ground may contain lead or other hazardous substances, use laboratory testing and follow local public health guidance before deciding how to grow food there.
Where soil contamination is confirmed or strongly suspected, options may include a properly designed barrier and a clean growing medium, but the correct method depends on the contaminant and site. Do not rely on a thin sheet of plastic or an unverified soil product as a universal safety fix.
Unknown soil history
Investigate the site’s former uses and consider testing before growing edible crops.
Known contamination
Follow site-specific recommendations from a qualified laboratory or relevant local public health agency.
Maintain the Bed After Construction
A wooden raised bed needs simple upkeep to stay useful. Check the corners, screws, and long walls at the start of each growing season and after periods of heavy rain. Tighten loose fasteners when safe to do so, and replace damaged boards before they fail completely.
Keep the soil covered with living plants or a suitable mulch when practical. Mulch can reduce moisture loss and suppress weeds, but keep it away from plant stems when that helps prevent rot or pest problems. Water according to the crop, weather, and soil moisture rather than following a rigid daily schedule.
After harvest, remove diseased plant material and any weeds that have set seed. Add compost when needed based on the condition of the soil, crop rotation, and soil test results. Replacing the entire bed mix every year is usually unnecessary when the mix remains healthy and its nutrient needs are managed.
Source: rochack.org
Inspect the frame
Look for cracks, rot, rusted fasteners, leaning corners, and walls that have begun to bow.
Refresh the growing mix
Top up settled soil and add mature compost when appropriate rather than adding large amounts of fresh manure.
Protect moisture
Use mulch and consistent watering practices suited to the local climate and the crop’s growth stage.
Plan crop rotation
Where space permits, vary plant families between seasons to help manage some soilborne pests and diseases.
How Long Will a Wooden Raised Bed Last?
There is no single lifespan for every wooden raised bed. Naturally durable lumber may last much longer than untreated wood that stays wet, but species, board thickness, drainage, fasteners, climate, and construction all affect service life. A bed exposed to frequent rain and persistently wet soil may decay sooner than one in a dry, well-drained location.
Inspect the wood instead of relying on a fixed replacement date. Soft or crumbling areas, deep cracks, loose joints, and walls that no longer hold their shape are signs that repairs may be needed. Replace damaged parts with suitable materials and review the cause of the failure so the same problem does not return.
Reduce moisture stress
Provide good drainage and avoid designs that keep water trapped against the lumber.
Repair early
Replace weak boards and failed fasteners before the bed becomes unstable.
Adapt the Design to Your Yard and Budget
You do not need an 8-foot bed to grow useful amounts of food. A small 4-by-4-foot bed can fit a patio edge or compact backyard, while two narrow beds with a path between them may be easier to reach than one very wide box. Start with the space you can maintain, then add another bed if your garden needs more room.
For a lower-cost build, use a simple rectangle, avoid decorative trim, and compare lumber lengths to reduce waste. Ask about board condition and treatment before buying, and do not choose unknown salvaged wood solely because it is free. A small, well-built bed with suitable lumber is often more useful than a large frame that is hard to maintain.
In regions with harsh winters, freeze-thaw cycles and wet soil can put stress on the wood and fasteners. In hot areas, soil may dry more quickly, so watering access and mulch matter. Along the Gulf Coast and in other humid regions, good drainage and frequent inspections may be especially useful because persistent moisture can speed wood decay.
Small yard
Use a compact frame and plan the crop layout before building. Herbs, greens, and compact varieties can make good use of limited space.
Limited budget
Keep the design simple and use a clear cut list. Compare the cost of suitable lumber with the expected need for repairs or replacement.
Wet climate
Prioritize site drainage, compatible fasteners, and regular checks for rot.
Hot, dry climate
Place the bed where the selected crops receive suitable light and where watering is convenient.
Can You Build a Raised Bed Without Power Tools?
Yes. A hand saw, tape measure, square, and screwdriver can be enough for a basic frame, although cutting multiple thick boards by hand takes more time. A lumber supplier may be able to make the cuts if you provide a clear cut list and confirm the required lengths.
Pre-cut lumber and simple corner brackets can reduce the work, but the joints still need to be suitable for the weight of the soil. Check that the fasteners are intended for outdoor use and follow the hardware instructions. Never sacrifice joint strength simply to make assembly easier.
Simplify the cut list
Choose dimensions that match readily available lumber lengths and reduce the number of cuts.
Check the joints
Confirm that the corners stay square and the frame remains stable before filling it.
A Final Safety Check Before Planting
Before filling the bed, inspect every joint and check that the frame sits firmly on the ground. Remove exposed screw points, splinters, and sharp hardware that could catch clothing or injure hands. Confirm that any support posts or braces are secure and that the walls do not move noticeably under light hand pressure.
Use proper protective equipment when cutting and drilling lumber. Keep children and pets away from operating tools, and follow the instructions for saws, drills, and fasteners. If the project involves heavy materials, get help moving the frame or soil rather than risking a strain.
Finally, verify the suitability of the lumber and growing materials for food production. Use clean soil and mature compost from known sources, and investigate possible soil contamination when the yard’s history raises concern. A well-built frame is only one part of a healthy garden; safe materials, good soil, and suitable care matter just as much.
Stable structure
The corners are secure, the walls are supported, and the frame sits level without twisting.
Safe materials
The wood, fasteners, and soil are suitable for the intended garden use.
Ready to grow
The soil drains well, the bed receives suitable light, and water is easy to access.
Frequently Asked Questions
Q
What is the best wood for a raised garden bed?
Cedar and redwood are common choices because some species have natural resistance to decay. Untreated pine may cost less but can break down sooner in wet soil. Choose wood with a known history, and check the intended-use guidance for any treated lumber before using it around edible crops.
Q
How deep should a wooden raised garden bed be?
A depth of 6 to 12 inches can work for many crops when the bed sits over suitable ground soil and roots can grow below it. A bed over concrete needs enough soil depth for the crops because roots cannot reach the ground underneath. Consider the crop’s root needs, drainage, and the amount of bending you want to avoid.
Q
Should I line a wooden raised garden bed with plastic?
Do not cover the bottom of a ground-level bed with waterproof plastic because it can trap water and block root growth into the native soil. A suitable wall liner may help separate soil from the boards in some designs, but it should not prevent drainage. Choose materials based on their intended use and avoid unknown plastics or coatings.
Q
Do I need to remove the grass under a raised garden bed?
Remove or suppress grass and weeds before adding growing mix. Persistent grass and perennial weeds can grow through the soil and compete with vegetables. You can cut away the turf or use a suitable smothering method, but inspect the area first and remove aggressive roots where possible.
Q
How much soil do I need for a 4-by-8-foot raised bed?
At a depth of 12 inches, a 4-by-8-foot bed has a nominal volume of 32 cubic feet. The actual amount will be slightly lower when measured between the inside walls. If each bag contains 2 cubic feet, 16 bags would equal 32 cubic feet before allowing for settling or measurement differences.
Q
Can I use pressure-treated wood for a vegetable garden?
The answer depends on the specific treatment and product guidance. Modern pressure-treated lumber uses different preservatives, and not every product has the same intended uses. Read the label and follow the manufacturer’s instructions for food-garden applications. When the treatment history is unknown, choose known, untreated, naturally durable lumber.
Q
Do wooden raised garden beds need drainage holes?
A ground-level raised bed with no floor generally does not need drainage holes because excess water can move into the ground below when the site drains properly. A planter built with a solid bottom needs suitable drainage outlets. In either case, the growing mix and the location must allow excess water to escape.
✦ Wrapping Up
Conclusion
Building a wooden raised garden bed is a manageable DIY project when you plan the dimensions, choose suitable lumber, and assemble the frame with care. A simple 4-by-8-foot design gives many home gardeners room to grow vegetables, herbs, and flowers without taking over the yard. The most useful bed is one that fits the space, the gardener, and the crops rather than one that is simply large.
Focus on the details that support long-term use: level ground, square corners, secure joints, suitable soil, and open drainage. Check the wood before buying, calculate the growing mix you need, and inspect the frame after filling it. These basic steps help prevent common problems and make the garden easier to care for through the growing season.
💡 Key Takeaway
Start by measuring a sunny, well-drained area and choosing your bed dimensions. Make a cut list, select known and suitable lumber, assemble and level the frame, then calculate the soil volume before filling and planting.
I enjoy sharing simple gardening ideas, lawn care tips, and honest product reviews that help make outdoor work easier. From home gardening guides to helpful tools and lawn care advice, I write easy-to-follow content to help readers create a healthier and better-looking outdoor space without wasting time or money.