As an Amazon Associate, I earn from qualifying purchases.
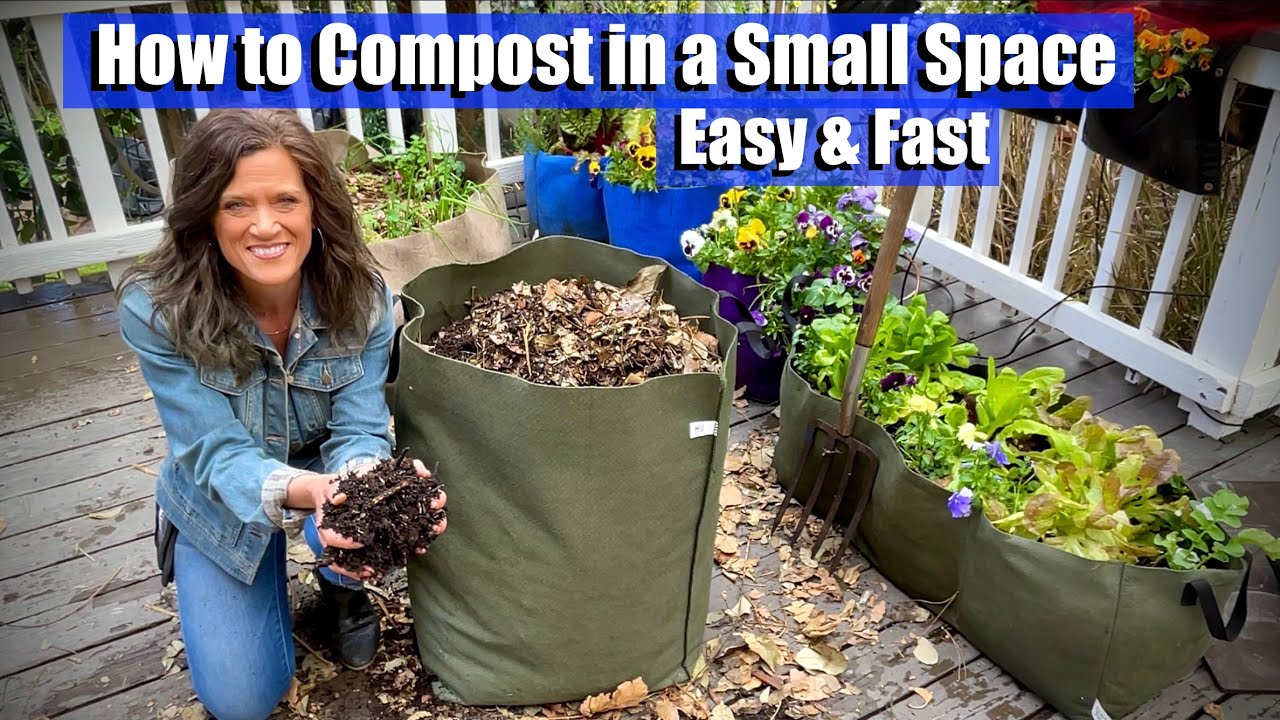
To compost in a small backyard, choose a compact bin, mix kitchen scraps with dry leaves or shredded cardboard, keep the pile as damp as a wrung-out sponge, and add air as the material breaks down. With steady care, you can turn many everyday plant scraps into useful compost for your garden.
Across the United States, home gardeners deal with very different growing conditions. A backyard in humid Florida may stay damp, while a small garden in Arizona may dry out fast. Yet both can support a useful compost system, even when space is tight.
You do not need a large yard, costly gear, or a huge pile to begin. A lidded compost bin, a small patch of level ground, and a steady supply of plant scraps and dry leaves are enough for a simple setup. The key is to balance wet, fresh material with dry, air-filled material.
Small-scale composting works best when you choose a method that fits your space and daily habits. A closed bin can help keep scraps tidy, a tumbler can make mixing easier, and a worm bin can suit gardeners with very little outdoor room. This guide explains how to choose, build, maintain, and use a small backyard compost system without adding needless work.
Composting is the natural breakdown of plant and other approved organic materials into a dark, crumbly product called compost. Tiny living organisms, including bacteria and fungi, do much of the work. They use food, water, and air to break down scraps and yard waste.
In a small backyard, the goal is to manage this process in a compact space. You can use a bin on bare soil, a sealed-sided container with air holes, or a compost tumbler. The best choice depends on the room you have, the amount of waste you make, and how often you want to tend the pile.
Compost helps improve soil structure, supports water retention in many soils, and returns organic matter to garden beds. It can also reduce the amount of suitable food and yard waste sent to the trash. It does not replace every plant nutrient, and its benefits depend on the quality and maturity of the finished material.
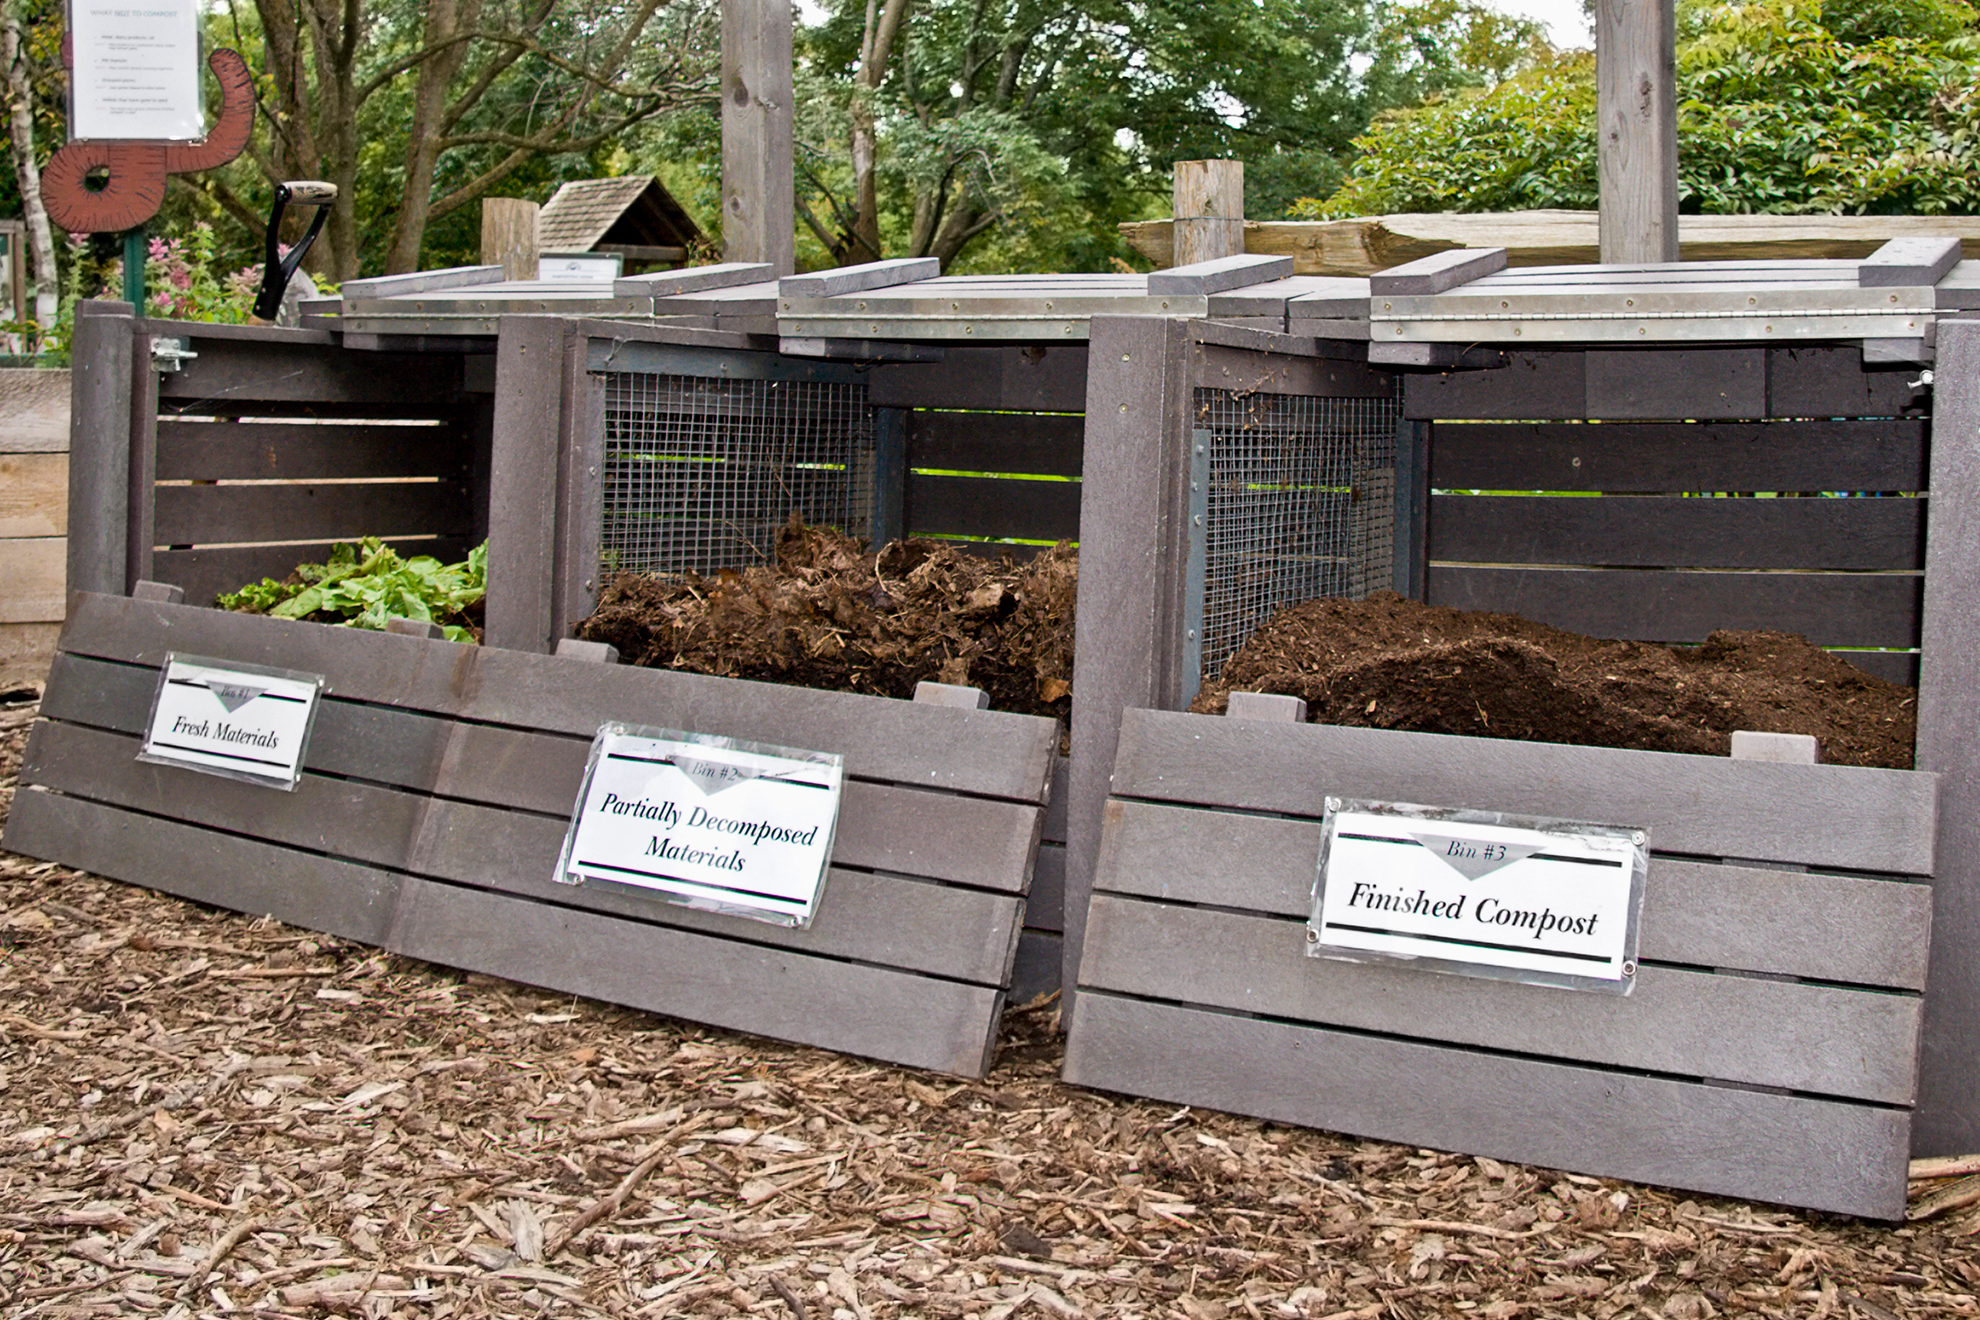
Source: i.pinimg.com
Green materials
These are often moist and rich in nitrogen. Examples include vegetable scraps, fruit peels, coffee grounds, tea leaves, and fresh plant trimmings.
Brown materials
These are usually dry and rich in carbon. Examples include dry leaves, plain shredded cardboard, untreated paper, straw, and small dry twigs.
Air and water
Microbes need moisture to work, while air helps support the organisms that break material down without the sour smells linked to oxygen-poor conditions.
Why Composting Works in a Small Space
A compact bin can manage the small, steady flow of scraps from one household. You do not need to compost every item you throw away, and you do not need to fill a bin in one day. Adding a little material often is easier than handling a large pile all at once.
A smaller system may break down slowly because it loses heat more easily than a large pile. That is normal. For a home garden, steady progress and good material are often more useful than trying to force rapid heating.
Less space
Choose a bin that fits beside a shed, along a garden fence, or in another accessible spot.
Less waste to manage
Add scraps as they arise and cover each fresh addition with brown material.
Choose the Best Composting Method for Your Yard
The best small backyard compost method is one you can reach, feed, and maintain with little effort. Before buying or building a bin, think about how much space you have, whether you produce many leaves, and how much time you want to spend turning the contents.
Place the system where you can reach it in all seasons. A spot with some shade can help prevent the mix from drying out too quickly, especially in hot climates. Make sure the location has good drainage and is not against a building where damp material or spills could cause problems.
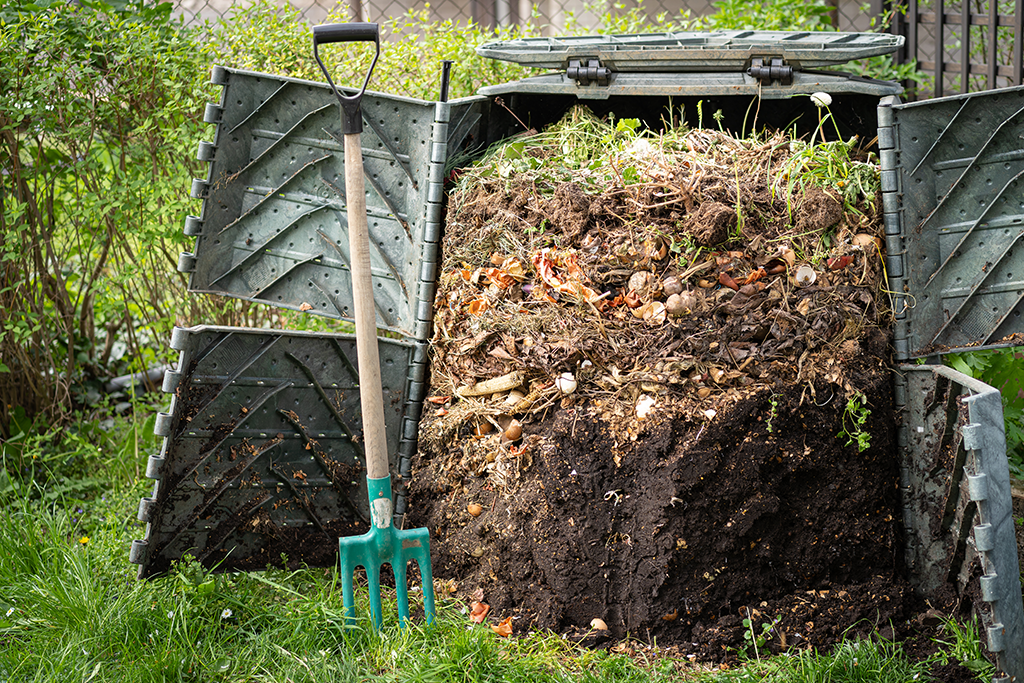
Source: gardenforbeginners.com
Compact stationary bin
A plastic or wooden bin with air openings is a practical choice for most small yards. It keeps the pile contained and can be covered to help limit excess rain and access by animals.
Compost tumbler
A tumbler holds material in an enclosed drum that can be rotated for mixing. It is tidy and easy to turn, but capacity is limited and the contents can become too wet or clumped if the mix is poorly balanced.
Wire mesh enclosure
A small cylinder made from suitable sturdy mesh can hold leaves and plant scraps. It offers airflow, but it may be less effective at keeping out pests and may dry out faster than a closed bin.
Worm composting
A worm bin uses composting worms to process suitable food scraps. It can fit on a patio or in a sheltered outdoor area, but it needs suitable bedding, moisture, and protection from extreme heat and cold.
How Much Space Do You Need?
A compact bin about 2 feet wide and 2 feet deep may fit a small garden, though a bin of this size can break down material more slowly than a larger one. Check the maker’s capacity and leave room to open the lid, mix the contents, and remove finished compost.
If you have only a patio or a narrow strip of soil, consider a small tumbler or worm bin. If you have enough room for a bin on bare earth, that can make drainage and access by soil organisms easier. A bin placed on paving can still work, but it needs a design that allows excess water to drain.
For a tiny yard
Use one compact bin and add a small amount of scraps at a time.
For a yard with many leaves
Keep a separate dry-leaf store or paper bag so brown material is ready when you need it.
For a patio
Choose a stable, ventilated container with drainage and a lid that is easy to secure.
Gather the Right Materials Before You Start
A good compost mix starts with a steady supply of safe organic materials. Collect fruit and vegetable scraps in a small kitchen container, and store dry leaves or shredded cardboard nearby. Having both types on hand makes it easy to cover fresh scraps right away.
The words green and brown describe the roles materials play in composting, not just their color. Fresh green plant matter often adds nitrogen and water, while dry brown matter supplies carbon and helps keep the mix open. Different materials vary, so the goal is a workable blend rather than a perfect laboratory formula.
Source: platthillnursery.com
Good green materials
Use fruit and vegetable scraps, coffee grounds, plain tea leaves, crushed eggshells, and small amounts of fresh garden trimmings.
Good brown materials
Use dry leaves, plain uncoated cardboard torn into small pieces, untreated paper, straw, and small woody trimmings.
Materials to leave out of a basic home bin
Avoid meat, fish, bones, dairy, oily foods, pet feces, and large amounts of cooked food. These can attract pests or create odor problems. Do not add treated wood, plastic, glossy packaging, or plants contaminated with persistent herbicides.
What Is the Right Mix of Green and Brown Material?
A simple starting point is to cover each addition of kitchen scraps with roughly two to three loose volumes of brown material. For example, if you add one small bowl of vegetable scraps, add two or three similar bowls of dry leaves or shredded cardboard. This is a practical starting guide, not a strict scientific ratio, because each material has a different moisture and carbon content.
Watch the mix as it changes. If it becomes wet, dense, or smelly, add more dry brown material and gently loosen it. If it stays dry and the scraps seem unchanged for a long time, add a little water and check whether there is enough green material.
Save dry leaves in fall
Bag or store dry leaves in a breathable container so you can use them through the winter and spring.
Shred cardboard
Tear plain cardboard into small pieces so it mixes well and does not form large, wet sheets.
Cut scraps into smaller pieces
Smaller pieces expose more surface area to microbes and can break down sooner than large chunks.
How to Compost in a Small Backyard Step by Step
You can start a small backyard compost system in one afternoon. Set up the bin, add a loose base, layer green and brown materials, and then adjust moisture and airflow as the contents settle. The routine after setup is simple: add scraps, cover them, and check the condition of the mix.
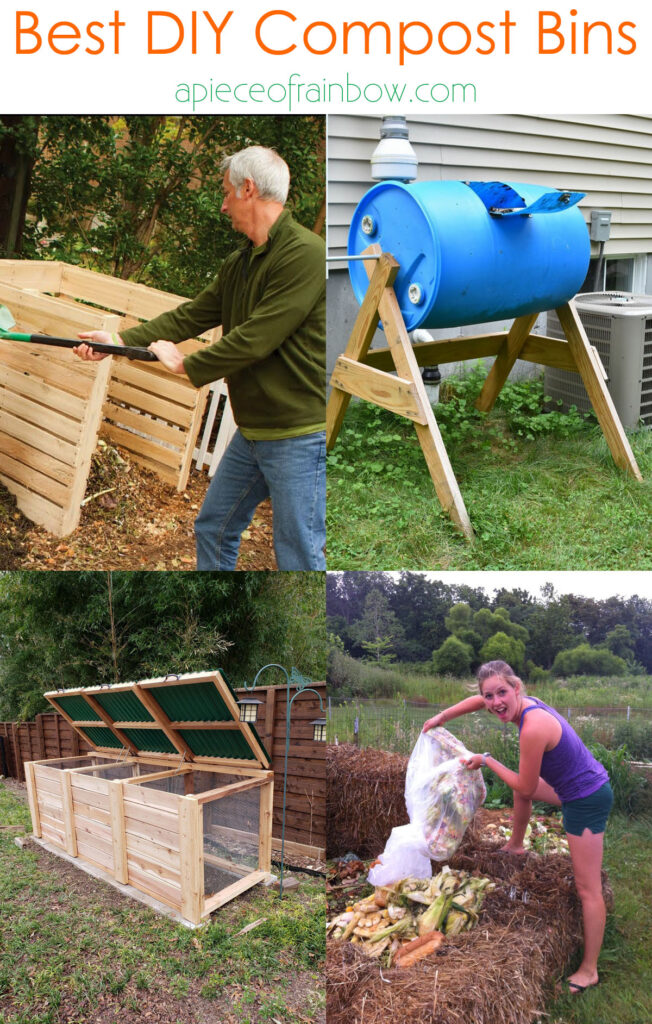
Source: apieceofrainbow.com
Step 1: Pick a practical location
Choose a level, well-drained spot with room to open the bin and remove compost. Partial shade is useful in hot weather. Follow local rules and any landlord or homeowners association requirements.
Step 2: Prepare the bin
Use a bin with suitable air holes and drainage. If the design allows it, place it on bare soil so excess water can drain and soil organisms can reach the contents. Keep the bin stable and secure.
Step 3: Add a loose base
Start with a few inches of dry leaves, small twigs, or shredded cardboard. This layer helps air move near the bottom and can reduce the chance of a soggy base.
Step 4: Add kitchen and garden scraps
Spread fruit peels, vegetable trimmings, coffee grounds, and other approved green material over the base. Chop large scraps when practical, and avoid adding large amounts of one material at once.
Step 5: Cover each addition with brown material
Add a layer of dry leaves or shredded cardboard over fresh scraps. This helps absorb excess moisture, improves the carbon balance, and makes the food less exposed to flies and other pests.
Step 6: Check moisture
The contents should feel like a wrung-out sponge. If they drip when squeezed, add dry leaves or cardboard. If they feel dusty and dry, sprinkle in water while mixing gently.
Step 7: Allow air to enter
Keep vents clear and mix the contents from time to time with a garden fork or suitable tool. A tumbler can be rotated according to its instructions. Avoid packing the mix tightly.
Step 8: Keep adding material in balance
Each time you add kitchen scraps, cover them with brown material. If the bin is nearly full, pause new additions and let the contents break down, or use a second container if space permits.
A Simple First-Week Plan
On the first day, set up the bin and add the base, a small batch of scraps, and enough brown material to cover them. Check that the mix is damp rather than soaked. You do not need to fill the bin to the top to get started.
During the rest of the week, add scraps as you collect them and cover each addition. Check for excess water after heavy rain, and look for signs of flies, pests, or sour odors. A small bin may show little visible change at first, so focus on moisture, airflow, and a balanced mix rather than speed.
Daily or every few days
Collect scraps and cover them with brown material.
Weekly
Check moisture, inspect the lid and vents, and gently mix the contents if needed.
After heavy rain or hot weather
Check for sogginess or drying and make small corrections.
Keep Your Compost Healthy in a Small Yard
The easiest way to maintain a small compost bin is to check three things: moisture, airflow, and the balance of materials. These factors affect one another. Wet scraps can clump together and block air, while a dry mix slows microbial activity.
You do not need to turn the bin every day. Occasional mixing is enough for many home systems, especially when you add loose brown material regularly. A tumbler may be turned more often according to its design, but too much handling is not needed for a basic slow compost system.
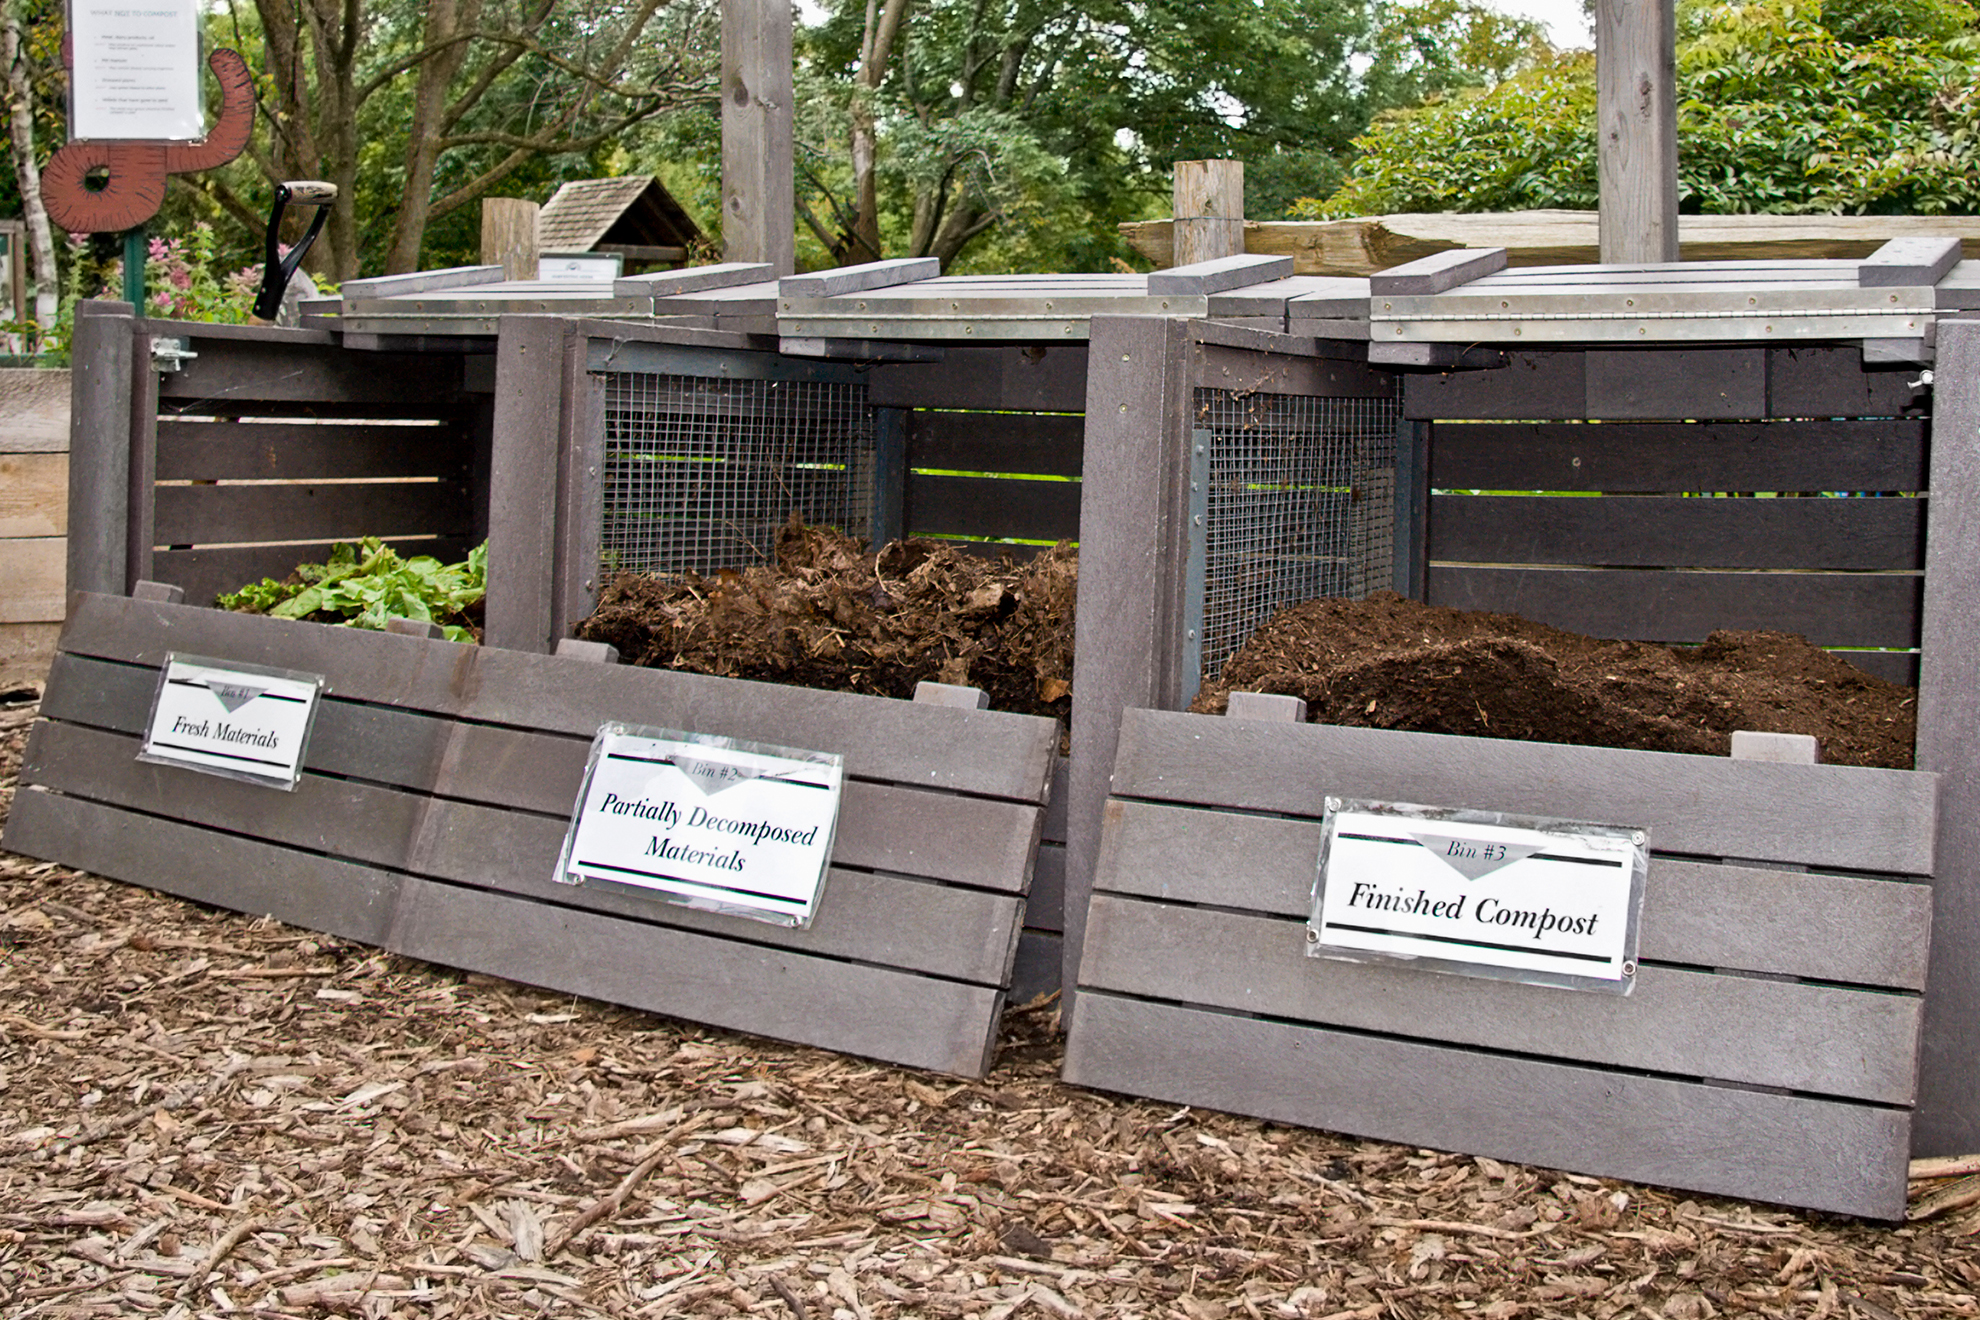
Source: i.pinimg.com
Keep the mix damp
Add water in small amounts when the contents are dry. Check beneath the surface, since the top may look dry while the middle is already wet.
Protect against excess rain
Use a lid or a suitable cover that still allows airflow. Make sure rainwater can drain rather than pooling at the bottom.
Maintain airflow
Leave room between pieces of material, keep vents open, and loosen compacted areas when needed.
Keep pests away
Bury or cover fresh scraps, secure the lid, clean spills, and keep meat, dairy, and oily food out of a basic backyard pile.
Does a Small Compost Bin Need to Get Hot?
Not every backyard compost bin becomes hot. A small pile may not hold enough material to reach the high temperatures associated with managed hot composting. It can still break down through the work of microbes, fungi, and other decomposers.
If your goal is to reduce weed seeds or plant disease organisms, do not assume that an ordinary cool pile has done so. A home pile that is not monitored for temperature may not provide the conditions needed to kill them. Keep persistent weeds, diseased plants, and invasive plant parts out unless your system is known to manage them safely.
For ordinary garden compost
Focus on a balanced mix, suitable moisture, and enough time for the material to mature.
For managed hot composting
Use a method designed to reach and maintain suitable temperatures, and monitor the whole pile rather than judging heat by the surface alone.
Adjust for American Seasons and Climate
In much of the United States, seasonal weather changes how often a compost bin needs attention. Summer heat can dry out a small bin, while winter cold can slow decomposition. In wet regions, a covered bin and extra dry leaves can help prevent waterlogging.
In hot, dry areas, place the bin in partial shade and check moisture more often. In cold climates, continue adding suitable scraps if convenient, but expect slower activity during freezing weather. If you garden in a region with local composting or waste rules, follow those requirements before adding yard materials.
Hot, dry summers
Check the center for dryness, add water in small amounts, and protect the bin from harsh afternoon sun.
Rainy or humid weather
Use a lid, improve drainage, and add dry browns when the mix becomes heavy or wet.
Cold winters
Expect slower breakdown. Save dry leaves and keep the bin accessible, but do not worry if activity drops.
How Long Does Small Backyard Composting Take?
Compost can take several months or longer to become ready, depending on the material, weather, bin size, moisture, airflow, and how often you mix it. A small, cool pile often takes longer than a large, well-managed hot pile. There is no single schedule that applies to every backyard.
You can speed the process by cutting scraps into smaller pieces, mixing materials well, keeping the contents damp, and providing air. Adding too much wet food at once or letting the bin dry out can slow the process. Avoid adding chemical products or large amounts of fertilizer to try to force a result.
Source: eminenceorganicfarm.com
Small pieces break down sooner
Chop thick stems and large vegetable scraps into smaller pieces when convenient.
Balanced moisture supports microbes
A damp mix supports biological activity, while a soaked or very dry mix can slow it.
Mixing adds air
Turn or loosen the material when it becomes compacted or begins to smell sour.
Time allows the compost to mature
Do not use a fixed number of weeks as the only test of readiness. Check the texture, smell, and remaining scraps.
How to Tell When Compost Is Ready
Finished compost is usually dark brown, crumbly, and earthy-smelling. Most of the original food scraps and leaves should no longer be recognizable, although small bits of twigs or eggshells may remain. The material should not smell strongly sour or like rotting food.
If the compost still contains obvious scraps, looks slimy, or has a strong unpleasant smell, give it more time and correct any moisture or airflow problems. You can screen the finished material through a suitable garden sieve if you want a finer texture, then return larger pieces to the bin for more breakdown.
Color and texture
Look for dark, loose material rather than distinct layers of fresh scraps.
Smell
A clean, earthy smell is a useful sign. A sour or rotten smell suggests that the material needs more air or drier browns.
Visible scraps
A few tough pieces may remain, but most soft scraps should have broken down.
Troubleshoot Common Small Compost Problems
Most compost problems can be fixed by changing the moisture level, adding the right material, or improving airflow. Make one or two small changes at a time and check the result before making a major adjustment. A healthy bin should have a mild earthy smell and should not be dripping wet or completely dry.
Source: i.ytimg.com
The bin smells rotten or sour
The mix may be too wet, too dense, or short on air. Add dry leaves or shredded cardboard, gently loosen the contents, and check drainage.
The scraps are not breaking down
The mix may be dry, cold, or dominated by large pieces. Add water if needed, cut up bulky scraps, and mix in suitable green and brown materials.
Fruit flies gather around the bin
Fresh scraps may be exposed. Cover them with dry browns, keep the lid closed, and clean nearby spills. Avoid adding large quantities of fruit scraps at once.
The bin attracts rodents or other pests
Check for gaps, exposed food, and unsuitable ingredients. Secure the lid, use a pest-resistant container, cover scraps well, and follow local advice on backyard composting.
The contents are slimy
Too much moisture and compacted food may be blocking airflow. Add dry, coarse browns and mix gently to open the material.
The bin is full before compost is ready
Stop adding fresh scraps and let the contents mature, or use a second container if you have room. A separate container for new scraps can keep the process going without disturbing the older material.
What If the Compost Is Too Wet?
Add dry leaves, torn cardboard, or another suitable dry brown material and mix it through the wet areas. If water is pooling, check the drainage holes and protect the bin from heavy rain. Do not seal a wet pile so tightly that air cannot move through it.
If the bottom remains soggy, remove some material temporarily if needed, clear the drainage path, and rebuild the mix with a loose layer at the base. Make changes in stages so you do not turn the entire bin into a dense mass.
First fix
Add dry browns and gently mix the wet sections.
If the problem returns
Reduce large additions of wet scraps, improve drainage, and check whether rain enters the bin.
What If the Compost Is Too Dry?
Sprinkle in water as you mix the contents until the material feels like a wrung-out sponge. Add moisture gradually, because a small bin can become waterlogged if you pour in too much at once. Check the middle of the pile rather than judging only the dry surface.
If the bin sits in direct afternoon sun, move it to partial shade when practical. You can also cover the top with a suitable lid to reduce water loss while keeping the air openings clear.
First fix
Add a little water, mix, and check the moisture again.
Long-term fix
Reduce exposure to harsh sun and use a cover that limits drying without trapping excess water.
How to Use Finished Compost in a Small Garden
Use mature compost to improve garden soil, add organic matter, and support healthy root growth. Spread it over a garden bed and mix it into the upper layer of soil where appropriate, or apply a thin layer around established plants. Avoid piling it against stems or tree trunks.
For many garden beds, a layer of about 1 to 2 inches of finished compost can be worked into the top few inches of soil before planting. The right amount depends on the existing soil, crop, and garden plan. For established plants, a thinner surface application is often enough to add organic matter without burying the crown or stems.
Compost is not a guaranteed complete fertilizer. Its nutrient content varies with the materials used, and nutrients may not be available to plants at the same rate. If a crop has special nutrient needs or your soil has a known deficiency, use a soil test and follow locally appropriate guidance.
Source: i.pinimg.com
Vegetable beds
Blend mature compost into the soil before planting, taking care not to use unfinished material around sensitive crops.
Flower beds
Add a modest surface layer or work compost into the soil when preparing a bed.
Trees and shrubs
Spread compost over the root zone without piling it against trunks or stems.
Containers
Use only mature compost in a suitable potting mix and in a moderate amount. Pure compost may hold too much water or have a nutrient balance that is not ideal for every potted plant.
Can You Use Compost That Still Has Food Scraps?
It is better to let the material mature before using it around growing plants. Fresh scraps can attract pests, create odors, and continue breaking down after they are added to the soil. That process can temporarily affect the availability of some nutrients.
If a few woody bits remain in otherwise finished compost, you can screen them out and return them to the bin. When in doubt, let the compost rest longer rather than spreading an immature mix through a vegetable bed.
Use mature compost
Check for an earthy smell, a crumbly texture, and few recognizable scraps.
Keep a batch in reserve
If you have room, allow a finished-looking batch to rest while you begin filling another container.
Small Backyard Composting: Cost and Setup Choices
You can start composting with a basic homemade enclosure or choose a ready-made bin. The lowest-cost setup is often one that uses materials you already have, provided they are clean, sturdy, and suitable for outdoor use. A purchased bin may save time and help control pests, but it is not required for composting to work.
Compare systems by capacity, airflow, drainage, access, and ease of turning rather than appearance alone. A bin that is hard to open or awkward to empty may be less useful than a plain design that fits your daily routine. Avoid containers that previously held chemicals or other hazardous substances.
Source: platthillnursery.com
Homemade bin
A suitable enclosure made from untreated wood or sturdy mesh can work well if it provides airflow, drainage, and safe access.
Ready-made stationary bin
A covered bin is often convenient for a small yard and can help contain scraps, although the contents may need manual mixing.
Tumbler
A tumbler can make turning easier, but it has a set capacity and still needs the right balance of materials and moisture.
Worm bin
A worm bin suits a small volume of kitchen scraps, but worms need appropriate bedding and a protected temperature range.
A Simple Maintenance Budget
A basic compost system may need little beyond the bin, a tool for mixing, and a place to store dry browns. You can often use fallen leaves and plain cardboard you already have, as long as they are free of unsuitable coatings, contamination, or chemicals. The main ongoing cost is time spent checking the mix and handling the finished compost.
Before spending money, decide whether you need help with containment, turning, or pest control. Buy equipment only to solve a real problem in your setup. A larger or more complex system will not automatically make better compost if it is poorly managed.
Start with essentials
Use one suitable bin, a small kitchen scrap container, and a simple garden tool.
Reuse safe materials
Save dry leaves and clean plain cardboard to provide browns through the year.
Upgrade only when needed
Consider a second bin or tumbler if your current system fills too quickly or is difficult to turn.
Small Backyard Composting Questions Worth Planning For
A useful compost routine should fit the amount of waste your household makes and the space you can maintain. Before adding more material or changing the setup, check whether the current problem is capacity, moisture, pests, or slow breakdown. Each issue has a different fix, so changing the whole system is rarely the first step.
Source: apieceofrainbow.com
If you make few scraps
Use a small bin and add material as it becomes available. There is no need to keep the bin full.
If you have lots of yard leaves
Store dry leaves separately and add them as needed to cover wet scraps.
If local rules limit composting
Check municipal guidance and any property restrictions before installing a bin or adding particular waste types.
What to Do When You Have More Scraps Than Space
If the bin fills before the material is ready, pause new additions and let the existing contents continue to break down. If space permits, use a second container for fresh scraps while the first matures. You can also check whether your local community offers food-scrap collection or a permitted drop-off program.
Do not keep packing fresh food into a full bin. Dense layers are harder to aerate and can cause odors. A steady system with enough room to work is more useful than a bin that is constantly overfilled.
Pause feeding
Let the current batch mature when the container is full.
Separate fresh and aging material
Use a second bin if you have room and want to keep collecting scraps.
Frequently Asked Questions
Q
Can I compost in a very small backyard?
Yes. A compact stationary bin, small tumbler, or worm bin can work in a limited outdoor space. Choose a system that fits your waste volume and leaves enough room to open, maintain, and empty it. Even a small bin can produce useful compost if you balance materials, moisture, and airflow.
Q
Can I compost directly on the ground without a bin?
Yes, if you have a suitable spot and local rules allow it. A small open pile is simple, but it may attract pests, spread material, or dry out more easily. In a compact yard, a covered bin often provides better control over scraps and moisture.
Q
Can I compost kitchen scraps without attracting rats?
You can reduce the risk by using a secure, pest-resistant bin, keeping the lid closed, covering fresh scraps with brown material, and cleaning spills. Keep meat, fish, dairy, fats, and oily food out of a basic backyard pile. No method can guarantee that pests will never visit, so follow local guidance if rodents are a known problem.
Q
Should I add soil to my compost bin?
You usually do not need to add garden soil. A compost mix made from suitable organic materials already supports decomposers, and a bin on bare ground may allow soil organisms to enter naturally. A little finished compost can be used to inoculate a new batch, but it is not essential.
Q
Why does my compost smell bad?
A rotten or sour smell often means the mix is too wet, too dense, or short on air. Add dry leaves or shredded cardboard, loosen the contents, and check drainage. If the smell comes from exposed food, cover the scraps and keep unsuitable ingredients out.
Q
Can I compost during winter?
Yes. Decomposition often slows in cold weather and may nearly stop when the contents freeze, but the process can resume as temperatures rise. Continue adding suitable scraps if convenient, cover them with browns, and expect the finished compost to take longer.
Q
How often should I turn a small compost bin?
There is no single schedule for every bin. Check it regularly and turn or loosen the contents when they become compacted, smell sour, or need more air. If the mix is balanced and airy, occasional mixing may be enough for a slow backyard system.
✦ Wrapping Up
Conclusion
Learning how to compost in a small backyard starts with a simple setup and a few steady habits. Choose a bin that fits your space, collect suitable kitchen and garden scraps, and cover fresh green material with dry browns. Keep the mix damp, allow air to move through it, and make small changes when the contents become too wet, too dry, or smelly.
The process may take months, especially in a small bin or during cold weather. That is normal. Look for dark, crumbly material with an earthy smell rather than relying on a fixed date, and let unfinished compost mature before using it around plants.
A small compost bin does not need to be perfect to be useful. Start with the scraps and leaves you already have, observe how the mix behaves, and build a routine that suits your yard and local conditions. Over time, your household can turn suitable organic waste into a helpful soil amendment for flower beds, vegetables, and other garden plants.
💡 Key Takeaway
Set up one compact bin, save a supply of dry leaves or plain shredded cardboard, and start with a small batch of fruit and vegetable scraps. Cover the scraps, check moisture once or twice during the first week, and adjust the mix as needed.
I enjoy sharing simple gardening ideas, lawn care tips, and honest product reviews that help make outdoor work easier. From home gardening guides to helpful tools and lawn care advice, I write easy-to-follow content to help readers create a healthier and better-looking outdoor space without wasting time or money.