
As an Amazon Associate, I earn from qualifying purchases.
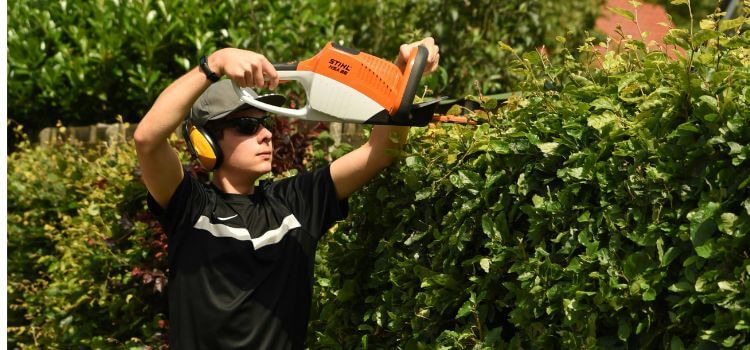
Sharpen hedge trimmer blades by using a honing stone or a file. Hold the blade at the correct angle and move it along the sharpener.
Hand trimmers need sharp blades for precise garden shaping and craft paper trimming. Dull blades can lead to poor performance and even injury. With the right tools and technique, sharpening hand trimmer blades is straightforward at home.
A standard honing stone or a simple flat file usually does the trick. Securing the blades and sharpening them following the original edge angle is essential. Regular maintenance keeps your hand trimmers in top condition, always ensuring clean, effortless cuts. Taking the effort to sharpen your tools extends your life and makes your work easier.
Sharp Trimmer Blades
We all know how frustrating dull tools can be in the garden. Sharp trimmer blades make a world of difference. Clean cuts and quick work are a gardener’s dream. Keeping your hand trimmer blades strong is convenient and essential for maintaining a healthy and beautiful garden.
Sharp blades are crucial for the health of your plants and the efficiency of your gardening. Dull blades tend to tear and harm plant tissue. This can lead to disease and slow recovery. A sharp trimmer makes clean cuts, helps plants heal faster, and reduces hand strain.
Impact On Plant Health
Clean cuts made by sharp blades help plants in several ways:
- Prevent damage: Torn or jagged cuts can weaken plants.
- Reduce disease risk: Clean cuts heal quicker, lowering disease chances.
- Stimulate growth: Proper trimming encourages healthy new growth.
Enhanced Gardening Efficiency
Benefits of sharpened blades on gardening performance include:
- Time-saving: Less effort is needed to make each cut.
- Precision: Sharp blades provide more control for precise shapes.
- Less fatigue: Reduced hand strain allows for longer gardening sessions.
Safety First: Preparing To Sharpen Blades
Sharp blades mean efficient trimming, but safety is most important. Preparing keeps you safe. Learn how with these steps.
Protective Gear Necessities
Safety gear is a must before you start. Below is what’s needed:
- Gloves: Wear thick gloves to protect your hands from sharp edges.
- Goggles: Eye protection is crucial against metal filings and dust.
- Long Sleeves and Pants: These protect your skin from sparks.
- Non-Slip Shoes: Provide stability and prevent falls.
Powering Down And Handling The Trimmer
Proper handling and power management ensure your safety. Follow these steps:
- Turn off the Trimmer: Ensure the trimmer is off and unplugged.
- Remove Battery: If the battery is battery-operated, take out the battery.
- Secure the Blade: Hold the blade still with a clamp or vise.
- Clean the Blade: Before sharpening, brush off debris and dirt.
Identifying Dull Blades And Maintenance Signals
Keeping hand trimmers sharp ensures efficient, clean cuts for your gardening tasks. Sharp blades mean less effort during trimming and a healthier plant. Over time, blades will naturally dull from use or rust, making regular inspection necessary. Recognizing when blades need maintenance is vital to keeping your hand trimmers in top condition.
Visual Inspection Tips
A careful look at your trimmer blades can reveal much about their condition. Bright, reflective edges typically indicate sharpness. Dull or nicked blade edges reflect light poorly. Rust spots can also tell you it’s time for a sharpening session. If you spot any blade colour or texture inconsistency, consider it a sign for maintenance.
Performance Indicators
Performance suffers when blades are dull. You’ll feel it in your hands. Red signals include using more force than regular or jagged, bruised plant cuttings. Clean and easy snips indicate well-maintained, sharp blades. Pay attention to these performance signals to know when your trimmer is due for a sharpening.
Gather Your Sharpening Tools
Keeping your hand trimmer blades sharp is vital to maintaining their effectiveness. Sharp blades mean clean cuts, less trimming effort, and healthier plants. Gathering the right tools before starting the sharpening process is crucial. These will ensure the job is done accurately and safely.
Selecting The Right File
The correct file is vital for effective sharpening. Choose a file with the following features:
- Proper shape: A flat file works best for hand trimmers.
- Suitable size: The file should match the size of your trimmer’s blade.
- Fine grit: Look for a fine-toothed file to achieve a smooth edge.
Always wear gloves to protect your hands. Secure the trimmer in a vise if possible. This keeps the blade steady.
Alternative Sharpening Kits
For those looking for a more straightforward method, purchase a sharpening kit. A good kit should have the following:
| Component | Usage |
|---|---|
| Sharpening Stone | For fine-tuning the blade’s edge |
| Honing Oil | To lubricate the stone for smooth sharpening |
| Cleaning Cloth | To remove debris after sharpening |
Follow the kit’s instructions. Keep the blade’s angle consistent during sharpening.
How to Sharpen Hedge Trimmer Blades
Keeping your hand trimmer blades sharp is crucial for efficient gardening. Sharp blades ensure clean cuts, healthier plants, and less effort during trimming. The sharpening process can seem daunting, but with this step-by-step guide, it’s easier to get your hand trimmers in top-notch condition! Let’s discuss the details.
Cleaning The Blades
Start with a clean slate. Blades collect sap, dirt, and debris. This can make sharpening hard. Follow these steps to clean them:
- Use soapy water to wipe down the blades.
- Rinse with clean water and dry thoroughly.
- Apply rubbing alcohol to disinfect and remove any remaining residue.
Secure Blade Positioning
With clean blades, secure the trimmer for safety and precision. Follow these steps:
- Clamp the trimmer or tie it in a vise.
- Ensure the blade is immovable for steady sharpening.
The Filing Technique
Filing takes patience and technique. Use a fine-tooth file or a whetstone. Here’s how:
| Action | Details |
|---|---|
| Angle | Match the file angle to the blade’s bevel. |
| Direction | Push the file in one direction—towards the blade edge. |
| Strokes | Consistent strokes maintain an even edge. |
| Pressure | Apply moderate pressure for best results. |
Checking For Even Sharpness
Last but not least, check your work. Do this:
- Look at the blade edge under a light. No light should reflect if it’s sharp.
- Test the blade by cutting paper. It should slice through easily.
- Make sure the sharpness is even along the blade.
Reassembling And Testing Your Trimmer
After sharpening your hand trimmer blades, it’s crucial to reassemble the trimmer correctly. A well-assembled trimmer will cut effortlessly, ensuring your gardening work is practical and enjoyable. Reassembling and testing the trimmer are the final checks to guarantee optimal performance. Follow these steps to make sure your trimmer is ready for action.
Steps To Reassemble Safely
Reassembling your trimmer is simple if you follow these steps:
- Collect all pieces: Lay out all parts of the trimmer. This includes the blades, screws, and handles.
- Place the blades together: Align the sharpened blades correctly.
- Attach the handles: Secure the blades to the handles. Ensure they move freely.
- Fasten screws: Tighten each screw by hand. Then, use a screwdriver for a firm fit.
- Oil the blades: Apply a few drops of machine oil. This prevents rust and ensures smooth movement.
- Check all parts: Ensure every piece is secure. No part should wobble or be loose.
Conducting A Test Cut
A test cut reassures you that the trimmer is ready:
- Select a test branch: Choose a small, easy-to-cut branch.
- Position the trimmer: Hold the trimmer at the base of the branch.
- Apply even pressure: Gently squeeze the handles together. Cut the branch cleanly.
- Examine the result: Check the trimmer’s cut. It should be clean, without any jagged edges.
- Adjust if necessary: If the trimmer fails to cut well, go back and recheck the assembly.
Enjoy a sharp, effective tool that makes garden maintenance a breeze.
Ongoing Care And Maintenance
Sharp blades mean efficient trimming. Ongoing care and maintenance keep hand trimmers cutting cleanly for years. Proper techniques extend the life of the blades and ensure they remain sharp and ready for action.
Routine Sharpening Schedule
Maintaining a regular sharpening schedule prevents dull blades. Check sharpness each time before use. A good rule is to sharpen after every few hours of use. Mark your calendar to keep track.
- Inspect blades before each use.
- Sharpen after every 5 hours of trimming.
- Use a fine file or stone for sharpening.
- Follow the original angle of the edge.
- Clean the blades after sharpening.
Proper Storage Practices
How you store your hand trimmers affects their longevity. Always clean the blades after use. Moisture leads to rust, so ensure they are dry before storing.
| Step | Action |
|---|---|
| 1. | Clean the blades: Remove sap and debris. |
| 2. | Dry thoroughly: Prevent rust and corrosion. |
| 3. | Apply oil: Protect the metal surfaces. |
| 4. | Store safely: Use a sheath or hang in a dry place. |
Consistency in care and maintenance makes a difference. Follow these simple steps to ensure your hand trimmer blades stay in prime condition. Start these habits today, and your hand trimmers will thank you for years to come!
Frequently Asked Questions On How To Sharpen Hand Trimmer Blades
To sharpen hand-held trimmers, clean the blades, then use a fine file along the cutting edge at the same angle as the slope. Perform smooth strokes on each blade, and finish by oiling the blades for protection and smoother operation.
To sharpen a trimmer blade, first disconnect the trimmer’s power supply. Then, remove the blade and clean it. Run a sharpening stone at a 30-45-degree angle across the blade’s edge, making consistent strokes on each tooth. After sharpening, reattach the blade to the trimmer.
Cut a foil strip and fold it several times to sharpen clipper blades with aluminum foil. Then, run the blades through the folded foil 10-15 times, ensuring consistent motion. This process hones the blades, improving their cutting ability.
The best file to sharpen hedge trimmers is a flat file for sharpening blades. For optimal results, use a 10-inch mill file.
Conclusion
Sharpening hand trimmer blades is a simple yet essential task for garden upkeep. Maintaining a keen edge makes your trimming tasks more accessible and more efficient. Remember, clean, sharp blades mean healthier plants and a tidier garden. Embrace the routine of blade care and witness your garden flourish with every precise cut.
Keep your trimmers in top condition, and they’ll serve you well through countless gardening seasons.
Last Updated on October 5, 2025 by Saad Abdullah
I enjoy sharing simple gardening ideas, lawn care tips, and honest product reviews that help make outdoor work easier. From home gardening guides to helpful tools and lawn care advice, I write easy-to-follow content to help readers create a healthier and better-looking outdoor space without wasting time or money.