As an Amazon Associate, I earn from qualifying purchases.
To winterize a vegetable garden, remove unhealthy plant debris, harvest remaining crops, test the soil if needed, add compost, protect bare beds with mulch or cover crops, clean garden tools, and prepare watering systems for freezing weather. Adjust these steps to your local climate and the vegetables you plan to grow.
Across the United States, vegetable gardens face very different winters. A gardener in Minnesota may deal with frozen soil and heavy snow, while someone in Georgia may enjoy mild days and grow leafy greens well into winter. Gardeners in Texas, Florida, and Southern California may also keep planting through much of the cooler season. The best winter garden plan starts with your local weather, not a fixed date on the calendar.
Winterizing a vegetable garden means preparing the soil, plants, beds, tools, and water systems for the months ahead. The goal is to limit soil erosion, protect useful soil life, reduce pest and disease problems, and make spring planting easier. You do not need to strip every bed bare or spend a lot of money to get these benefits.
Start when your main summer crops begin to fade and your first hard freeze is approaching, if your area gets one. Keep healthy crops that can tolerate the coming weather, harvest what is ready, and remove plants that are diseased or no longer productive. Then focus on protecting the soil. A little care in fall can save hours of work when the next growing season begins.
Begin winterizing when summer crops slow down and the weather starts to shift. In much of the northern United States, this work takes place in fall before the ground freezes. In milder parts of the South and West, you may prepare some beds while other beds remain in production.
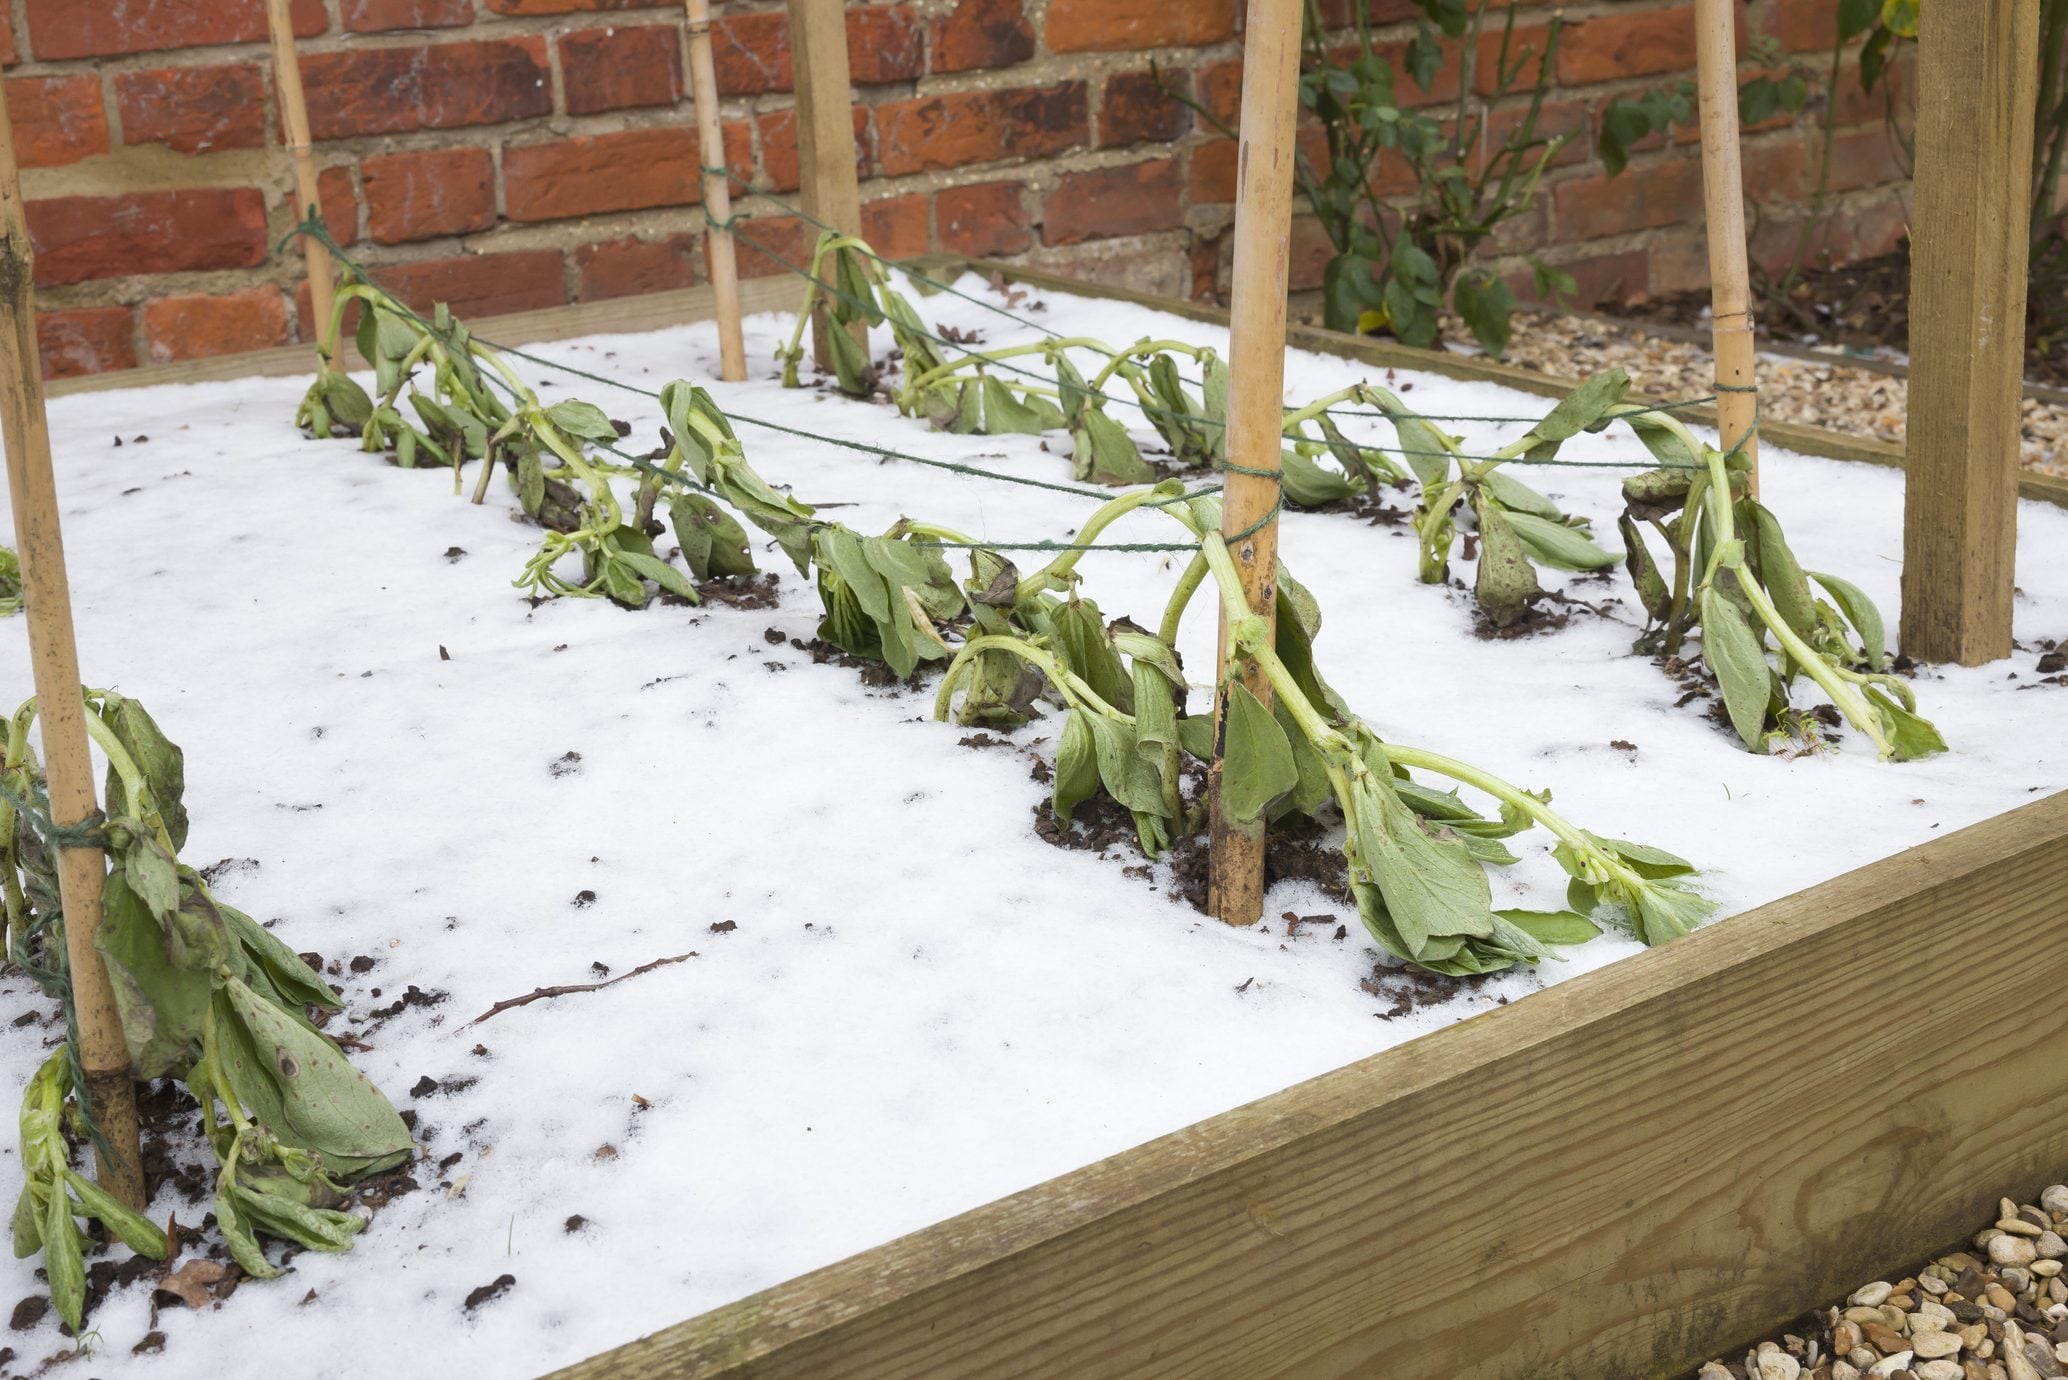
Use your local first-frost date as a planning guide, not a strict deadline. A light frost can damage tender crops such as basil, beans, and many types of squash, while kale, spinach, and some other cool-season vegetables can tolerate colder conditions. A hard freeze can damage even hardy crops, depending on the temperature, duration, and plant variety.
Check your local forecast before removing plants or applying thick mulch. If a freeze is expected soon, harvest tender vegetables and protect any crops you intend to keep. If the weather remains mild, you may have time to sow a cover crop, grow winter greens, or finish harvesting root vegetables.
Avoid working wet soil. When soil is saturated, digging and walking across beds can squeeze air from the soil and create clumps that are hard to break apart later. If a handful of soil smears into a sticky mass instead of crumbling when pressed, wait until it dries enough to work.
Source: i0.wp.com
Cold climates
Finish major cleanup and protect bare soil before the ground freezes. In areas with deep snow, secure row covers and other equipment before strong winds arrive.
Moderate climates
Remove summer crops in stages and leave room for cool-season vegetables. Mulch exposed soil and monitor winter rainfall.
Warm climates
Treat winter as another growing season when local conditions allow. Clear old summer crops, replenish beds, and protect tender plants during occasional cold snaps.
Use Your Climate and Growing Plans as Guides
USDA plant hardiness zones describe average annual extreme minimum winter temperatures. They help with perennial plant choices, but they do not tell you everything about vegetable growing conditions. Local frost dates, wind, soil drainage, winter rain, and short periods of unusual cold also matter.
Write down which beds will rest, which will hold winter crops, and which may receive an early spring planting. This simple plan helps you avoid removing healthy plants too soon or covering a bed that still needs to produce food.
For resting beds
Focus on soil cover, cleanup, compost, and equipment care.
For active winter beds
Keep paths accessible, remove diseased leaves, and use suitable row covers or low tunnels when cold protection is needed.
2. Harvest Remaining Vegetables Before the Cold Sets In
Harvest ripe vegetables before frost or prolonged cold can damage them. Pick mature tomatoes, peppers, beans, squash, and other tender crops while they are still in good condition. Check under leaves and along stems because small fruits often hide near the soil or inside dense growth.
Some green tomatoes may ripen indoors if they have reached a suitable stage of development. Keep them dry, sort out damaged fruit, and place sound tomatoes in a warm indoor spot away from direct sun. Very immature fruit may not ripen well, so use judgment rather than expecting every tomato to turn red.
Cold-tolerant vegetables can often remain in the garden longer. Carrots, parsnips, kale, and certain other crops may handle cool weather well, although their ability to survive winter depends on the variety, soil temperature, and local conditions. In regions with severe freezes, harvest root crops before the soil becomes too hard to dig.
Do not harvest everything simply because winter is near. In mild climates, a healthy bed of spinach, lettuce, mustard greens, or other cool-season crops may continue producing. Decide which plants will stay, which will be harvested, and which will be removed before starting the cleanup.
Source: i.pinimg.com
Pick tender crops first
Harvest mature tomatoes, peppers, beans, eggplants, and squash before damaging cold arrives.
Check root vegetables
Harvest mature roots before the ground freezes deeply or becomes waterlogged. In mild regions, some roots can remain in place under suitable mulch.
Save usable produce
Sort harvested vegetables, refrigerate those that need cold storage, and preserve suitable crops by freezing, drying, or canning with tested food-preservation methods.
Decide Which Crops Can Stay Outside
Cold tolerance varies among species and varieties. Kale and collards may survive temperatures that damage lettuce, while young seedlings can be less hardy than established plants. A row cover can reduce cold stress, but it does not guarantee survival during a severe freeze.
Check seed packets or reliable local extension guidance for the crop and variety you grow. If a cold snap is coming, harvest what you can and protect only the plants that are worth keeping. This avoids spending time and materials on crops that are unlikely to recover.
Keep healthy crops
Leave suitable cool-season vegetables in place when the weather and your growing setup support continued growth.
Remove declining crops
Take out plants that have finished producing, are badly damaged, or show signs of serious disease.
3. Remove Old Plants and Handle Diseased Debris Carefully
Clear out spent plants that no longer produce useful food. Old vines, fallen fruit, dead leaves, and broken stems can shelter pests and disease organisms. Removing them also makes it easier to inspect the soil, repair bed edges, and apply a winter cover.
Healthy plant debris can often be composted. Chop large stems into smaller pieces to help them break down, and mix green material with dry leaves or other carbon-rich matter. Keep the pile moist but not soggy, and turn it when practical to support decomposition.
Diseased material needs more care. Plants with severe leaf spots, blights, mildew, or unexplained decline should not automatically go into a home compost pile. A cool backyard pile may not reach the temperatures needed to destroy all disease organisms, so follow local extension advice on disposal.
Do not leave rotting vegetables scattered across the bed. Remove fallen fruit and any plants that could attract rodents or allow pests to persist. If a plant is healthy and has a root system that can break down in place, cutting it at soil level may be enough, depending on your crop rotation and pest history.
Source: i.pinimg.com
Compost healthy debris
Use sound leaves, non-diseased stems, and other suitable plant waste in a managed compost pile.
Separate suspicious material
Bag or dispose of heavily diseased plants according to local waste rules and regional extension guidance.
Remove weeds before they seed
Pull weeds while they are manageable and prevent mature seed heads from spreading through the garden.
Should You Pull Out Every Root?
No. Healthy roots can decompose in the soil and add organic matter as they break down. For many annual vegetables, cutting the plant at ground level is enough when the roots are healthy and there is no serious disease or pest issue.
Pull roots when you need to remove a diseased plant, inspect a problem, or clear a bed for a crop that requires a clean planting area. Avoid pulling large amounts of soil out with the roots, since this can disturb soil structure and remove useful topsoil.
Leave healthy roots
Cut suitable spent plants at the base and allow their roots to break down naturally.
Remove problem roots
Pull plants affected by serious root disease or damaging soil pests when removal is part of a sound management plan.
4. Test Your Soil Before Adding Amendments
A soil test helps you decide what your garden needs before the next growing season. Years of growing vegetables can change nutrient levels and soil pH, especially when you add fertilizer or compost each year. Testing is more useful than adding the same products to every bed without checking.
Contact your state university cooperative extension service or an accredited soil testing laboratory to learn how to collect a sample. Sample the area at the recommended depth, avoid unusual spots such as old compost piles, and follow the lab’s instructions for combining samples. Separate beds may need separate tests if they have different histories or growing conditions.
A soil test can report pH and nutrient levels and may include recommendations for lime or fertilizer. Soil pH affects how well plants can access nutrients, so correcting it when needed can improve the growing environment. Do not add lime just because winter is approaching; excessive lime can raise pH too far.
If your soil is already fertile and has suitable pH, you may not need much beyond a modest layer of mature compost. Heavy feeding can waste money and increase the risk of nutrient runoff. Follow the test report and crop needs rather than assuming more fertilizer means more vegetables.
Source: thekitchengarten.com
Test pH and nutrients
Use a suitable soil laboratory and follow its sampling instructions before choosing amendments.
Apply lime only when recommended
Lime changes soil pH and should be used at the rate advised by a soil test.
Avoid excessive fertilizer
Base nutrient additions on measured needs, especially where winter rain or snowmelt can carry nutrients away.
What If You Cannot Test the Soil Before Winter?
You can still protect the soil while you wait for a test. Remove unhealthy debris, prevent erosion, and cover bare beds with suitable organic mulch. If you have mature compost, a modest application may be useful, but avoid large, unmeasured additions of fertilizer or lime.
Collect a soil sample when conditions allow and use the results to guide spring preparation. Keeping the soil covered does not require you to guess at its nutrient needs.
Protect first
Use mulch or a suitable cover crop to reduce soil exposure while delaying major nutrient decisions.
Amend with a plan
Use the eventual soil report to decide whether pH correction or added nutrients are needed.
5. Add Compost to Improve Soil Structure
Mature compost can help improve soil structure, water movement, and organic matter levels. It also supports the organisms that help break down plant residues and cycle nutrients. Compost is not a cure for every soil problem, but regular, suitable use can make a vegetable bed easier to manage.
Spread a thin, even layer of finished compost across the bed after removing unwanted debris. A layer around one-half to one inch is often a reasonable starting point for established vegetable beds, but the right amount depends on soil condition, previous applications, and the compost’s nutrient content. Follow local recommendations if your soil test suggests a different approach.
You can leave the compost on the surface rather than digging it deeply into the soil. Rain, worms, and other soil organisms can gradually incorporate some of the material. This approach also limits disturbance to the soil structure.
Use compost that is dark, crumbly, and earthy smelling, with no obvious fresh manure or large amounts of undecomposed food waste. Avoid applying raw manure to beds where food crops will soon grow, because it can introduce pathogens and may contribute excess nutrients. Follow current food-safety guidance for manure use in vegetable gardens.
Source: i.pinimg.com
Use finished compost
Choose mature material that has largely broken down and has a pleasant earthy smell.
Spread it evenly
Apply a modest layer across the bed instead of piling it against plant crowns or filling paths.
Match the amount to the soil
Reduce additions when the soil already contains high nutrient levels or has received frequent compost applications.
Do You Need to Dig Compost Into the Bed?
Not always. Surface application works well when the soil is reasonably loose and you want to limit digging. Deep mixing may be useful when you are establishing a new bed or correcting a specific soil issue, but repeated heavy tillage can damage soil structure, particularly when the soil is wet.
If your bed is compacted, first identify why the problem developed. Avoid stepping on growing areas, improve drainage where possible, and use organic matter over time. Compost alone will not fix a bed that stays saturated or receives repeated heavy foot traffic.
Established beds
Top-dress with mature compost and let natural soil activity help incorporate it.
New beds
Mix suitable organic matter into the upper soil when the ground is dry enough to work without smearing or compacting it.
6. Cover Bare Soil With Mulch or a Cover Crop
Do not leave healthy garden soil bare all winter if you can avoid it. Wind, heavy rain, and snowmelt can move exposed topsoil, while repeated wetting and drying can damage its surface. A protective cover helps reduce erosion and can make spring bed preparation easier.
Organic mulch is often the simplest option for small vegetable gardens. Shredded leaves, clean straw, and other suitable plant materials can shield the soil while gradually breaking down. Use materials that are free of persistent weed seeds and avoid hay that may introduce unwanted weeds.
Apply mulch after the soil has cooled, especially in colder regions. A layer of roughly two to four inches of loose organic material is a common starting point for a resting bed, although the ideal depth depends on the material, climate, drainage, and pest pressure. Keep heavy, wet mulch away from plant crowns and avoid covering active seedlings that need light.
A cover crop is another useful way to protect soil. Plants such as cereal rye, oats, field peas, or clover may be suitable depending on the region, planting date, and intended use. Cover crops can reduce erosion and capture nutrients, but the right species must fit the local climate and the time available before winter.
Source: youryardexpert.com
Shredded leaves
Use clean leaves, preferably shredded so they settle more evenly and are less likely to form a dense, water-resistant mat.
Clean straw
Spread straw over resting beds when available, but check that it is suitable for garden use and does not contain troublesome weed seeds.
Cover crops
Choose a crop that can establish before cold weather and can be managed without interfering with spring planting.
How to Choose Between Mulch and Cover Crops
Mulch works well when you want quick soil protection with little maintenance. It is especially useful for small raised beds, late-fall cleanup, and places where there is not enough time for a cover crop to establish. Mulch can also make it harder for some weeds to emerge, though it will not stop every weed.
Cover crops are useful when you have enough growing time and want living roots in the soil. Their roots can help hold soil in place, and certain species can capture leftover nutrients. Some legumes can contribute nitrogen under suitable conditions, but that does not mean every cover crop will supply enough nitrogen for the next vegetable crop.
In cold regions, winter-killed crops such as oats may be practical in some situations, while winter-hardy crops such as cereal rye can resume growth in spring. In warm regions, a suitable cover crop may continue growing during the winter. Check local planting windows and termination methods before sowing.
Choose mulch when time is short
Cover the soil directly if cold weather is close or the bed is too small to justify growing and terminating a cover crop.
Choose a cover crop when timing allows
Sow a regionally suitable species early enough for it to establish before unfavorable weather.
Plan spring termination
Leave time to cut, mow, or otherwise terminate the cover crop before planting vegetables, following local guidance for the species used.
Avoid Common Mulching Problems
A very thick, wet layer can create a poor environment around crowns and stems. Some mulch materials can also shelter slugs or rodents, especially near structures or in damp areas. Check beds from time to time and adjust the cover if pests become a problem.
Do not use treated wood waste, contaminated yard debris, or materials of uncertain safety as garden mulch. Keep paths clear and avoid piling leaves against wooden bed frames or house siding where trapped moisture may cause problems.
Keep the cover loose
Use a depth suitable for the material and climate instead of compressing it into a solid mat.
Watch for pests
Inspect damp corners and the area around stored materials if rodents or slugs are common in your garden.
7. Protect Raised Beds and Improve Drainage
Raised beds need winter care too, especially where freezing, thawing, and heavy rain are common. Check the sides, corner joints, screws, and supports for damage. Repair loose boards before wet soil and winter weather make the job harder.
Make sure water can drain from the bed. Soil that remains saturated for long periods can deprive roots and soil organisms of air, while repeated freezing and thawing may put added pressure on bed walls. If water collects in a bed, look for blocked drainage paths, compacted soil, or a site that receives runoff from nearby ground.
Do not fill raised beds to the top with fresh material just because the soil level has dropped. Add suitable topsoil and mature compost as needed, but account for the bed’s existing soil and nutrient history. A small amount of settling is normal as organic matter decomposes.
In areas with very wet winters, consider keeping mulch loose and avoiding materials that remain waterlogged. In dry climates, a surface cover can reduce moisture loss and wind erosion. The best protection is the one that suits the bed’s drainage and local winter pattern.
Source: flowers-plants.com
Inspect bed walls
Replace damaged wood, tighten safe fasteners, and check that the structure can hold the soil without bowing.
Check drainage
Look for standing water after rain and address the source before adding more soil or compost.
Protect exposed soil
Use mulch or an appropriate cover crop to limit erosion and reduce the impact of winter weather.
Should You Cover Raised Beds With Plastic?
Plastic covers can reduce direct rainfall and may help manage moisture in some systems, but they are not a universal winter solution. A poorly secured cover can blow away, collect water, trap unwanted moisture, or interfere with air exchange. Clear plastic can also warm the soil on sunny days, which may affect plants or soil conditions in ways you did not intend.
For most home gardens, organic mulch or a suitable cover crop is a simpler choice. If you use a plastic cover, secure it properly, prevent water from pooling, and make sure the setup suits the crop and climate. Do not seal living plants under an unsuitable cover for long periods.
Use plastic with a clear purpose
Choose it only when you understand the moisture, temperature, and ventilation effects of the specific setup.
Prefer breathable soil cover when practical
Mulch and cover crops often provide soil protection without the same risk of trapped water or wind damage.
8. Protect Winter Vegetables From Cold Snaps
If you plan to keep vegetables growing, prepare a way to protect them before the first severe cold snap. Floating row covers, low tunnels, and cold frames can help trap warmth and reduce exposure to wind. The level of protection depends on the material, how well it is installed, sunlight, and the outdoor temperature.
A floating row cover is a lightweight fabric laid over plants or supported by hoops. It can reduce frost exposure and wind stress while allowing some light and air through. Heavier covers generally provide more protection than lightweight fabric, but the actual result varies with conditions.
A low tunnel uses hoops and a covering material to create a protected space over a bed. A cold frame is a low box with a transparent lid that can shelter small plants. Both can be useful, but they need ventilation during sunny weather because temperatures beneath a cover can rise quickly, even in winter.
Secure covers so wind cannot lift them or rub them against plants. Check the forecast, inspect the structure after storms, and remove or open covers when ventilation is needed. Covers do not replace good crop selection, and they cannot guarantee that a tender vegetable will survive a severe freeze.
Source: i.pinimg.com
Use row covers
Choose a cover weight suited to the crop and expected conditions, and secure the edges to reduce wind exposure.
Build low tunnels where useful
Use hoops and suitable covering material to shelter a row of greens or other cool-season crops.
Ventilate on sunny days
Open or adjust covers when temperatures rise to reduce heat buildup and excess moisture.
Which Vegetables Are Best for Winter Growing?
Kale, collards, spinach, and some other leafy greens can tolerate cool weather, while carrots, turnips, and certain other root crops may also grow well in suitable conditions. The best choices depend on your local climate, the variety, and whether you are growing in open ground, a raised bed, or a protected structure.
In the southern United States, fall planting can provide a long harvest period for cool-season vegetables. In northern regions, many winter crops must be established before daylight and temperatures fall too far for useful growth. Some plants may survive cold without producing much new growth until conditions improve.
Leafy greens
Consider spinach, kale, and collards where local conditions and crop varieties support winter growth.
Root vegetables
Plan carrots, turnips, and other suitable roots around local sowing dates and expected soil temperatures.
Tender summer crops
Harvest or remove them before severe cold unless you have a suitable protected growing system and realistic expectations.
9. Clean, Repair, and Store Garden Tools
Clean tools before storing them for winter. Soil left on spades, hoes, and trowels can hold moisture and encourage rust, while plant residue on pruners can carry pests or disease organisms from one plant to another. A few minutes of care now can make spring work easier.
Brush off soil, wash tools when needed, and dry metal parts well. Use a suitable disinfectant on cutting tools when disease management calls for it, following the product label and allowing the tool to dry. Routine cleaning and disease-related disinfection are not the same task, so use the level of care that fits the problem.
Sharpen cutting edges when needed and check handles for cracks or loose fittings. Lubricate metal parts and moving joints with a suitable product, taking care not to leave oily residues where they could contaminate edible crops. Store tools in a dry shed, garage, or covered storage area.
Inspect stakes, trellises, tomato cages, plant labels, and row-cover hoops as well. Repair damaged pieces and group them by use so you can find them easily in spring. Remove old plant ties that are brittle or contaminated and keep reusable materials clean.
Source: familyhandyman.com
Remove dirt and moisture
Brush or wash tools, then dry them before storage to reduce rust and corrosion.
Check blades and handles
Sharpen suitable cutting tools and repair or replace damaged parts before the next season.
Store equipment securely
Keep tools and small parts in a dry location where they will not create a trip hazard or become exposed to rain and snow.
Do Not Forget Irrigation Hoses and Outdoor Faucets
Freezing water can damage hoses, fittings, filters, valves, and irrigation lines. Disconnect garden hoses from outdoor faucets, drain them, and store them in a sheltered place. Follow the faucet manufacturer’s guidance for protecting the faucet itself, especially if the pipe runs through an unheated wall.
Drain or winterize irrigation systems according to the system design. Some systems require specific valve settings or other procedures, and compressed air can be dangerous if used incorrectly. Follow the manufacturer’s instructions or ask a qualified irrigation professional when you are unsure.
In areas without freezing winters, inspect hoses for leaks and store equipment out of direct sun when possible. Even where freezing is rare, routine checks can prevent wasted water and avoid spring repairs.
Drain hoses
Disconnect, empty, and store hoses before freezing weather arrives.
Protect irrigation components
Follow the system’s instructions for draining or insulating exposed parts.
Check outdoor faucets
Use the recommended freeze-protection steps for your faucet and plumbing setup.
10. Plan Crop Rotation and Spring Planting
Use the winter break to plan where next year’s crops will grow. Crop rotation means moving related crops to different beds over time to help manage certain soilborne diseases and pests and to balance nutrient use. It is especially useful for crops that share common disease or pest problems.
For example, if tomatoes, peppers, eggplants, or potatoes grew in one bed, consider planting a different crop family there next season. Move brassicas such as cabbage and broccoli when practical, and keep records of where legumes, roots, and leafy crops grew. Rotation is not a complete solution for every pest, but it can reduce repeated problems when combined with other sound practices.
Draw a simple map of the garden and write down the crops that grew in each bed. Note which varieties produced well, where disease appeared, which beds stayed too wet, and where pests caused damage. These records are more useful than relying on memory when seed catalogs and planting tasks return.
Check your local planting calendar before buying seeds. A vegetable that performs well in one region may struggle in another because of heat, day length, humidity, or frost timing. Select varieties suited to your area and buy only the quantities you can reasonably grow.
Source: flowers-plants.com
Map the current garden
Record which crops occupied each bed and note any disease, pest, drainage, or productivity issues.
Rotate related crops
Move crop families when practical, especially where recurring pests or soilborne diseases are a concern.
Plan by local planting dates
Use local extension calendars and seed-packet guidance to set sowing and transplant dates.
A Simple Winter Garden Checklist
A short checklist makes winter preparation easier to finish. You do not need to complete every task on the same day, and you can skip steps that do not apply to your garden. Focus first on harvest, diseased plant removal, soil protection, and any equipment that could be damaged by freezing weather.
Harvest
Pick ripe crops and decide which cold-tolerant vegetables will remain in the garden.
Clean
Remove spent plants, weeds with seed heads, fallen fruit, and debris that may harbor pests or disease.
Test and amend
Collect a soil sample if needed and apply compost or other amendments according to soil conditions.
Cover
Protect bare soil with suitable mulch or a locally appropriate cover crop.
Repair
Inspect raised-bed sides, stakes, trellises, row covers, and irrigation parts.
Store
Clean and dry tools, drain hoses, and protect equipment from rain and freezing temperatures.
Plan
Map crop locations, review problems from the past season, and prepare a spring planting schedule.
11. Adapt Winterizing to Your Region
The best winterizing plan changes with the local climate. A method that works in a cold northern garden may be unnecessary in a warm southern garden, while a garden in a wet coastal area may need more attention to drainage than one in a dry inland region. Use regional planting calendars and local weather forecasts to fine-tune your routine.
In northern states, frozen soil and deep snow can limit winter work. Complete repairs before the ground freezes, protect bare beds, and avoid walking on frozen or saturated soil when it could damage the surface. In regions with heavy snowfall, secure structures and remove any equipment that could be crushed or blown away.
In the Mid-Atlantic and parts of the Midwest, fall cleanup and soil cover are useful, but many gardeners can also maintain winter crops under suitable protection. Watch for alternating wet and frozen conditions, which can stress plants and affect raised-bed structures.
In the Southeast and Gulf Coast, winter may allow continued production of cool-season crops. Remove summer plants that have declined, check beds for drainage after heavy rain, and use mulch to limit weeds and soil exposure. During occasional cold snaps, cover sensitive crops and uncover them when temperatures rise.
In the Southwest and other dry western areas, winter soil protection should account for low rainfall, wind, and local water limits. Mulch can help reduce evaporation, while irrigation may still be needed during dry spells if winter crops are actively growing. Avoid watering on a schedule that ignores current soil moisture and weather.
In coastal and milder western areas, rain and persistent dampness may be the main concern rather than deep freezing. Keep beds draining well, remove badly diseased debris, and avoid thick, soggy mulch against plant stems. Local cooperative extension guidance is particularly useful when winter rainfall patterns vary from one part of a state to another.
Cold northern regions
Finish equipment care before hard freezes and use mulch or other suitable soil protection on resting beds.
Cool and mixed winter regions
Combine fall cleanup with protection for any winter crops you intend to keep growing.
Warm southern regions
Keep suitable cool-season vegetables in production and prepare for short periods of unexpected cold.
Dry western regions
Protect soil from wind, monitor moisture, and irrigate only as local conditions and crop needs require.
Wet coastal regions
Prioritize drainage, sound mulch placement, and removal of severely diseased plant material.
What to Do If Winter Arrives Earlier Than Expected
If a sudden cold snap catches you off guard, focus on the tasks that prevent immediate loss. Harvest ripe tender crops, cover plants that can reasonably benefit from protection, and disconnect hoses before water freezes inside them. Do not try to dig or heavily amend soil that is frozen or saturated.
You can finish many cleanup and planning tasks later when conditions improve. Protecting the soil and preventing equipment damage are usually more urgent than making every bed look tidy. A garden does not need to be spotless to enter winter in good shape.
Handle urgent risks first
Harvest vulnerable produce, protect suitable crops, and drain exposed water equipment.
Delay unsuitable work
Wait for workable soil before digging, repairing buried irrigation, or making major soil changes.
12. Avoid Common Winterizing Mistakes
The most common mistake is treating every vegetable bed the same way. Climate, crop choice, drainage, and disease history all affect the right approach. A simple plan based on those factors is usually more useful than following a rigid fall cleanup routine.
Do not leave diseased plants in place simply to add organic matter. Do not spread fresh manure over beds without considering food-safety guidance, nutrient needs, and planting dates. And do not apply fertilizer or lime without a reason to believe the soil needs it.
Avoid digging wet soil or walking repeatedly through beds when they are soft. Compaction can reduce air spaces and make it harder for roots to grow. If the soil is too wet to crumble, wait until it drains.
Do not assume that all mulch is beneficial in any amount. A dense, wet layer may cause trouble in poorly drained beds, and certain materials can introduce weeds or unwanted contaminants. Use clean materials and check the bed during winter when weather allows.
Finally, do not confuse winterizing with abandoning the garden. A brief check after heavy rain, strong wind, or a major freeze can reveal damaged covers, standing water, or broken structures. Small repairs are easier when caught early.
Mistake: Clearing every healthy plant
Keep suitable winter crops when conditions allow, and remove only plants that have finished producing or need to be removed.
Mistake: Adding too much fertilizer
Use soil-test results and crop needs to avoid nutrient excess and potential runoff.
Mistake: Working wet soil
Wait until the soil is workable to limit compaction and damage to its structure.
Mistake: Ignoring water equipment
Drain hoses and protect irrigation components before freezing weather.
Mistake: Forgetting spring timing
Plan cover-crop termination and mulch removal early enough that the bed is ready when planting time arrives.
How to Tell Whether Your Garden Is Ready for Winter
A winter-ready garden does not need to be bare or perfectly neat. You should have harvested the crops that need picking, removed plants that pose a clear disease or pest concern, protected exposed soil, and dealt with equipment that could be damaged by cold.
Look for a stable soil cover, clear paths, secure bed structures, and no hoses left full of water in freezing conditions. If you plan to grow through winter, the remaining crops should have a suitable growing setup and a clear plan for cold protection and ventilation.
Soil is protected
Bare beds have suitable mulch, a cover crop, or another practical form of erosion protection.
Problem debris is removed
Diseased plants and fallen fruit have been handled appropriately.
Equipment is ready
Tools are clean and dry, and water systems have been prepared for local winter conditions.
Spring plans are recorded
Crop locations, soil concerns, and likely planting windows are written down for easy reference.
Frequently Asked Questions
Q
When should I winterize my vegetable garden?
Start when summer crops slow down and fall weather begins to arrive. In cold regions, complete urgent tasks before the ground freezes or a hard frost damages tender crops. In warmer regions, winterizing can happen in stages while cool-season vegetables continue to grow.
Use local frost forecasts and planting calendars instead of relying on one date for the entire country.
Q
Should I cover my vegetable garden soil over winter?
Yes, covering bare soil is generally useful because it helps limit erosion and protects the soil surface. Suitable options include shredded leaves, clean straw, or a regionally appropriate cover crop. Choose a cover that fits your climate, drainage, and spring planting plans.
Keep mulch from smothering active plants, and monitor damp beds for signs of poor drainage or pests.
Q
Should I add compost before winter?
You can add mature compost before winter if your soil and nutrient needs make it appropriate. A modest surface layer can add organic matter and support soil structure over time. The right amount depends on your soil condition and previous compost use.
Avoid applying large amounts of fertilizer, lime, or fresh manure without considering soil-test results and food-safety guidance.
Q
Can I leave vegetables growing in the garden during winter?
Yes, some vegetables can keep growing or remain harvestable during winter, depending on the crop and local climate. Kale, collards, spinach, and some root crops can tolerate cool conditions, but their cold tolerance varies by variety and plant maturity.
In colder regions, row covers, low tunnels, or cold frames may help protect crops. Check the forecast and ventilate covered structures on sunny days to prevent overheating.
Q
Can I compost old vegetable plants before winter?
Healthy, non-diseased plant material can usually go into a properly managed compost pile. Chop large stems and balance green plant waste with dry leaves or other carbon-rich materials.
Keep severely diseased plants out of a typical home compost pile unless local guidance confirms a suitable treatment method. Compost piles do not all reach temperatures high enough to destroy every plant pathogen.
Q
Do I need to till my vegetable garden before winter?
No. Many established vegetable beds can be prepared without tilling. You can remove unwanted debris, spread mature compost on the surface, and cover the soil with mulch. This approach reduces disturbance and avoids working wet soil.
Tillage may be useful in certain situations, such as preparing a new bed or addressing a specific soil problem, but the method should fit the soil and planting plan.
Q
How do I protect a raised vegetable bed from winter damage?
Inspect the sides, joints, supports, and drainage before severe weather arrives. Repair loose or damaged parts and cover exposed soil with a suitable mulch or cover crop. Avoid walking on saturated soil and correct standing-water problems where possible.
In freezing regions, drain hoses and protect exposed irrigation parts. If you use a plastic cover, secure it well and prevent water from collecting on top.
✦ Wrapping Up
Conclusion
Learning how to winterize a vegetable garden is mostly about making a few useful choices at the right time. Harvest tender crops, remove plant debris that may carry pests or disease, protect the soil, and use compost or other amendments according to actual needs. Clean tools and prepare hoses and irrigation parts before cold weather causes damage.
The right approach depends on where you garden in the United States. A northern gardener may need to finish most outdoor work before the ground freezes, while a gardener in a mild southern climate may keep cool-season crops growing throughout winter. In wet regions, drainage may matter most; in dry regions, soil cover and careful moisture management may take priority.
A well-prepared garden does not need to look empty. Healthy roots, suitable mulch, cover crops, and hardy vegetables can all have a place in a winter garden. Keep a simple record of what you did, which problems you noticed, and what you plan to grow next year. That record will make your spring work more focused and help you improve the garden one season at a time.
💡 Key Takeaway
Start with one bed today: harvest ripe vegetables, remove unhealthy debris, check the soil, add a suitable cover, and prepare nearby tools and hoses for your local winter weather. Then repeat the process across the garden as crops finish.
I enjoy sharing simple gardening ideas, lawn care tips, and honest product reviews that help make outdoor work easier. From home gardening guides to helpful tools and lawn care advice, I write easy-to-follow content to help readers create a healthier and better-looking outdoor space without wasting time or money.