As an Amazon Associate, I earn from qualifying purchases.
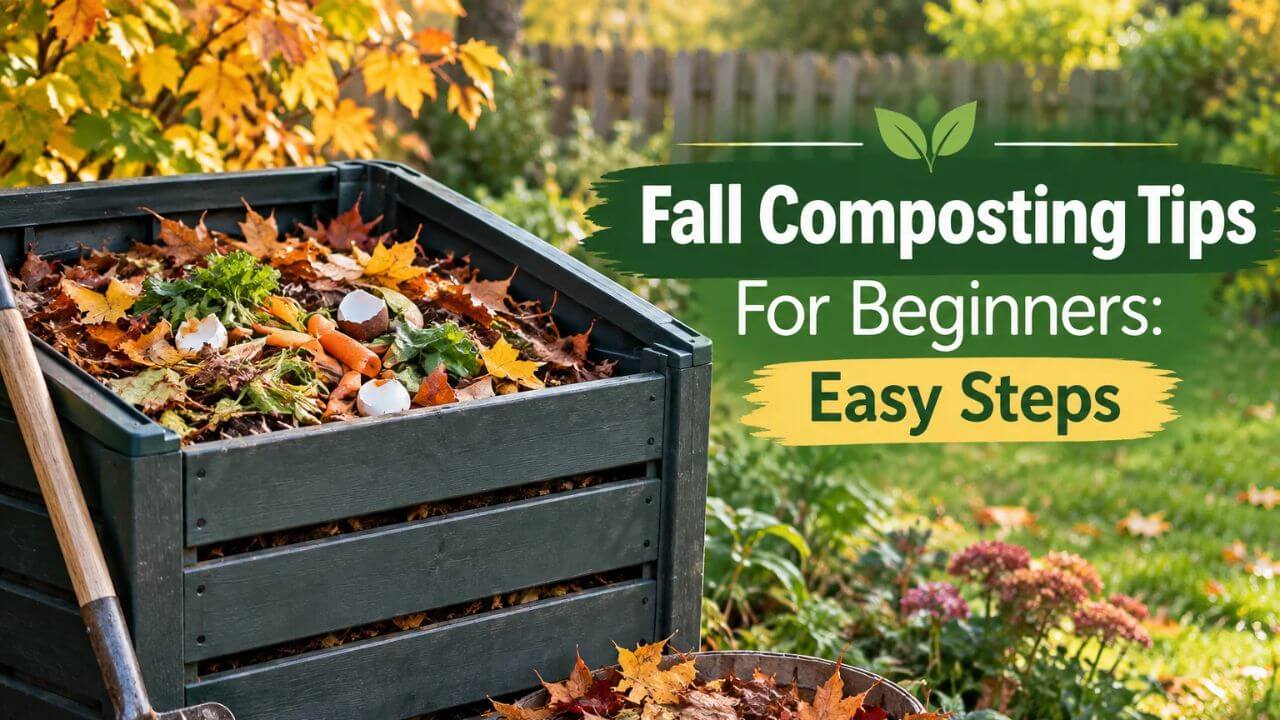
The best fall composting tips for beginners are to collect dry leaves, mix them with fresh green waste, keep the pile damp but not soaked, chop large scraps, and protect the pile from heavy rain. Start with a simple bin or pile, add kitchen scraps under a layer of leaves, and keep adding material as your yard cleanup continues. Your compost may slow down in cold weather, but you can still build a useful supply for spring.
Across the United States, fall brings a fresh batch of compost materials to the backyard. Maple leaves blanket lawns in the Northeast and Midwest, oak leaves drop across the South, and gardeners in the Pacific Northwest often deal with wet leaves and steady rain. In warmer parts of the country, fall can also be a good time to clean up vegetable beds and add fresh plant waste to the compost pile.
If you are new to composting, you do not need a fancy machine or a perfect recipe. A pile, a bin, dry leaves, and suitable kitchen scraps are enough to begin. The main goal is to give tiny living things the right mix of food, air, and moisture so they can break plant waste down into a dark, crumbly material that helps improve garden soil.
Fall composting does come with a few challenges. Wet leaves can mat together, cold nights can slow decomposition, and a pile with too many food scraps may attract pests. These problems are easy to prevent when you know what to add, what to leave out, and how to manage moisture as the weather changes.
Fall is a useful time to start composting because many yards produce large amounts of leaves, spent plants, and other organic waste. Instead of bagging every leaf for disposal, you can save suitable material and turn it into a soil amendment. This makes fall cleanup part of your garden plan rather than a chore that ends at the curb.
Dry leaves are especially helpful because they supply carbon, which compost microbes use as part of their energy needs. Vegetable scraps and fresh green plants contain more nitrogen, another nutrient that helps microbes grow. A balanced mix of these materials supports decomposition and helps prevent the pile from becoming slimy or foul-smelling.
Fall also gives you time to build a compost pile before the next growing season. In mild climates, decomposition may continue through much of the winter. In colder areas, the pile may become nearly inactive during freezing weather, but its contents can resume breaking down when conditions improve.
Source: ie.pinterest.com
Use what your yard already provides
Save clean, dry leaves, healthy spent vegetable plants, and small untreated plant trimmings. These materials can reduce the need to buy compost later.
Prepare for spring gardening
A pile started in fall has several months to settle and break down. Whether it finishes by spring depends on its size, ingredients, moisture, airflow, and local temperatures.
Reduce waste
Composting suitable plant waste keeps useful organic matter in your garden instead of sending it to a landfill or yard-waste collection service.
What Makes Fall Composting Different From Summer Composting?
The main difference is temperature. Composting microbes work faster when conditions are warm and suitable, so a pile that breaks down quickly in summer may slow sharply as autumn turns to winter. Cold weather does not mean your compost has failed; it means the process needs more time.
Fall also brings a large supply of dry leaves. This is helpful, but leaves can form dense layers when they become wet and pressed together. Shredding them and mixing them with other materials creates better airflow and helps water move through the pile.
In cold regions
Build a well-sized pile before severe cold arrives, keep suitable materials covered, and avoid expecting rapid winter decomposition.
In mild regions
Continue adding suitable scraps and garden waste while checking moisture, airflow, and odors.
In rainy regions
Use a covered bin or rain-shedding cover while leaving enough openings for air to move through the compost.
Choose a Simple Composting Setup
You can begin fall composting with an open pile, a homemade enclosure, or a ready-made compost bin. Choose the setup that fits your yard, the amount of waste you produce, and the space available. A beginner does not need to buy special equipment before learning the basics.
Place your compost where it is easy to reach throughout the year. A level spot with good drainage is useful, and partial shade can help the pile hold moisture in dry weather. Avoid placing it where runoff may carry compost or leachate into a storm drain, stream, pond, or neighboring property.
Leave enough room to add materials and turn the pile if needed. If you have a small yard, a lidded bin may make the process tidier. If you have a large supply of leaves, a larger pile or leaf-only storage area can keep those valuable brown materials ready for use.
Source: www.pinterest.com
Open compost pile
An open pile is inexpensive and easy to build. It suits larger yards but may need more attention to keep rain, wildlife, and loose leaves under control.
Enclosed compost bin
A bin helps keep materials together and can make a small yard look neater. Choose one with suitable ventilation and enough access to add and remove material.
Leaf storage cage
A simple mesh enclosure can hold dry leaves until you need them. Store the leaves separately if your main compost pile has too much wet or nitrogen-rich material.
How Large Should a Beginner’s Compost Pile Be?
A pile around three feet wide, three feet long, and three feet high is a practical starting point for many backyard gardeners. It can hold heat better than a very small pile while remaining manageable to turn. This is a useful target, not a strict rule, and smaller bins can still make compost.
A larger pile can retain more heat, but size alone does not guarantee success. A compact pile packed with wet leaves may have too little air, while a well-aerated pile of a more modest size can break down steadily. Focus on a balanced mix and suitable moisture rather than chasing a particular pile size.
Small spaces
Use a compact bin, add smaller amounts often, and keep a separate bag or container of dry leaves nearby.
Large yards
Use a larger pile or enclosure that can hold the leaves and garden waste produced during fall cleanup.
Know Which Materials to Add in Fall
A good compost pile needs a mix of carbon-rich brown materials and nitrogen-rich green materials. Browns include dry leaves, shredded plain cardboard, small untreated twigs, and dry plant stems. Greens include vegetable scraps, coffee grounds, fresh grass clippings in modest amounts, and healthy green plant trimmings.
The brown and green labels describe their role in composting, not just their color. Coffee grounds look brown but generally count as a nitrogen-rich material. A yellow or brown leaf is usually a carbon-rich material, especially when it has dried out.
In fall, dry leaves are often the easiest brown material to collect in quantity. Store extra leaves in a dry spot so you can add them whenever the pile receives wet food scraps or fresh plant waste. This reserve is one of the simplest ways to keep a new compost pile in balance.
Source: artofit.org
Brown materials
Dry leaves, shredded plain cardboard, uncoated paper, small untreated twigs, straw, and dry garden stems help supply carbon and create structure.
Green materials
Fruit and vegetable scraps, coffee grounds with paper filters, fresh grass clippings, and healthy green plant trimmings add nitrogen and moisture.
Useful fall extras
Small amounts of chopped annual plants and healthy vegetable vines can be composted when they are free of serious disease and have not been treated with unsuitable chemicals.
Materials to Keep Out of a Basic Backyard Compost Pile
Do not put meat, fish, bones, dairy products, oils, grease, or cooked foods with heavy sauces into a basic backyard pile. They can create odors and attract animals. Some managed composting systems can handle certain food wastes, but those systems may use controlled heat, specialized equipment, or local collection rules that do not apply to a home pile.
Avoid dog and cat feces, used cat litter, human waste, and manure from pets. These can carry pathogens or introduce unwanted contaminants. Home compost piles may not maintain the time and temperature conditions needed to make such materials suitable for use around food crops.
Leave out diseased plant material when you cannot be confident that your pile will destroy the disease organism. Weed seeds and invasive weeds with persistent roots can also survive ordinary backyard composting. Follow local yard-waste rules for plants affected by serious diseases or invasive pests.
Treated or coated materials
Avoid painted or chemically treated wood, glossy or plastic-coated paper, synthetic fabrics, and materials contaminated with chemicals.
Large woody pieces
Do not add thick branches or large chunks of wood to a beginner pile unless you are prepared to wait a long time for them to break down.
Persistent weeds
Keep weeds with mature seeds or tough spreading roots out of a cool home compost pile unless you have a suitable process for handling them.
Balance Brown and Green Materials
Balance dry leaves and other browns with green materials rather than building the pile from one ingredient alone. Carbon-rich material supplies energy and structure, while nitrogen-rich material supports microbial growth. Too much of either type can slow decomposition or create an unpleasant pile.
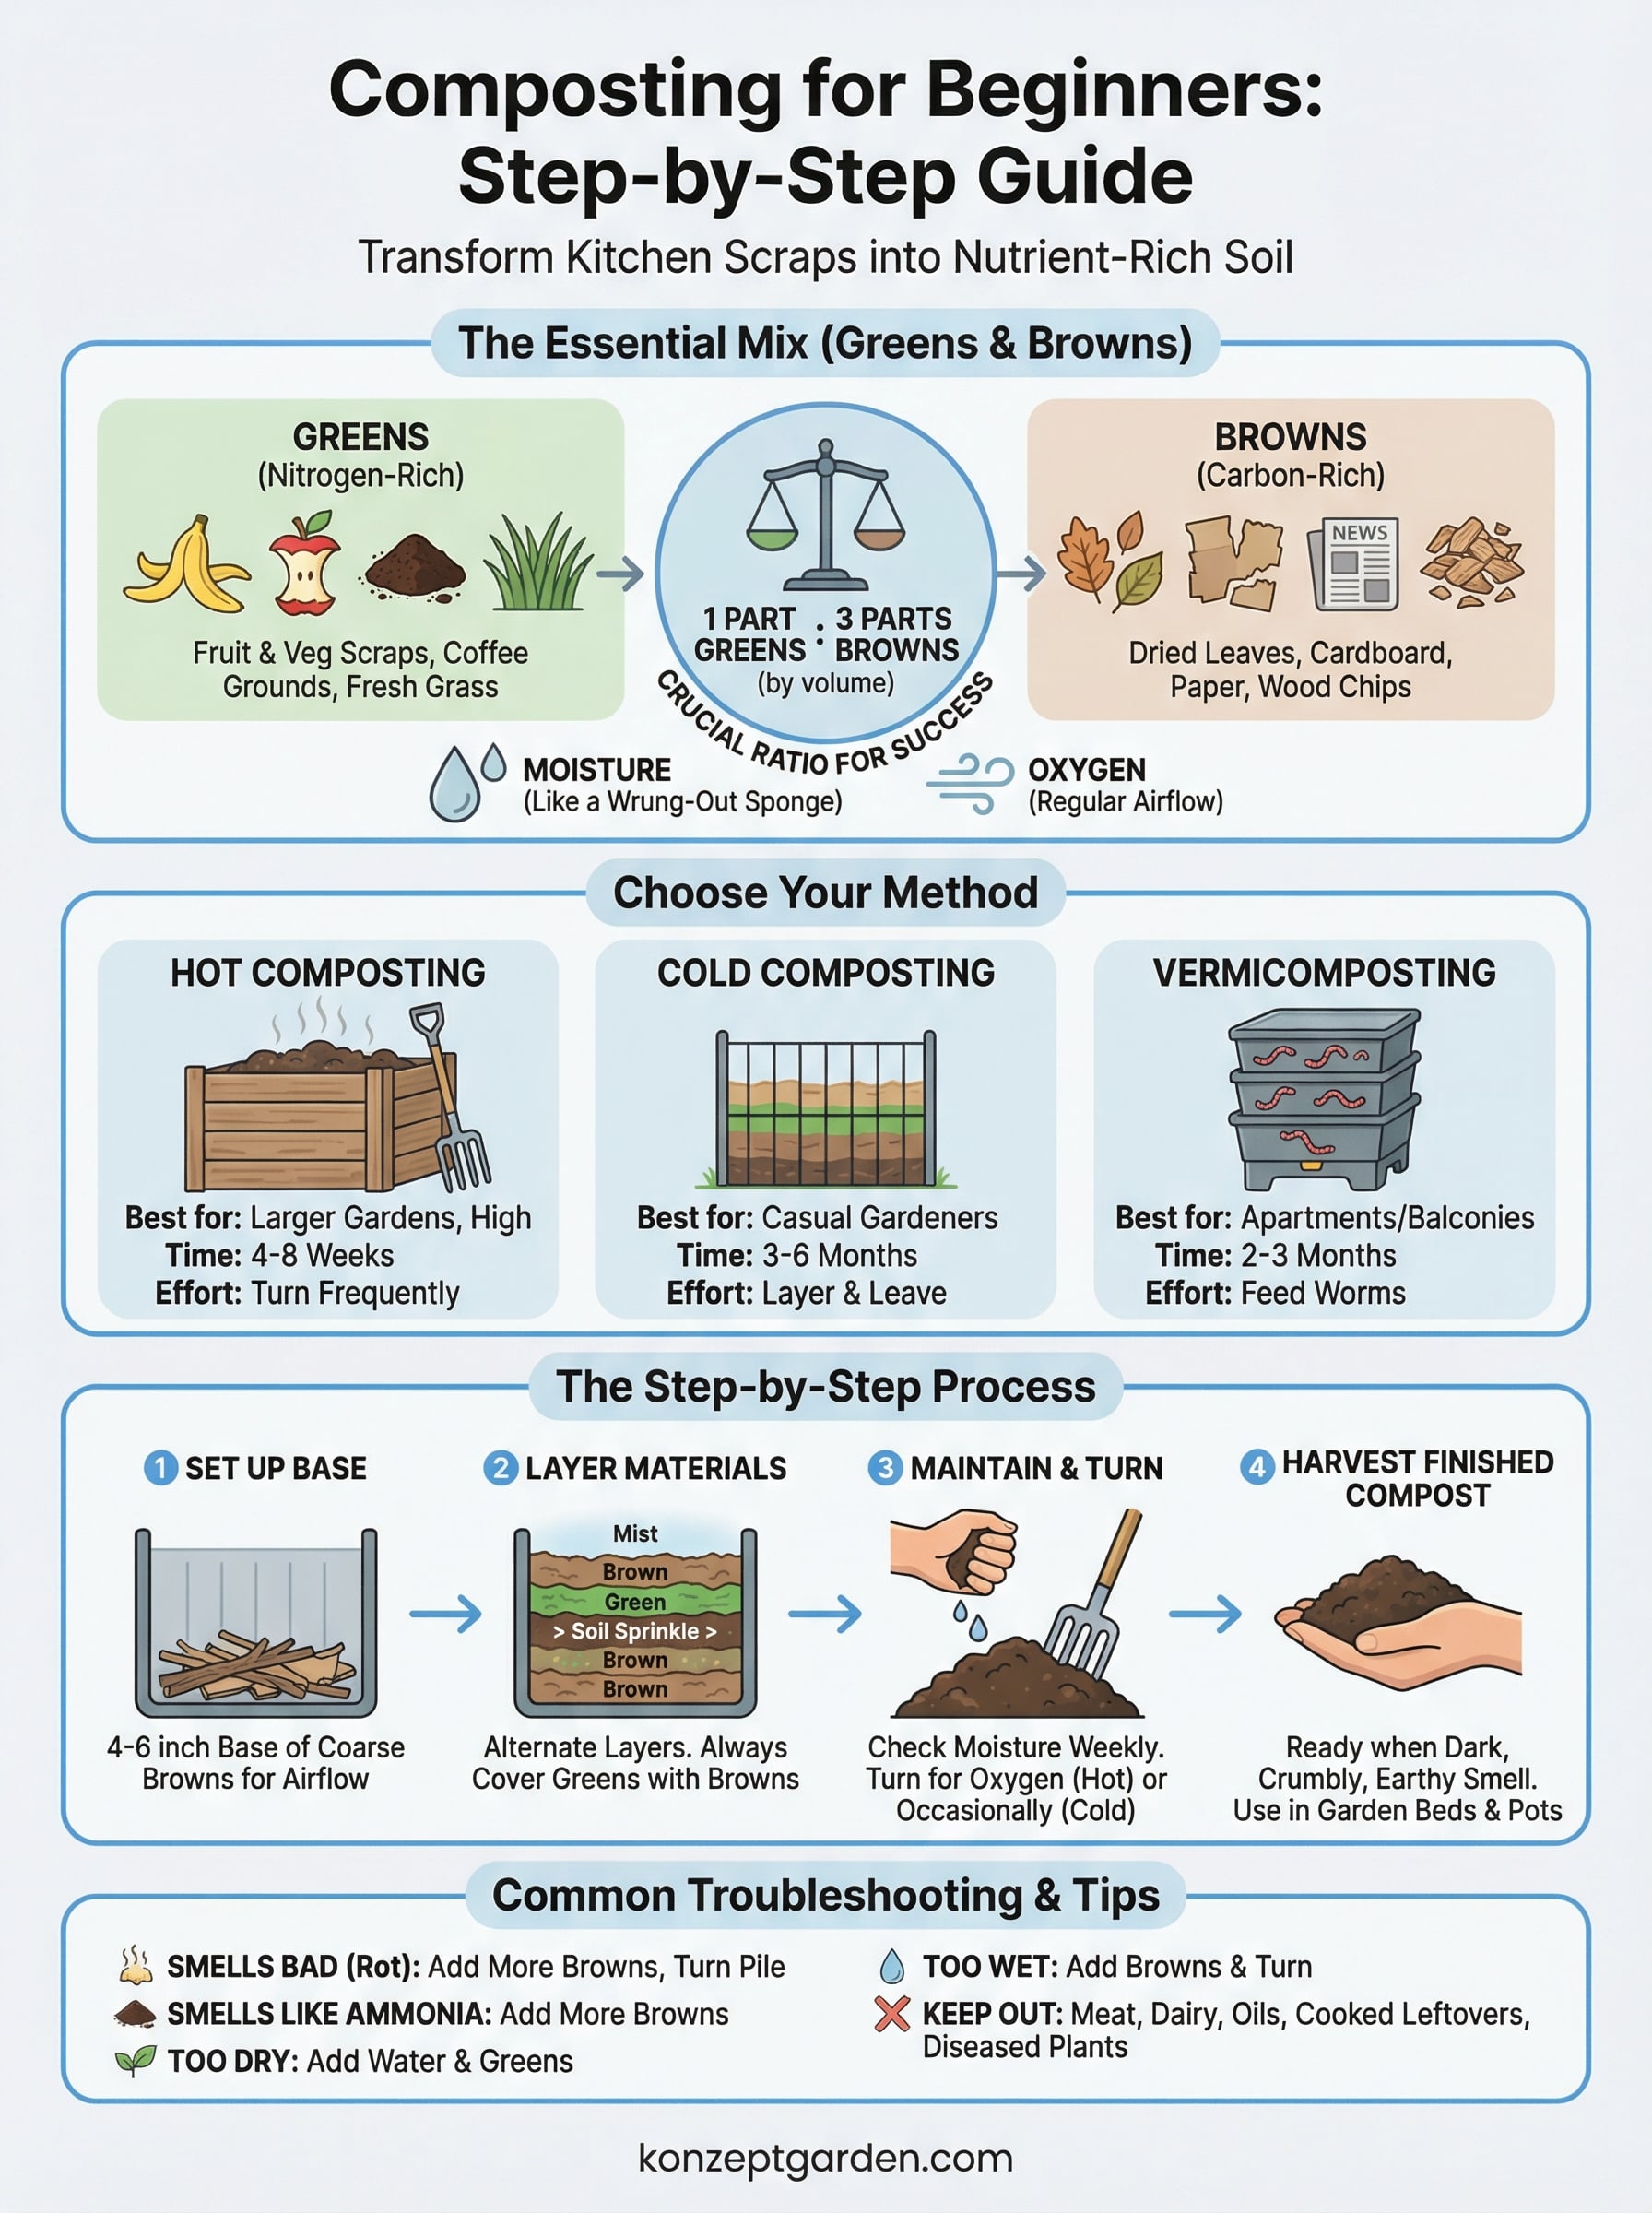
A useful starting point is about two to three volumes of loose brown material for every one volume of green material. This is a rough visual guide, not an exact chemical formula. Different materials vary in moisture, density, and carbon content, so you may need to adjust the mix as you work.
For example, if you collect a bucket of vegetable scraps, mix them with roughly two or three buckets of loose dry leaves. If the leaves are wet and packed down, use less or fluff them up first. If your pile smells sour or becomes slimy, add more dry browns and mix in air.
Source: www.pinterest.com
Too many greens
A pile with excess wet scraps or fresh grass may smell sour, feel slimy, or release too much liquid. Add dry leaves or shredded plain cardboard and improve airflow.
Too many browns
A pile made almost entirely of dry leaves may stay dry and break down slowly. Add suitable green materials and enough water to dampen the mix.
Large leaf mats
Shred or break up thick layers of leaves before mixing them into the pile. This reduces compacted sheets that can block air and water.
An Easy Fall Compost Recipe
For a simple batch, start with a loose layer of dry leaves. Add a thin layer of chopped vegetable scraps or healthy green plant waste, then cover it with another layer of leaves. Repeat until you use the available materials, adding a little water when the pile feels dry.
Do not pack the layers down tightly. Loose material allows air to move between pieces and gives microbes the conditions they need. If you have very large leaves, shred them with a mower only when it is safe to do so and the mower is suitable for that task.
Step 1
Add a base of coarse, dry leaves or small untreated twigs to help air move near the bottom.
Step 2
Add a mix of browns and greens, using roughly two to three volumes of loose browns for each volume of greens as a starting point.
Step 3
Moisten the mix if needed, then cover exposed food scraps with dry leaves or a thin layer of finished compost.
Manage Moisture as the Weather Changes
Your compost should feel about as damp as a wrung-out sponge. It should not drip when you squeeze a handful, and it should not crumble like dry dust. Water helps microbes work, but excess water fills the air spaces between materials and can cause poor smells.
Fall weather can make moisture hard to judge. A week of rain may soak the outer layers, while the center stays dry. In a dry autumn, a pile of leaves may need regular watering even when the surrounding lawn looks damp.
Check moisture inside the pile instead of judging it by the surface alone. Pull back the outer leaves and inspect material several inches into the mix. If it feels dry, add water gradually while turning or mixing the contents so moisture spreads evenly.
Source: graphicfolks.com
If the pile is too dry
Add water slowly and mix the material. Do not flood the pile, especially if it contains compacted leaves.
If the pile is too wet
Add dry leaves or shredded plain cardboard, loosen compacted areas, and protect the pile from further heavy rain.
If the surface is wet but the center is dry
Turn or mix the pile while adding a small amount of water to the dry inner layers.
Should You Cover Compost in Fall?
A cover can help protect a compost pile from repeated heavy rain and prevent useful moisture from escaping during dry spells. A lid or rain-shedding cover is often helpful in wet climates. In a dry climate, use a cover that does not stop the pile from drying out naturally when needed.
Do not seal the pile in an airtight covering. Compost microbes need oxygen, and the pile still needs ventilation. If you use a tarp, secure it against wind and leave the sides or openings arranged so air can move through the compost.
Wet autumns
Use a cover that sheds rain while allowing airflow through the bin or pile.
Dry autumns
Check moisture often and water when needed instead of assuming that a cover will keep the compost damp.
Improve Airflow Without Making Extra Work
Compost needs oxygen for efficient aerobic decomposition. When wet materials are packed too tightly, air cannot reach the center, and microbes that thrive without oxygen can produce sour or rotten smells. A loose mix of leaves, small stems, and other suitable materials helps prevent this problem.
Turn the pile with a garden fork when it becomes compacted or smells unpleasant. Lift material from the outer edges toward the center and move some of the center material outward. This mixes ingredients, introduces air, and helps expose undecomposed pieces to active areas of the pile.
You do not need to turn compost every few days. A new pile can be managed with occasional checks, especially in fall when cold weather slows activity. If you want faster decomposition and the weather is mild, turning more often may help, but only when moisture and material balance are also suitable.
Source: www.pinterest.com
Keep pieces manageable
Chop vegetable scraps and break large plant stems into smaller pieces. Smaller pieces expose more surface area for microbes to work on.
Avoid tight layers
Mix leaves with other materials rather than leaving thick, wet sheets of leaves in the pile.
Use coarse material in moderation
Small twigs can create air spaces, but large amounts of woody material slow breakdown and can make the finished compost hard to screen.
How Often Should You Turn Fall Compost?
For a low-effort backyard pile, check it about once a week and turn it when it is too wet, compacted, or slow because of poor airflow. In cold weather, you may need to turn it less often because the pile will naturally lose heat and microbial activity will decline.
If the pile is healthy, damp, and free of bad odors, leaving it alone for a while is reasonable. Turning is a tool, not a requirement for every composting method. A passive pile can still make good compost; it usually takes longer than a carefully managed hot pile.
Turn when needed
Use turning to loosen compacted material, mix fresh scraps, and correct odor or moisture problems.
Leave a healthy pile alone
If the pile has a pleasant earthy smell and suitable moisture, frequent turning may not provide much benefit during cold weather.
Protect Your Compost Pile From Cold Weather
You can keep composting through fall and winter, but the process may slow as temperatures drop. Microbes remain active when conditions allow, yet freezing weather can pause much of the decomposition. The pile may warm again during a mild spell or when warmer spring weather returns.
A large, well-mixed pile generally holds heat better than a very small one. Covering it with a layer of dry leaves or another suitable insulating material can help reduce heat loss. In colder regions, place the bin in a sheltered location where it is still easy to reach after snow or ice.
Do not worry if the pile appears unchanged for weeks in winter. Add suitable materials when convenient, but avoid digging into a frozen pile just to make it look active. Keep a supply of dry browns nearby so you can cover new food scraps and maintain a workable mix.
Source: GreenPal
Build before the coldest weather
Combine available leaves and garden waste while conditions are still manageable. A well-sized pile is better able to retain heat.
Insulate with leaves
A loose layer of dry leaves around or over the pile can help reduce heat loss, provided the pile still has access to air.
Keep adding browns
If you add kitchen scraps during winter, cover them with dry leaves or other suitable brown materials.
Plan for spring
Expect to inspect, mix, and possibly finish the compost when warmer weather returns.
Should You Add Water to Compost in Winter?
Add water only if the pile is dry and conditions allow the water to soak in without creating an icy, waterlogged mass. Snow can add moisture as it melts, but it may not wet the center evenly. Check the inner material when the pile is accessible.
If the compost is frozen, wait for a milder period before making major moisture changes. Do not pour large amounts of water onto a frozen pile. The goal is to maintain suitable moisture, not to force decomposition when temperatures are too low.
Dry and unfrozen
Add small amounts of water and mix them through the pile.
Frozen or saturated
Wait for better conditions and avoid adding water that could worsen drainage or freeze around the materials.
Prevent Odors, Pests, and Other Common Problems
A healthy compost pile should smell earthy or like damp plant matter, not like rotten eggs or spoiled food. Strong odors usually point to too much moisture, poor airflow, or a large amount of exposed food waste. Correct the cause rather than covering the smell with fragrance or chemicals.
Rodents, raccoons, flies, and other animals may visit compost that contains exposed scraps or unsuitable foods. Use a secure bin when wildlife is a concern, keep food waste buried in the center, and cover each addition with a generous layer of dry leaves. Do not assume that every bin is rodent-proof; inspect openings and the base.
If your pile attracts flies, check for exposed fruit scraps and damp organic material near the surface. If it smells sour, mix in dry browns and loosen compacted areas. If it is dry and inactive, add moisture and suitable greens, then give the pile time to respond.
Source: urbakieco.com
Rotten or sour smell
Add dry leaves, break up wet clumps, and improve airflow. Reduce additions of wet scraps until the pile returns to a suitable balance.
Flies around the pile
Bury fruit and vegetable scraps, cover them with browns, and keep the lid closed if your bin has one.
Rodent activity
Remove meat, dairy, grease, and cooked foods. Use a secure enclosure with a suitable base or mesh barrier where local wildlife is a concern.
No visible progress
Check temperature, moisture, particle size, and the brown-to-green balance before adding more materials.
Can Compost Attract Bears or Other Wildlife?
In areas where bears or other large wildlife live, compost and food scraps can attract animals. Follow state and local wildlife guidance, especially in rural and mountain communities. Some places restrict composting food waste outdoors or require specific bear-resistant containers.
A basic lidded bin may not be sufficient in a high-risk area. Never leave food scraps in an open pile if local guidance says they must be stored or collected in a wildlife-resistant system. Check with your state wildlife agency or local waste service before choosing a setup.
Check local rules
Confirm whether outdoor food-scrap composting is allowed and what type of enclosure is required.
Keep scraps secure
Use the approved container and avoid leaving food waste exposed while waiting to add it to the compost.
Know When Your Compost Is Ready to Use
Finished compost is usually dark, crumbly, and earthy-smelling. Most of the original materials should be hard to recognize, although small bits of wood or tough stems may remain. Readiness depends on the materials and conditions, so the calendar alone cannot tell you when compost is finished.
A fall pile may be ready in a few months under favorable conditions, but cold weather and passive management can extend the process considerably. If your compost still contains recognizable scraps, smells sour, or heats up strongly after turning, give it more time. You can also move partially broken-down material into a separate pile to finish while starting a new batch.
Use mature compost as a soil amendment rather than treating it as a complete replacement for soil or fertilizer. Mix it into garden beds, spread a suitable layer over the soil surface, or blend it into planting areas according to the needs of the plants. For containers, use a growing mix designed for pots rather than filling the entire container with dense homemade compost.
Source: www.pinterest.com
Check its appearance
Look for a dark, crumbly texture with few recognizable food scraps or fresh leaves.
Check its smell
Mature compost should smell earthy rather than rotten, sour, or strongly like ammonia.
Allow more time when needed
Return coarse or unfinished material to the pile and let it decompose further before using it around sensitive plants.
Screen if desired
A garden sieve can separate fine compost for seedbeds from larger pieces that can go back into the pile.
How to Use Fall Compost in the Spring Garden
Spread mature compost over vegetable beds and mix it into the upper layer of soil when preparing for planting. The amount needed depends on your soil, the crops you plan to grow, and any recent soil test results. Avoid adding large amounts year after year without considering nutrient levels.
Compost can improve soil structure and help the soil hold water while still supporting drainage. It also returns organic matter to the garden. These benefits are most useful when compost forms part of a broader soil care plan that includes suitable watering, mulch, and crop rotation.
Vegetable beds
Use mature compost to amend the soil before planting, adjusting the amount to the soil’s needs.
Flower beds
Apply a modest layer of finished compost around suitable plants, keeping it away from direct contact with stems and crowns.
Unfinished compost
Keep actively decomposing material in the pile rather than using it as a planting medium around young roots.
A Simple Fall Composting Schedule for Beginners
A simple routine makes composting easier to maintain. You do not need to measure every ingredient or turn the pile on a strict schedule. A few regular checks can catch most problems before they become difficult to fix.
Start by collecting leaves and choosing a suitable place for your pile or bin. Add a balanced mix of materials, check moisture, and cover each batch of food scraps. As the weather cools, focus on keeping the pile secure and suitably damp rather than forcing it to heat up.
Use the following schedule as a flexible guide. Adjust it to local weather, how much material you produce, and whether your pile remains active through winter.
Source: konzeptgarden.com
Early fall
Choose the site, set up the bin or pile, collect dry leaves, and begin adding suitable kitchen scraps and healthy garden waste.
Mid-fall
Shred thick layers of leaves, mix in fresh plant waste, check moisture, and correct any sour smells or compacted sections.
Late fall
Cover the pile as needed, keep extra browns dry, and make sure food scraps are buried and secured against wildlife.
Winter
Check the pile when practical, add suitable materials if desired, and avoid unnecessary turning when it is frozen or very cold.
Spring
Inspect the compost, give unfinished material more time, and use mature compost to help prepare garden beds.
What to Do if Your Compost Pile Stalls
First, decide whether the pile has truly stalled or has simply cooled because of the season. If the weather is cold and the materials are damp but healthy-smelling, slow activity is normal. If the weather is mild, inspect moisture, airflow, and the ingredient mix.
A dry pile needs water and possibly more green material. A soggy pile needs dry browns and better airflow. A pile made mostly of large leaves and woody stems may need shredding and mixing to expose more surface area.
Make one or two sensible changes at a time, then allow the pile to respond. Adding a large amount of food waste to a struggling pile can make odor and pest problems worse. In winter, patience is often more useful than frequent intervention.
Dry and dusty
Add water gradually and mix the contents so the center becomes damp.
Wet and smelly
Add dry leaves or shredded plain cardboard, loosen clumps, and reduce fresh wet additions.
Cold and inactive
Wait for warmer conditions, keep the pile covered as needed, and avoid assuming that cold compost has failed.
Large pieces remain
Break up tough pieces when practical and return them to the pile for further decomposition.
Frequently Asked Questions
Q
Can I start composting in the fall if I have never composted before?
Yes. Fall is a good time to start because dry leaves provide a ready supply of brown material. Set up a pile or bin, mix leaves with suitable green waste, keep the material damp but not soaked, and cover food scraps with browns. You can learn the process as you go without buying special equipment.
Q
Can I compost only dry leaves during fall?
Yes, but a pile made only of leaves is usually better described as leaf mold in progress. Leaves can break down into a useful soil amendment, though the process may take a year or longer depending on the leaf type, moisture, and climate. Shredding the leaves and keeping them damp can help them break down faster. If you want a more balanced compost pile, add suitable green materials as well.
Q
Should I add fallen leaves to my compost pile whole or shredded?
Shredded leaves are usually easier to mix and tend to break down faster because they have more exposed surface area. Whole leaves can still be composted, but thick layers may mat together when wet and limit airflow. If you have many leaves, shred some and store the rest dry for later use.
Q
Will compost keep breaking down during winter?
It may continue to break down during mild winter weather, especially in warmer parts of the United States. In freezing conditions, microbial activity can slow greatly or pause. The pile can become active again when temperatures rise. Keep the material balanced and secure, and do not worry if visible changes are limited during the coldest weeks.
Q
How can I stop my fall compost pile from smelling bad?
A sour or rotten smell often means the pile is too wet, too compacted, or overloaded with nitrogen-rich scraps. Add dry leaves or shredded plain cardboard, mix the material to restore airflow, and cover exposed food scraps. Avoid meat, dairy, grease, and cooked foods in a basic backyard pile. If the smell continues, check the center for waterlogged clumps and correct the moisture problem.
Q
Can I put pumpkins and fallen apples in my compost?
Yes, sound or spoiled pumpkins and apples can be composted in many backyard systems. Chop large pieces, mix them with dry leaves, and bury them in the center of the pile. Their high moisture content means they should not be added in large amounts without enough brown material. Remove decorations, plastic, candles, and other non-compostable parts first.
Q
How long does fall compost take to become ready?
There is no fixed timeline. A well-managed pile in warm conditions may break down in a few months, while a cool, passive pile may take many months or longer. Use the finished material’s appearance, texture, and smell as your main guide. If you can still recognize much of the original waste or the pile smells unpleasant, let it decompose longer.
Q
Can I put unfinished compost directly into my vegetable garden?
It is better to let compost mature before mixing it into beds where you will plant vegetables. Actively decomposing material can heat up, use available nitrogen, or contain compounds that may harm sensitive seedlings. Keep unfinished material in the pile until it becomes dark, crumbly, and earthy-smelling. If you need to prepare a bed soon, use mature compost or another suitable soil amendment.
✦ Wrapping Up
Conclusion
Fall composting does not have to be complicated. Collect dry leaves, mix them with suitable kitchen scraps and healthy garden waste, and keep the pile damp enough for microbes to work. Good airflow and a sensible mix will do more for your compost than expensive tools or constant turning.
As temperatures drop, let the pile slow down naturally. Protect it from heavy rain, keep food waste covered, and save extra leaves for later use. When spring arrives, inspect the material and give unfinished compost more time before adding it to your garden beds.
The best way to learn is to start small and pay attention to what the pile tells you. An earthy smell, suitable moisture, and gradual changes in texture are good signs. If you notice a problem, adjust the mix, water, or airflow rather than starting over.
💡 Key Takeaway
This fall, collect a bag of dry leaves, set up a simple compost pile or bin, and begin with a mix of leaves and vegetable scraps. Check moisture once a week, cover each food-scrap addition with browns, and keep the pile secure through winter. Your first batch may take time, but each round of composting will help you build a more useful soil amendment for future gardening.
I enjoy sharing simple gardening ideas, lawn care tips, and honest product reviews that help make outdoor work easier. From home gardening guides to helpful tools and lawn care advice, I write easy-to-follow content to help readers create a healthier and better-looking outdoor space without wasting time or money.